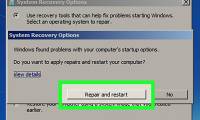
Startup Repair is one of the recovery tools in Advanced Startup Options . This toolkit is located on your PC's hard drive (recovery partition), Windows installation media, and recovery drive.
This guide will show you ways to open Startup Repair on Windows.
1. Open Startup Repair Using the Settings App
This is the easiest way to launch the Startup Repair tool on Windows, so we will cover this method first.
Open Startup Repair Using the Windows 11 Settings App
Here's how you can do it on Windows 11:
- Go to the search bar in the Start menu, type 'settings' and select the best result. Alternatively, press the Windows key + I shortcut.
- Now, select the System > Recovery button.
- From under the Advanced Startup section, click Restart now .
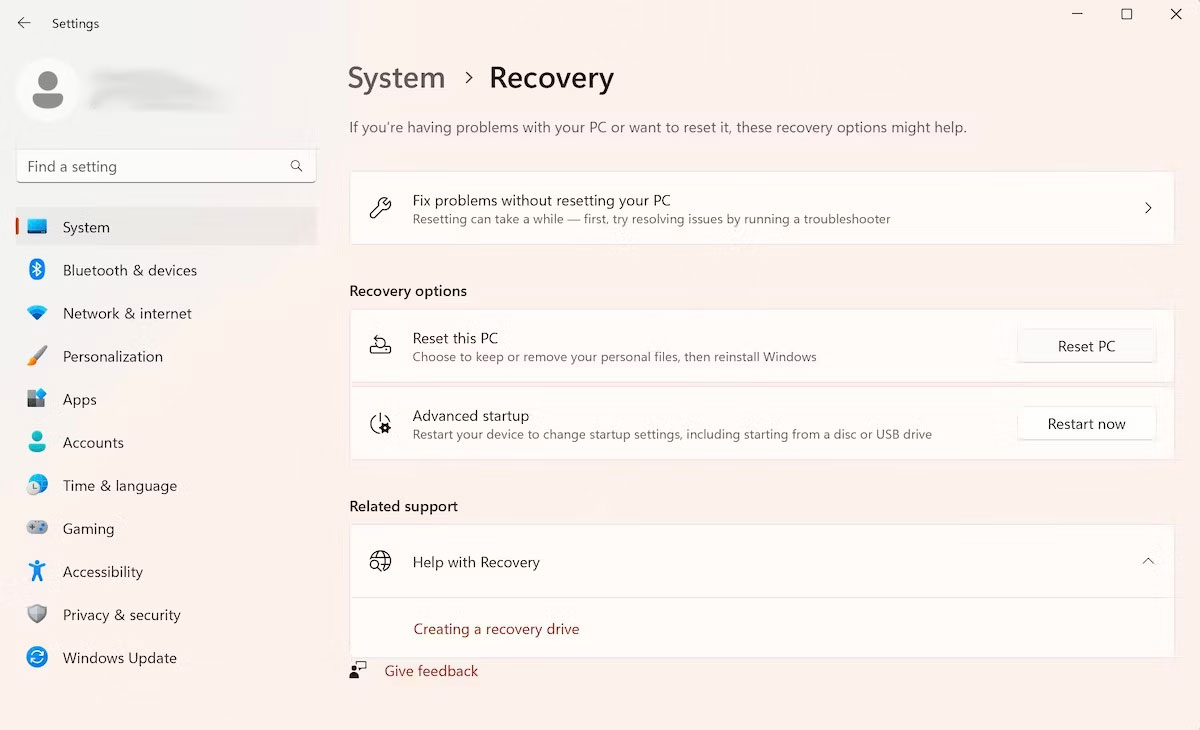
The next time you start Windows, your PC will launch into the Windows Recovery Environment . From there, click Troubleshoot > Advanced Options > Startup Repair .
And that's it. As soon as you click on the above option, the Startup Repair tool will be launched right away.
Open Startup Repair Using the Windows 10 Settings App
While the basic structure of opening Startup Repair on Windows 10 remains the same, the specific on-screen instructions will be slightly different. So here's how you can launch Startup Repair on Windows 10:
- Press Windows key + I to open the Settings menu.
- Select Update & Security > Recovery .
- In the Advanced startup menu, click Restart now .
Your Windows will boot into the Windows Recovery Environment (Win RE) as soon as you do this. From there, the steps are similar to the ones you followed for Windows 11.
2. Run the Startup Repair Tool via the Desktop
The method described above should work for practically all users. And in cases where it doesn't - usually when you can't access or open the Settings app - use this method. Here's how to do it:
- Click the Start menu icon and select the Power button.
- Hold down the Shift key and then click Restart .
Your PC will restart from here and you will then be taken to the Win RE menu. From there, follow the steps above from method one and click Advanced Options > Startup Repair .
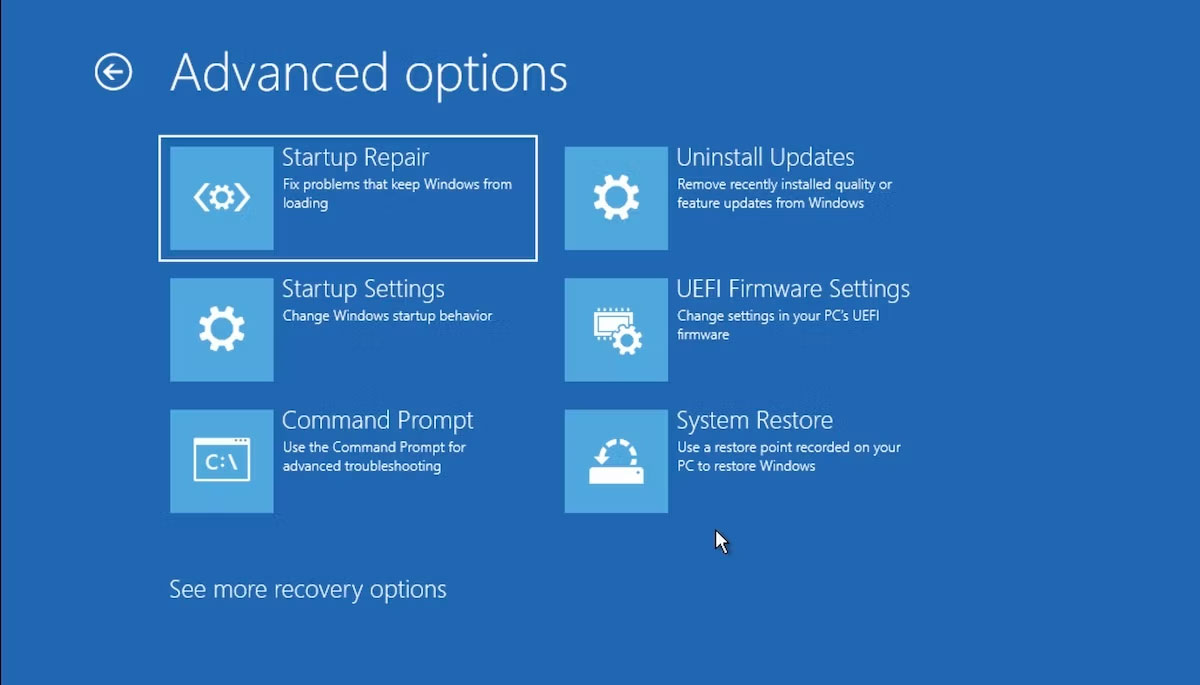
The Startup Repair tool will be launched from here.
3. Run Startup Repair from BIOS
If you have the installation media, using or opening the Startup Repair tool shouldn't be too difficult. Just plug in the USB containing the installation media and boot your PC from scratch.
Before you begin, you should create a Windows installation USB if you don't already have one. Once you have your USB ready, follow these steps:
- Go into your BIOS/UEFI settings and set USB as the first boot option.
- Then, plug in the installation USB and boot your PC with it.
- In Windows Setup , select Windows version, language, etc.
- Finally, click USB to start with Startup Repair.
The Startup Repair tool will launch from here. It will scan and fix any problems it finds on your Windows computer.
4. Using Command Prompt
Command Prompt is a free Windows utility that lets you manage Windows settings and everything in a way that makes using Windows easy.
Here's how you can use Command Prompt to launch Startup Repair on your PC:
- Go to the search bar in the Start menu, type 'cmd' and run Command Prompt with admin rights.
- In cmd, type the following command and press Enter :
shutdown /r /o
As soon as you press Enter , your PC will be restarted in the Advanced Startup Options menu; you can then select the Startup Repair option from there.
5. Use the F11 Shortcut Key When Starting Up
Sometimes, simply pressing the F11 key repeatedly during startup can bring you to the Advanced Options menu on many computers, so make sure you do that as well. From there, you can easily access the Windows Startup Options tool.


Reader Comments 0
Sign in with email or Google to join the discussion.