Table of Contents
This guide provides a practical overview of Understand the Connection and Key Presses on the Macbook, including its main features, benefits, limitations, and important considerations.
1. Connection port on Macbook
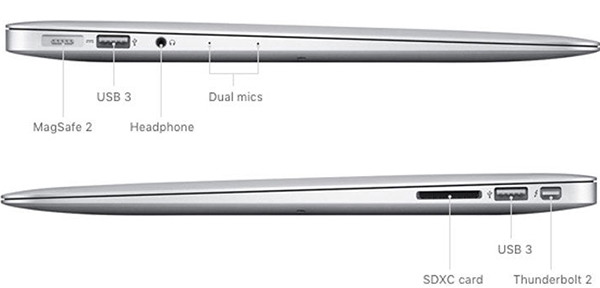
Magsafe and Magsafe 2 charging ports
Magsafe (Magsafe 1) was born in 2006 and is used from the 2015 Macbook line onwards. The structure of Magsafe 1 has 5 pins connected to the top of the music through the magnet around the charging port. This way you can remove or fully charge it.
Magsafe 2 was launched in 2012, similar in structure to Magsafe 1 but with a different design. Magsafe 2 is thinner, cleaner to match the increasingly thin design of the Macbook. These two types of chargers cannot be used together.
- Magsafe 1 for Macbook from 2011 onwards, or some use 2012 Macbook.
- Magsafe 2 for Macbook 2012, and 2013 to 2015 series.
- Since 2016, the entire Magsafe port has been replaced by USB Type-C charging.

Thunderbolt port
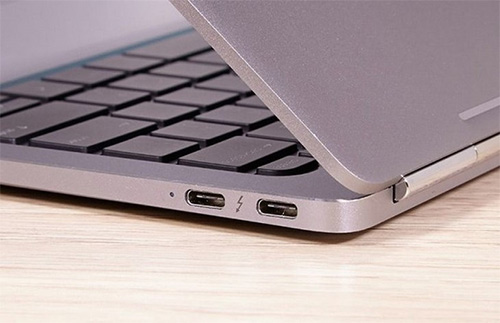
To the right of the charging port is a Thunderbolt port shaped like a lightning bolt. Launched in 2011, Thunderbolt uses copper wire, capable of transferring data up to 10gb / s, connecting faster than USB 3.0. We can use the port to connect the signal cables to a LAN cable, a VGA or HDMI cable.
USB 3.0 port
2012 and 2013 Macbook Air series has been upgraded to USB 3.0, on the two sides of the machine. The left port is below the Magsafe 2 charging port and the right port is below the Thunderbolt port.
3.5mm jack and SD card reader
The jack is on the left, next to the USB port. The card slot on the right side of the USB port, particularly for the Macbook Air series under 13.3 inches, there is no SD slot.
2. The keys on the Macbook
Power key
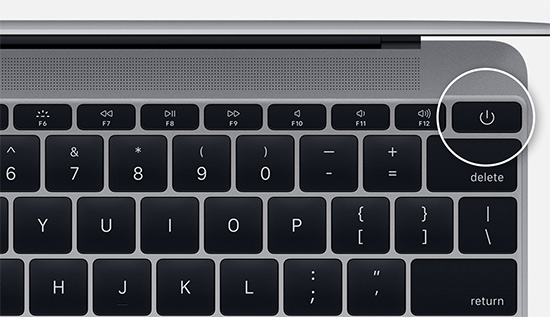
The Power key is the power key to boot the device, located on the top right of the keyboard. When you hold down the key, the device will boot if it's turned off or active if it's in Sleep mode. While the device is active, pressing this key will move to the shutdown menu, restart or enter Sleep mode.
Adjust the screen brightness
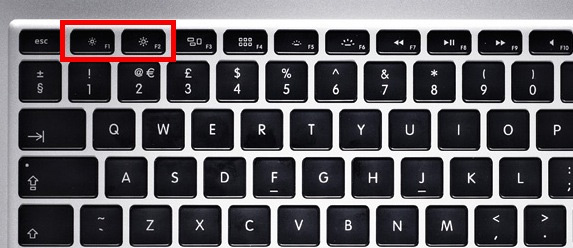
The brightness adjustment key has a glowing circle icon, located next to the Esc key in the top row of keys. When you press the key on the left, the screen will decrease in brightness and when you press the key on the right, the screen brightness will increase.
The key shows the currently active windows
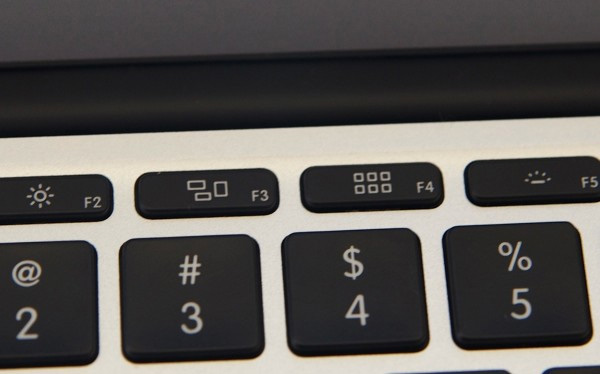
The window display key has a 3 rectangular icon next to each other, next to the key to increase or decrease the brightness. When you press the key will display the program window is on so we can access the window we want.
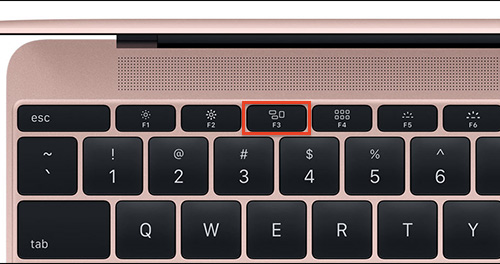
Application key
Application screen boot key next to the window display key, with 2 small squares. The key is used to launch Launchpad or applications screen for quick access.
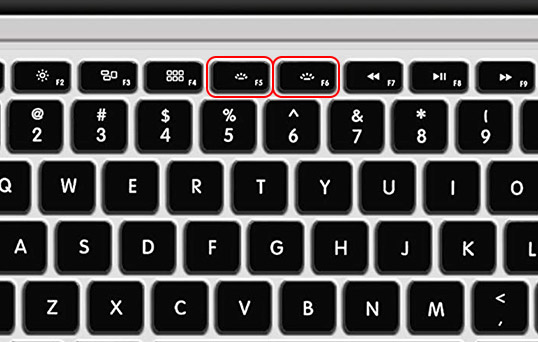
Key to turn on the keyboard light
The key is located next to the application window, there are 2 keys to increase or decrease the light intensity of the Macbook.
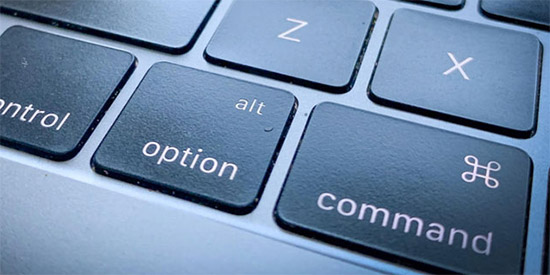
Command key
This is an important key on a Macbook like the Ctrl key on Windows. The Command key takes on the task of combining many other keys to execute commands on the system.
FAQ
What should I know about Understand the Connection and Key Presses on the Macbook?
Focus on the key features, requirements, limitations, and practical use cases explained in this guide.
How do I get the best results with Understand the Connection and Key Presses on the Macbook?
Follow the recommended steps, use current software or information, confirm compatibility, and review settings before major changes.
Are there any risks or limitations?
Potential limitations depend on compatibility, data quality, cost, privacy, support, and how the product or method is used.
Related Articles
 What Should I Consider When Choosing to Buy Slow Presses5 minutes read
 MacBook Air 2013 Suffers from a Wi-Fi Connection Error3 minutes read
 What Kind of Durable and Cheap Fruit and Vegetable Presses?5 minutes read
 Is the Hurom Review Machine Slow Down Good? How Much?8 minutes read
 Apple Underground Replaces the MacBook Air Model with Wi-Fi Errors4 minutes read
 What Kind of Fruit Juicer Should You Buy Most Today?13 minutes read
Reader Comments 0
Sign in with email or Google to join the discussion.