How to use Finder on Mac for beginners
The Finder in macOS is the gateway to all Mac apps, files, and downloads. Everything from the folders in Dropbox to the desktop background can be found in the Finder.
Table of Contents
You can manage a lot from the Finder. In the article below, TipsMake will guide you to use the Finder for the first time using a Mac.
Content category How to Use Finder on Mac for Beginners
- 1. How to open a Finder window
- 2. How to customize the Finder toolbar
- 3. How to use Quick Look
- 4. How to use the Info button
- 5. How to hide hard drives, external drives, CDs and connect to servers on the computer
- 6. Install new default window in Finder
- 7. How to use Tags
- 8. How to create custom Tags
- 9. Customize the Finder sidebar
- 10. How to use Stacks in Finder
- 11. How to use Gallery in Finder
- 12. How to view metadata files in Finder
- 13. How to use Quick Actions in Finder
1. How to open a Finder window
There are several ways to open windows in Finder to access files in the system.
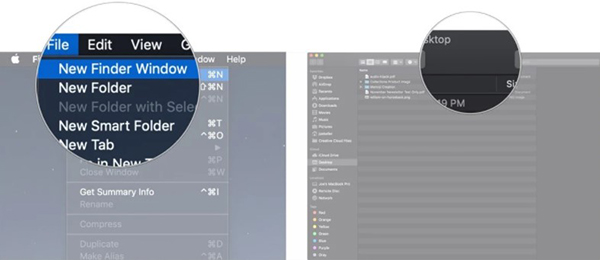
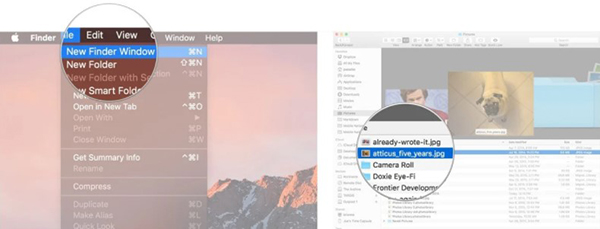
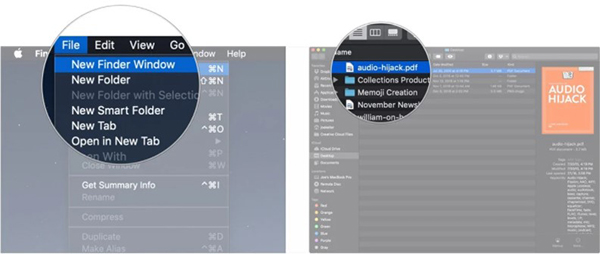
On the desktop (no need to choose an application or program), click File on the menu bar and choose New Finder Window .

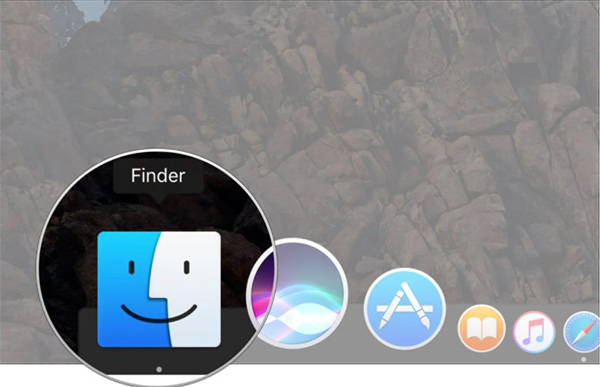
In the Dock , click the Finder icon (smiley face) .
On the keyboard, press Command + N .
2. How to customize the Finder toolbar
By default, the Finder toolbar has a few buttons you can use to change the way you view and perform operations, but you can customize the toolbar to your liking.
Step 1. Open a new Finder window .
Step 2. Hold the Control key on the keyboard and then click or double-click on the toolbar.
Step 3. Select Customize Toolbar .
Step 4. Click and drop other tools on the toolbar. Here are some tools you can choose from:
- Quick Look : The Quick Look button is a great tool for previewing documents or photos in Finder.
- Delete : Delete a file from Finder after selecting it.
- Connect : Connect to external server if you know the address. You can save a few of your favorite servers and switch between them using this button.
- Get Info : Select a file in the Finder and press this button to view its information.
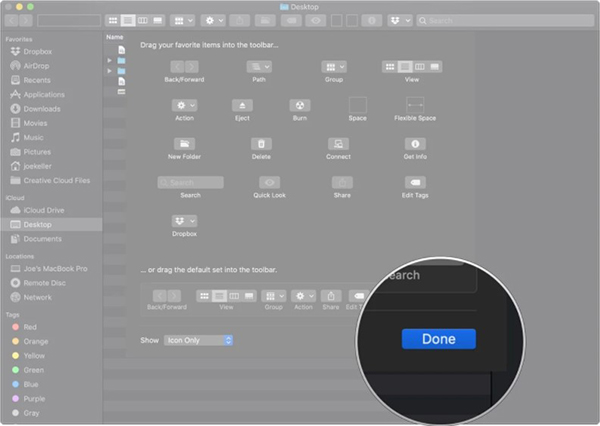
Step 5. Click Done when you finish customizing the toolbar to suit your preferences.
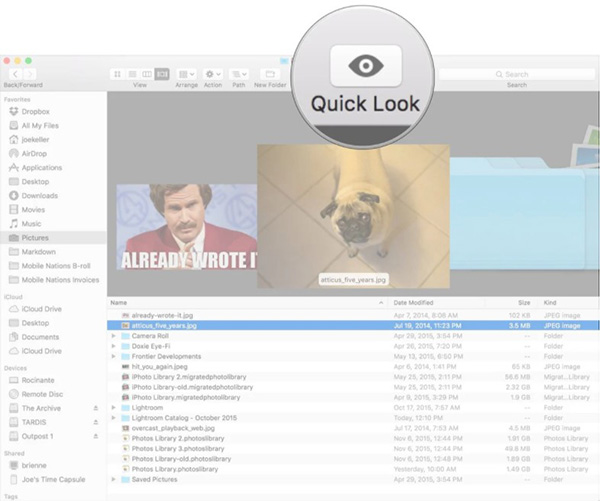
3. How to use Quick Look
After adding Quick Look to the Finder toolbar, use the button to preview documents, photos or other files before use.
Step 1. Open Finder window .
Step 2. Find the file you want using the Quick Look tool and click once .
Step 3. Click the Quick Look button on the Finder toolbar . Or press the Space key on your keyboard to perform the same action with Quick Look.
4. How to use the Info button
After you add the Info button to the Finder toolbar, you can use it to view the file's information.
Step 1. Open a new Finder window .
Step 2. Click on the file you want to get information about.
Step 3. Click the Info button .

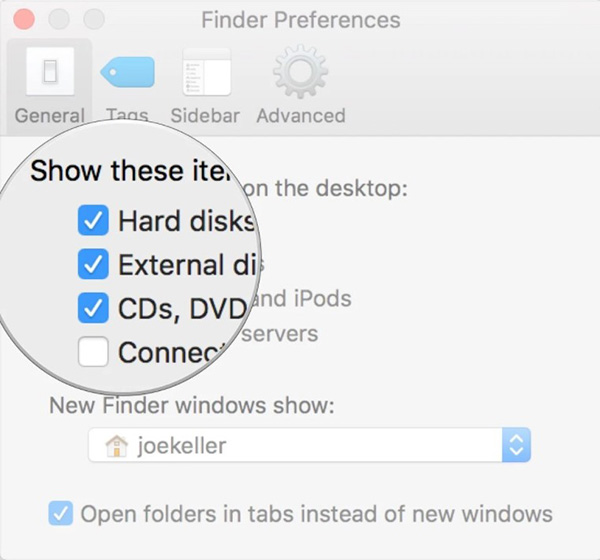
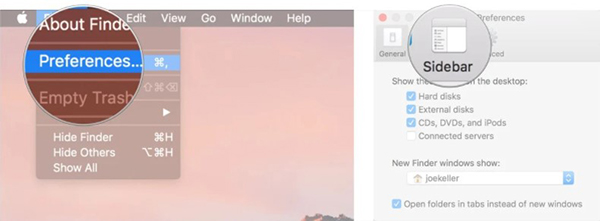
5. How to hide hard drives, external drives, CDs and connect to servers on the computer
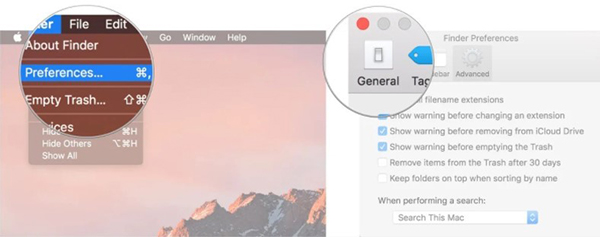
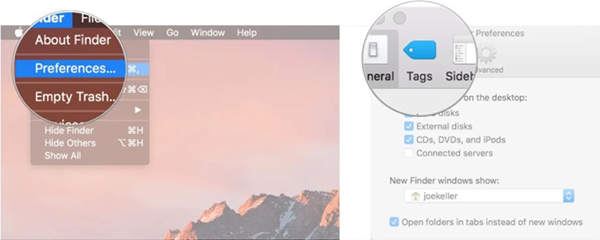
Step 1. Go to Finder, click Finder on the menu bar and choose Preferences .
Step 2. Click General .
Step 3. Check the boxes where you want the information to be displayed on the screen.
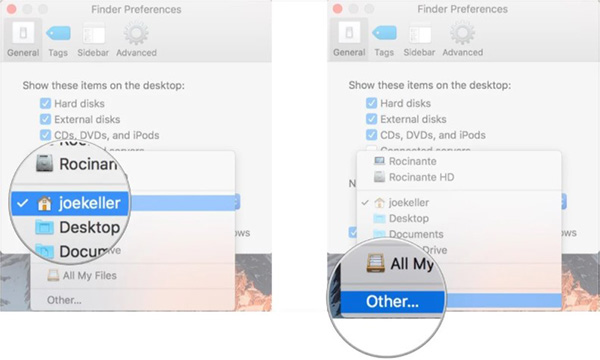
6. Install new default window in Finder
Step 1. Go to Finder, choose Finder from the menu bar and click Preferences .
Step 2. Select General .
Step 3. In the drop-down menu, click folder or storage device.
Step 4. If the item you want to select is not available, click Other .
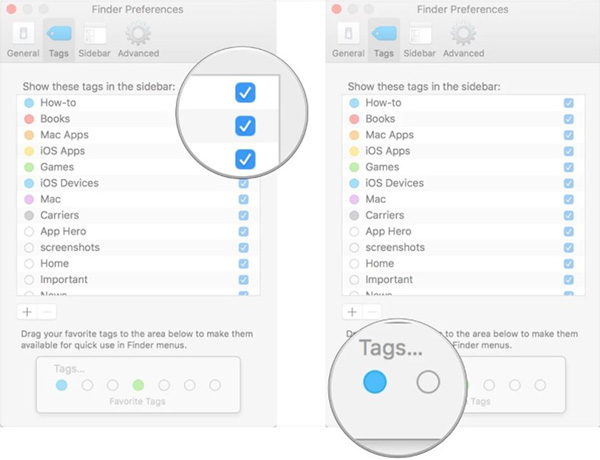
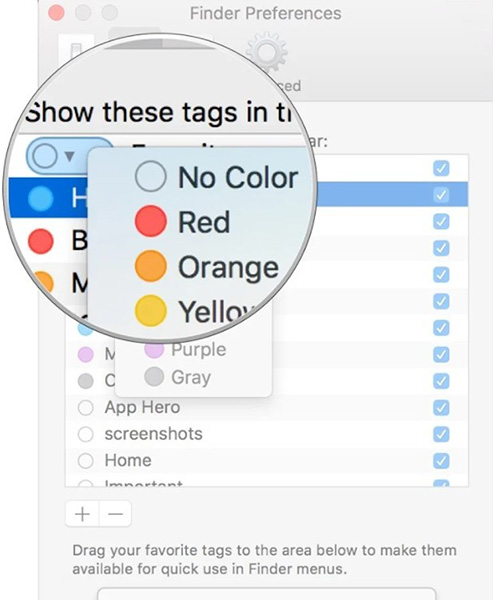
7. How to use Tags
Step 1. In Finder, click on Finder on the menu bar and choose Preferences .
Step 2. Select Tags .
Step 3. Check the boxes next to the tabs you want to display in the Finder sidebar .
Step 4. Drag your favorites to the bottom of the Tags tab for quick access in the Finder menu .
8. How to create custom Tags
Step 1. In Finder, click on Finder on the menu bar and choose Preferences .
Step 2. Click Tags .
Step 3. Under the card list, press the '+' button .
Step 4. Add a name to the tag.
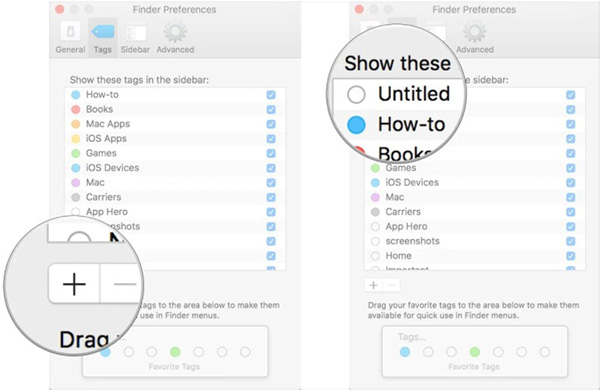
Step 5. Click the circle next to the card to set the color.
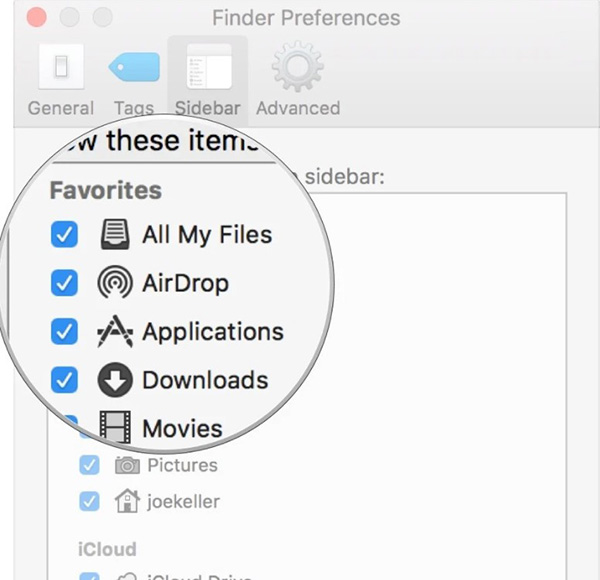
9. Customize the Finder sidebar
Step 1. In the Finder, choose Finder from the menu bar and then click Preferences .
Step 2. Select Sidebar .
Step 3. Check the items you want to see in the Finder sidebar .
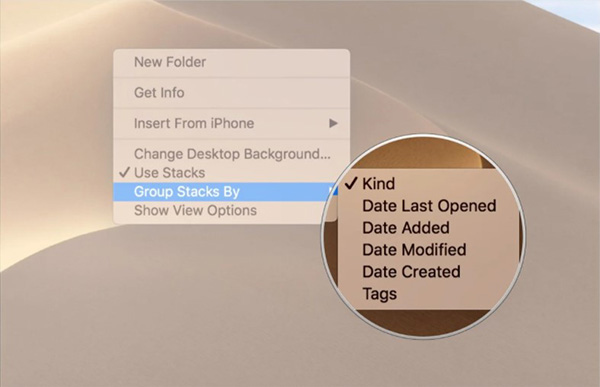
10. How to use Stacks in Finder
Step 1. Click View on the menu bar when there is no application running on the device.
Step 2. Click Use Stacks .
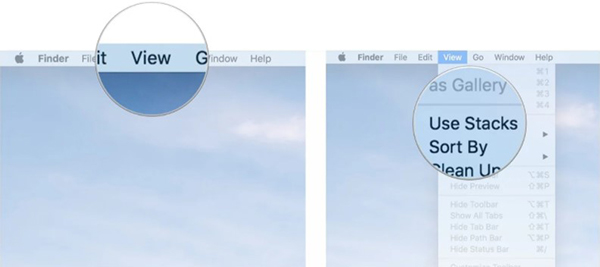
Step 3. Hold down the Control key and then click or click with two fingers on the computer.
Step 4. Hover your mouse on Group Stacks By section . Choose between Kind , Date , Last Opened , Date Added , Date Modified , Date Created, and Tags .
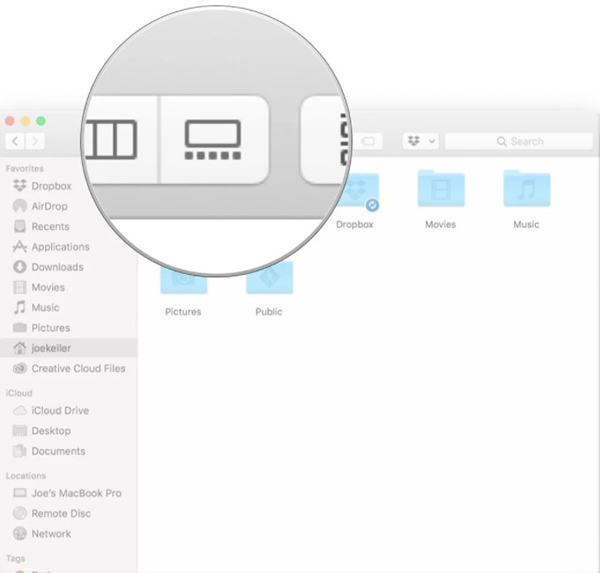
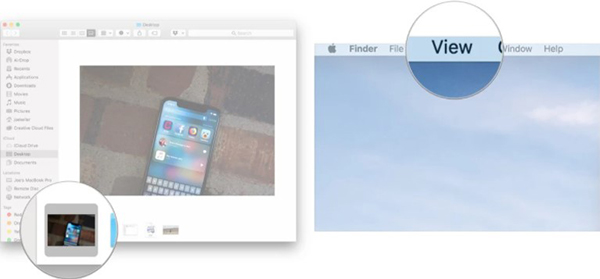
11. How to use Gallery in Finder
Step 1. Click the Finder icon in the Dock to open a new Finder window.
Step 2. Go to the folder or section you want to view.
Step 3. Click the Gallery View button on the right side of the Finder window .
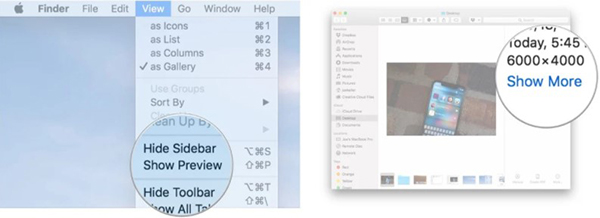
12. How to view metadata files in Finder
Step 1. Click the Finder icon in the Dock to open a Finder window.
Step 2. Select the view type.
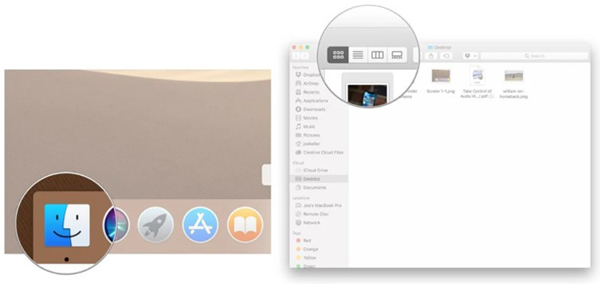
Step 3. Select the file with the information you want to use.
Step 4. Click View on the menu bar.
Step 5. Select Show Preview .
Step 6 Click Show More on the Preview page to see related metadata.
13. How to use Quick Actions in Finder
Step 1. Click the Finder icon in the Dock to open a new window.
Step 2. Select the view type.
Step 3. Select one or more files you want to perform quick operation.
Step 4. Click View on the menu bar if the View page is not displayed.
Step 5. Select Show Preview .
Step 6. Select one of the operations available at the bottom of the page to perform on the selected files.
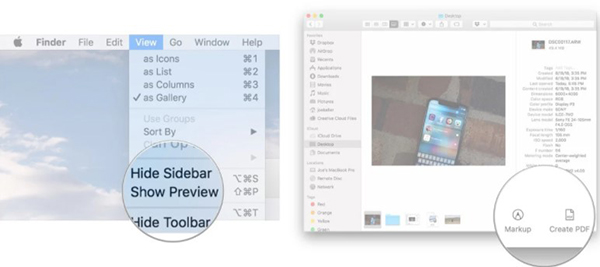
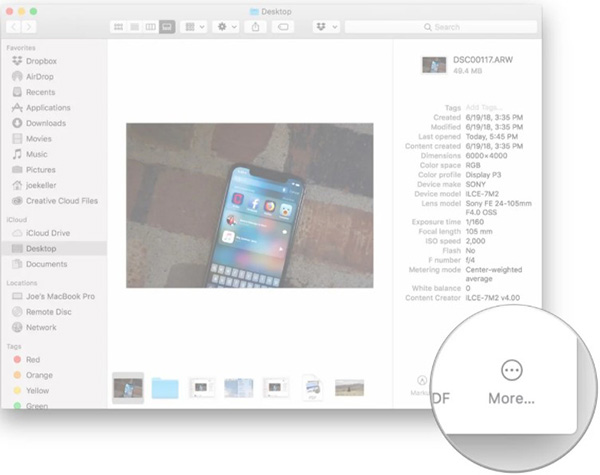
Step 7. Click More… to find more operation.
Was this article helpful?
Your feedback helps us improve.
Related Articles
 Tricks for using Finder on Mac more effectively7 minutes read
 How to Relaunch Finder on a Mac1 minutes read
 Why do many people prefer Windows File Explorer over macOS Finder?4 minutes read
 How to set a default folder opening in Finder on Mac2 minutes read
 Sort and sort files in Lion Finder10 minutes read
 Download Windows Product Key Finder 2020 free, the software that stores the license key3 minutes read
Reader Comments 0
Sign in with email or Google to join the discussion.