Table of Contents
This practical guide walks through how to turn a macbook into a desktop Mac, explains the main requirements, and highlights common issues that may appear along the way.
Use a separate display with a MacBook
Using a separate display with a MacBook can be very versatile. You can use your laptop with a monitor, or connect it to a monitor and no longer need a MacBook. macOS will remind you of things like your resolution and how your windows are organized whenever you connect or disconnect your monitor.
Understanding the limitations of the MacBook is important. The year of the hardware's manufacture and capabilities will tell you. The best way to find out which model your MacBook belongs to is by searching the Apple Support website.
For example, searching for '15-inch MacBook Pro 2016' will reveal the specs for the base 2016 model. In the 'Video Support' section, it is stated that this model supports two external displays with 5120 x 2880 resolution at 60Hz or four displays with 4096 x 2304 resolution.
You can use the same method to understand how to connect any external monitor to your MacBook. The 2016 MacBook Pro should look for native DisplayPort support over USB-C, which means it doesn't have HDMI output, only USB-C, so is 'native'. The spec sheet says HDMI, VGA and Thunderbolt 2 are supported as well, but you need an adapter to make it work.

If you're using Thunderbolt to connect your monitor, you can chain the monitors together. In other words, you'll connect one monitor to your MacBook and a second monitor to that first.
Both screens will then display, and you can use them independently in macOS. Make sure you check that your MacBook and monitor have the necessary tech support before you buy.
Select an external keyboard
The keyboard is also an essential accessory when connecting the MacBook to an external display. The best choice is Apple's Magic Keyboard, which comes in two types with a numeric keypad and a non-numeric keypad.
Both keyboards connect via Bluetooth, are rechargeable, and use Lightning charging connectors for Apple's iPhones and iPads. There's a full set of multimedia keys and the usual Mac-specific layout you're used to on your MacBook keyboard.
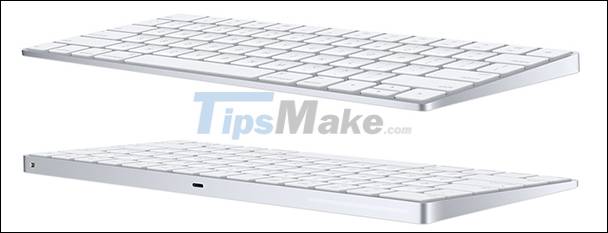
While Apple makes a solid keyboard, there are plenty of other options. Almost any USB or wireless keyboard (RF or Bluetooth) will work with your Mac. You can also use apps like Karabiner-Elements to customize your keyboard layout. This also means you can use keys like Windows Alt to Command - so you can use them on a Mac.
The mechanical keyboard is also not a bad choice. Although regularly marketed to gamers, it is ideal for those who spend a lot of time in the day typing. Each key design feels and sounds different, but they can be individually replaced with custom keys if desired.
Adjust the mouse pointer
If you're reading this, you're familiar with the MacBook's oversized, multi-point touchpad. To emulate its feel and functionality, there's nothing better than Apple's Magic Trackpad 2. There is no product on the market like this one.
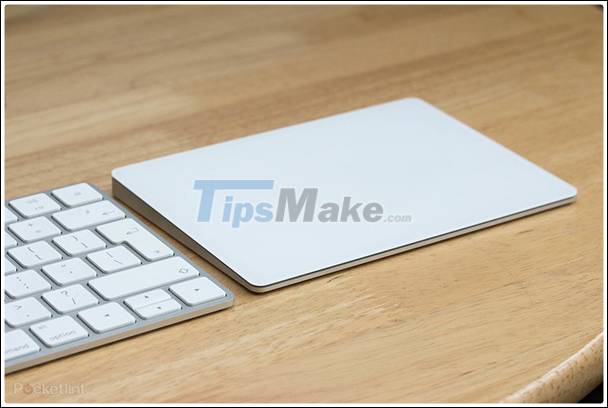
Most regular mice will also work with your Mac, whether they are wired or wireless. Some wireless mice require an RF dongle that you connect via the MacBook's USB port. Magic Mouse 2 will do a good job, and regular mouse models do just the same.
Don't forget the hard drive
One of the biggest limitations of modern laptops is the storage capacity. SSDs are fast and durable, but they're still quite expensive compared to mechanical hard drives. If you want your MacBook to function as a desktop computer, you'll likely need some sort of external memory.
This is as simple as a hard drive attached to a USB. The drive can be used to back up your Mac with Time Machine and store personal data. However, if your budget allows, you can choose an external SSD. It will give you much faster read and write speeds.
Docks and Hubs simplify the transition
Dock and hubs help two use MacBooks: expand the number of ports and simplify using the MacBook as a desktop computer.
The first benefit is pretty obvious. If you have a recently made MacBook, you won't have anything other than a USB-C (Thunderbolt 3) port to connect external devices, such as a USB stick. The Hub provides a wider range of ports, allowing you to connect to multiple devices.

Docks really shine when they're used as a single connection point for all the peripherals on your desk. If you connect all your monitors, storage devices, and other peripherals to one dock, you can simply connect your MacBook to an adapter or outlet when you get home and that's it. You already have a desktop computer.
Key Takeaways
Use the information above as a practical reference for how to turn a macbook into a desktop Mac. Review each step carefully, confirm any requirements, and choose the option that best fits your situation.
FAQ
What does this guide explain about Turn a Macbook into a Desktop Mac?
It explains the main concepts, practical considerations, and useful steps related to turn a macbook into a desktop Mac without requiring advanced knowledge.
Who can benefit from learning about Turn a Macbook into a Desktop Mac?
This information is useful for readers who want a clear overview, practical guidance, and reliable steps related to turn a macbook into a desktop Mac.
What should I check before applying this information?
Review the requirements, confirm that your device, software, or situation matches the instructions, and back up important data before making major changes.
Related Articles
 How to Fix Macbook Not Powering on Error: Step-by-Step Guide13 minutes read
 Top 5 MacBooks Worth Spending Money on in 20254 minutes read
 Compare Macbook, Macbook Pro and Macbook Air10 minutes read
 How to Turn on and Off the Picture in Picture (Pip) Feature4 minutes read
 Hard to Force 'Desktop'7 minutes read
 How to Restore Boot Sound on the 2016 MacBook Pro4 minutes read
Reader Comments 0
Sign in with email or Google to join the discussion.