Table of Contents
A RAM upgrade helps only when the computer runs short of memory during the work you actually do. Before buying modules, confirm that the memory is replaceable, then match the system's DDR generation, module form factor, supported capacity, slot layout, and speed. Desktop DIMMs and laptop SO-DIMMs are physically different, and DDR generations are not interchangeable.
1. Confirm that more RAM will solve the problem
Open Task Manager in Windows, select Performance > Memory, and use the computer normally. Look for sustained high memory use, heavy paging, or applications closing because memory is exhausted. Also check each important application's recommended memory requirement.
A slow computer may instead be limited by CPU performance, storage, heat, malware, or a full system drive. TipsMake's slow-computer troubleshooting guide can help identify the bottleneck before you spend money.
2. Check whether the memory can be upgraded
Look up the exact desktop motherboard or laptop service manual. Confirm:
- whether RAM is soldered, socketed, or a combination of both;
- the number and location of memory slots;
- maximum supported capacity in total and per slot;
- supported DDR generation and module form factor;
- whether opening the case affects warranty or requires a technician.
Some thin laptops have only soldered memory and cannot be upgraded. Others have one soldered portion and one SO-DIMM slot. Do not remove a cover based only on a similar-looking model; product families often contain several internal designs.
3. Identify the installed memory
CPU-Z can show the active memory type and current configuration on the Memory tab. The SPD tab can report the capacity, manufacturer, part number, and stored profiles for a selected socket when the system exposes that data.
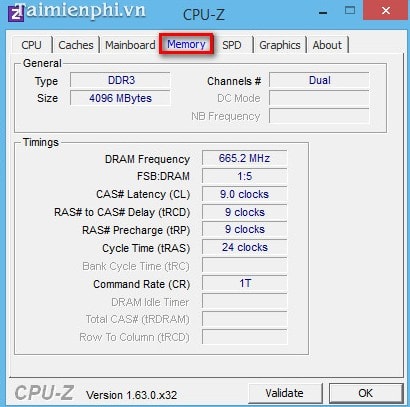
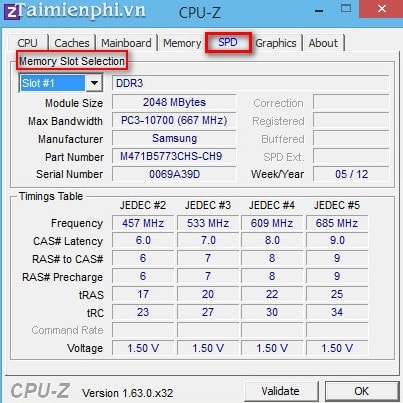
Software cannot always tell whether an empty-looking SPD selection corresponds to a physical slot, and it cannot reveal soldered layouts reliably. Confirm the result in the service manual or by inspecting the board only when it is safe to open.
For help reading these fields, see how to check PC specifications with CPU-Z.
4. Match the replacement or additional RAM
- DDR generation: use the exact generation supported by the system. DDR3, DDR4, and DDR5 have different electrical and physical keys.
- Form factor: desktops normally use full-size UDIMMs; laptops normally use smaller SO-DIMMs. Workstations and servers may require other module types.
- Capacity: stay within the motherboard or computer's total and per-slot limit.
- ECC and buffering: ECC, registered, unbuffered, and on-die ECC are not interchangeable terms. Match the platform's documented module type.
- Speed and profiles: faster-rated memory may run at a lower supported speed. XMP or EXPO profiles are optional overclocks and can require testing.
- Voltage and organization: use modules supported by the system; density, rank, and chip organization can matter on older or tightly specified platforms.
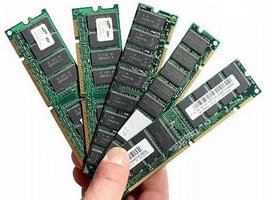
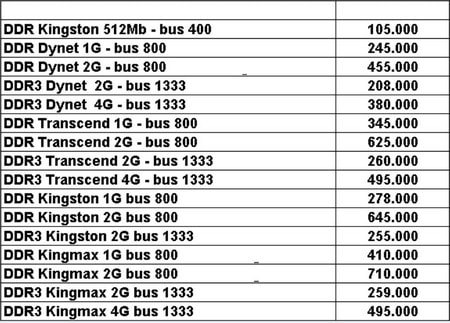
For the least uncertainty, buy a matched kit listed by the motherboard or memory vendor for the exact model. Mixing kits with the same headline speed can still produce different chips, timings, ranks, or profiles. A mixed system normally runs at settings all installed modules and the memory controller can sustain.
5. Decide how much capacity to buy
Use the operating system and application requirements plus observed memory pressure. Leave headroom for browser tabs, background services, and larger future projects. Do not buy capacity the platform cannot address, and do not assume extra unused RAM will make CPU- or storage-limited work faster.
When replacing a matched dual-channel kit, compare the cost and reliability of a complete larger kit with adding unmatched modules. Two supported modules are often simpler to stabilize than filling four slots at high speed.
6. Install desktop DIMMs safely
- Shut Windows down completely, switch the power supply off, and unplug the power cable.
- Press the case power button briefly after unplugging, then touch an unpainted metal part of the case to equalize static charge. Work on a clean, non-carpeted surface.
- Open the case and use the motherboard manual to identify the recommended slots. With two modules, these are often—but not always—the second and fourth slots from the CPU.
- Open the retaining latches. Align the module's notch with the slot; it fits in only one direction.
- Press evenly on both ends until the module is fully seated and the latches close. Never force a module whose notch does not align.
7. Install a laptop SO-DIMM only when supported
Follow the model-specific service manual. Disconnect the charger and, when the manual instructs, disconnect or disable the internal battery before touching the memory. Insert a SO-DIMM at the documented angle, then press it down until the side clips lock.
Stop if the bottom cover, battery connector, or memory shield requires unfamiliar force. A repair shop is safer than damaging a battery, ribbon cable, or motherboard. The laptop RAM upgrade guide covers additional considerations.
8. Verify and test the upgrade
- Start the computer and check the BIOS or UEFI memory total.
- Confirm Windows reports the expected usable capacity.
- If a profile such as XMP or EXPO was enabled, verify the active speed separately.
- Run a memory test and then the applications that normally use substantial RAM.
If the computer does not boot, power it off and unplug it before reseating the modules. Test one module at a time in the manual's recommended slot, load default memory settings, and check the board's diagnostic LEDs. Any memory error matters; follow TipsMake's RAM testing guide before trusting the system with important files.
Related Articles
 How to Upgrade Computer RAM Most Effectively6 minutes read
 How to Assemble CPUs from Intel and AMD6 minutes read
 5 Reasons to Install Linux on Old Computers6 minutes read
 17 Lightweight Linux Distributions Bring New Life to Old14 minutes read
 How to Install and Using Avast Free Antivirus to Effectively8 minutes read
 Reuse Old Computers: A Practical Guide9 minutes read
Reader Comments 0
Sign in with email or Google to join the discussion.