Table of Contents
Choose a motherboard only after deciding which desktop CPU and case you will use. The board must match the processor's socket, chipset, and required BIOS version; fit the case; support the intended memory; and provide enough storage, expansion, power, and external connections. A matching socket alone does not guarantee that the system will boot.
This guide focuses on standard desktop PCs. Laptop motherboards are usually proprietary to a particular chassis, display, cooling system, battery, and firmware, so they are not normal retail upgrades.
1. Match the board to the case
The motherboard's form factor determines its physical dimensions, mounting points, and typical expansion capacity. Common desktop sizes include:
- ATX: a full-size mainstream option with room for more slots and connectors.
- Micro-ATX (mATX): shorter than ATX and often a good balance of price and expansion.
- Mini-ITX: compact, normally with fewer slots and tighter cooling and cable constraints.
- E-ATX: larger than standard ATX; dimensions are not perfectly uniform, so check the exact case clearance.
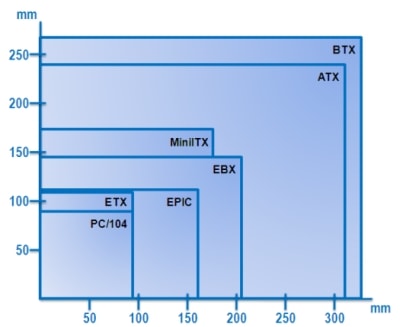
Confirm the case manufacturer's supported board sizes and standoff positions. A large case can usually accept smaller boards, but front-panel cable reach, expansion-slot alignment, radiator clearance, and appearance may differ. See TipsMake's motherboard form-factor guide for a size comparison.
2. Verify CPU socket, chipset, and BIOS support
Start with the exact processor model, then open the motherboard manufacturer's CPU support list. Confirm all three items:
- Socket: the processor must physically fit the board.
- Chipset and board revision: the platform must support that CPU family and its required features.
- BIOS version: the support list may specify a minimum firmware release for that processor.
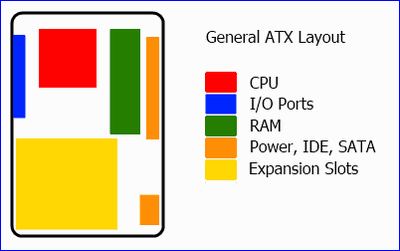
A board made before a newer processor launched may need a BIOS update before it can boot with that CPU. If the board cannot update firmware without a working processor, ask the seller to confirm the installed BIOS or choose a model with a documented USB BIOS Flashback-style feature.
Do not rely on marketplace titles such as “supports Ryzen” or “Intel compatible.” Use the exact board model, revision, CPU model, and support-list entry.
3. Check memory generation and capacity
A motherboard supports one memory generation; DDR4 and DDR5 modules are not interchangeable. Check:
- supported memory type and maximum capacity;
- number of DIMM slots;
- supported speeds at default settings and through XMP or EXPO profiles;
- the recommended slot arrangement for one, two, or four modules;
- the board's memory qualified-vendor list when using high speeds or large capacities.
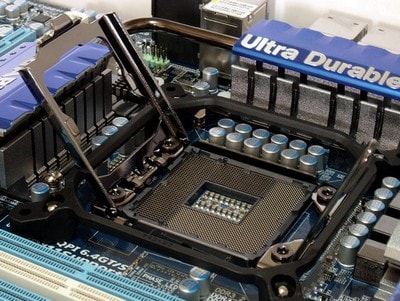
Four slots provide upgrade flexibility, but filling every slot can make high memory speeds harder to stabilize. A supported memory profile is still an overclock on many systems. If you plan to tune memory, review the guide to RAM profiles and stability testing.
4. Plan storage and PCIe expansion
Count the devices you will install now and later:
- M.2 slots for NVMe or SATA drives, including supported lengths and interfaces;
- SATA ports for 2.5-inch SSDs, hard drives, or optical drives;
- the main full-length PCIe slot for a graphics card;
- additional slots for capture, network, sound, storage, or accelerator cards.
Read the motherboard block diagram or manual for lane sharing. Installing an M.2 drive may disable a SATA port, reduce another slot's bandwidth, or change how two expansion slots operate. Also check whether an M.2 heatsink is included and whether a large graphics card will cover adjacent slots.
5. Make sure power delivery and cooling fit the CPU
Confirm the board has the required 24-pin motherboard connector and CPU EPS power connector arrangement supported by the power supply. For a high-power processor or sustained rendering workload, look for documented cooling on the voltage-regulator area and independent reviews of the exact board.
Marketing “phase” counts are not directly comparable across designs. A more expensive board does not automatically make a stock CPU faster; it may instead provide stronger power delivery, extra controllers, better diagnostics, or more connectivity.
6. Check rear ports and internal headers
List the connections you actually need:
- USB-A and USB-C ports with the required speeds;
- front-panel USB-C and USB headers for the case;
- Ethernet speed and built-in Wi-Fi or Bluetooth;
- audio outputs, optical audio, and microphone inputs;
- display outputs if the CPU has integrated graphics;
- fan, pump, RGB, Thunderbolt/USB4 add-in, and temperature-sensor headers.
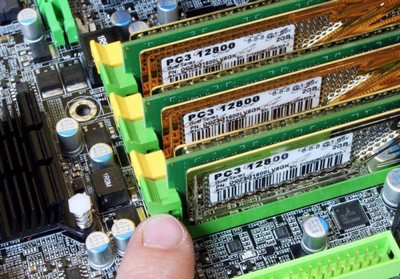
A video output on the motherboard works only when the installed processor provides integrated graphics and the firmware supports it. Similarly, a connector's shape does not prove its speed or display capability; read the specifications.
7. Look for useful build and recovery features
Features such as clearly labeled front-panel pins, preinstalled I/O shield, diagnostic LEDs or postcode display, enough fan headers, tool-free M.2 latches, and BIOS recovery can save time. Overclocking controls matter only if the CPU and platform support them and you intend to use them.
Final compatibility checklist
- Exact CPU appears on the board's support list for the installed BIOS.
- Board form factor and connectors fit the case.
- RAM generation, capacity, and module layout are supported.
- GPU, storage, and add-in cards have enough slots and lanes.
- Power supply has the required connectors and capacity.
- CPU cooler fits the socket, case, RAM, and board components.
- Rear I/O and internal headers cover every required device.
Set the budget after this compatibility list. Spending extra on unused ports or styling rarely improves performance, while missing one connector can require adapters or a different board. For the broader upgrade order, see PC upgrades that provide practical value.
Related Articles
 Things to Know When Choosing to Buy Mainboard13 minutes read
 How to Find Motherboard Compatible RAM9 minutes read
 How to Choose Laptop CPU That Meets the Needs (Part 2)14 minutes read
 What Is Motherboard? Learn About the Mainboard in the Computer14 minutes read
 Computer: Basic Notes When Choosing a Mainboard to Build PC5 minutes read
 Choose to Buy the Right Board for Your PC4 minutes read
Reader Comments 0
Sign in with email or Google to join the discussion.