Table of Contents
This practical guide walks through how to test RAM, check RAM on the computer is simple and, explains the main requirements, and highlights common issues that may appear along the way.
1. Instructions on how to test RAM on the computer
Use the Windows Memory Diagnostic tool
There are many ways to open the Windows Memory Diagnostic tool on Windows, but I will guide you through the most general way, applicable to all Windows versions.
Method 1: Use the Windows + R key combination and enter the command mdsched.exe> Press OK.

Method 2: Open Control Panel and choose Administrative Tools.

The Administrative Tools dialog box appears and select Windows Memory Diagnostic.
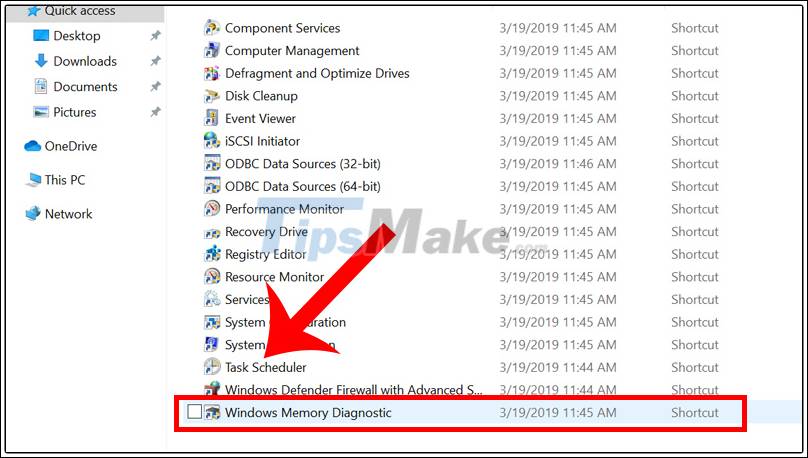
The RAM test tool has been activated. Press Restart now and check for problems (recommended) to start error checking.

Next, your computer will restart, the Windows Memory Diagnostic Tool will start and start checking for RAM errors on your computer.
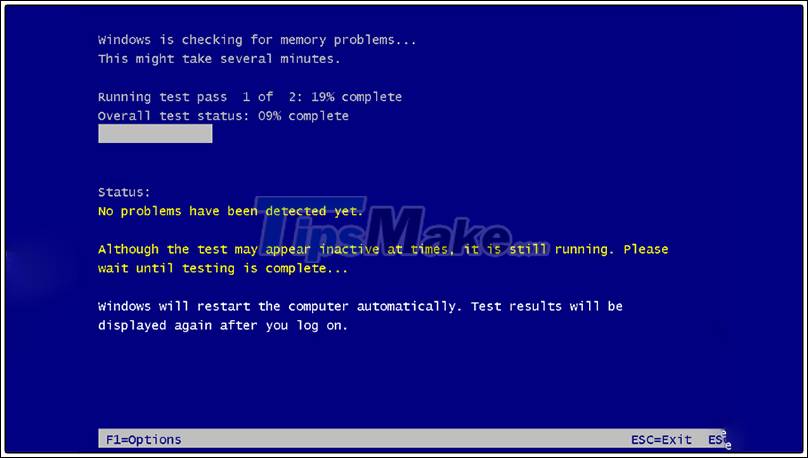
After running the program, the computer will reboot again. If you want a closer look at the notifications, you can open Windows Logs to see them.
How to open Windows Logs:
Step 1: Press the Windows + R key combination to open the Run dialog box> Enter the keyword eventvwr.msc.

Step 2: Click Windows Logs> Select System> Click Find.
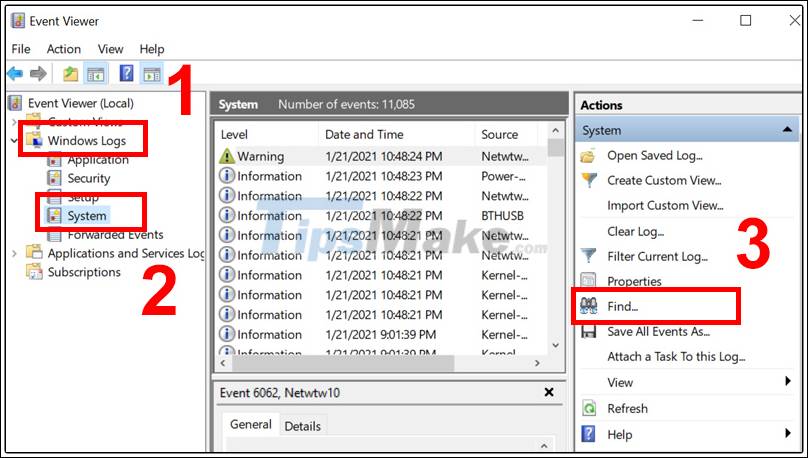
Step 3: Enter MemoryDiagnostic in the Find what box> Click Find Next to search.
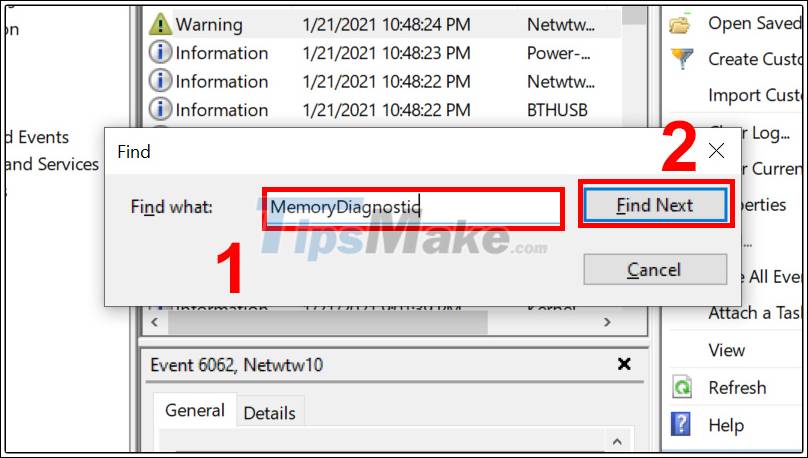
And this is the result.

Using the MemTest86 software
Step 1: Download the software MemTest86: HERE .

Step 2: Create USB Boot, download MemTest86, then transfer MemTest86 to USB (called USB Boot).
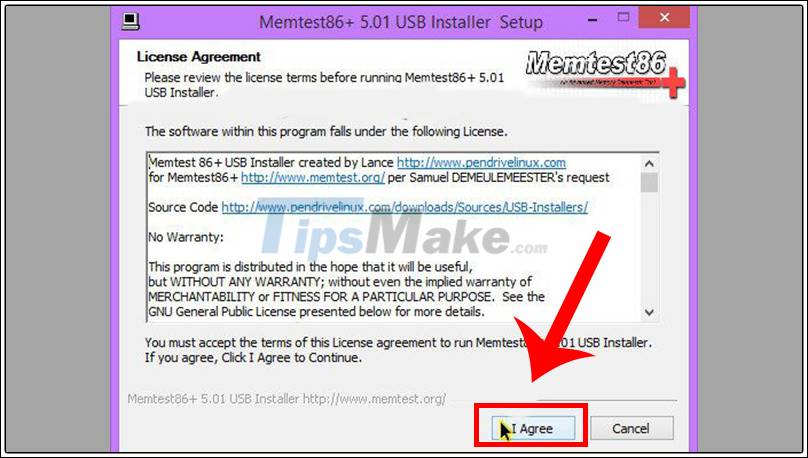
To create a USB Boot, open the downloaded MemTest86> Click I Agree.
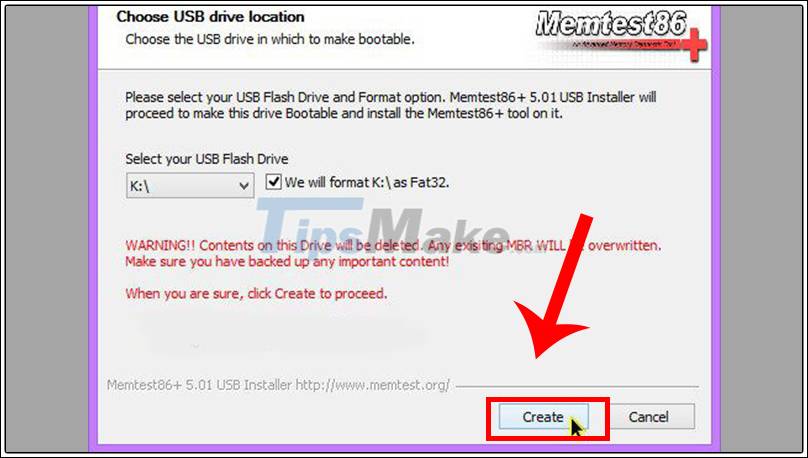
Step 3: In the Select your USB Flash Drive, select the USB drive and click Create to make it bootable for USB.
After the program is running, you have a bootable USB to test RAM.
Step 4: Check the RAM using MemTest86.
Depending on the computer model to access the Boot mode, there will be different ways. For example: To access the Boot Menu of a Dell computer , press F12 when it boots.
To search more precisely the Boot menu of each laptop you can search on Google under the suggestion "Boot menu + laptop brand name".
Step 5: Next, MemTest86 will proceed to check the RAM on the user's device.
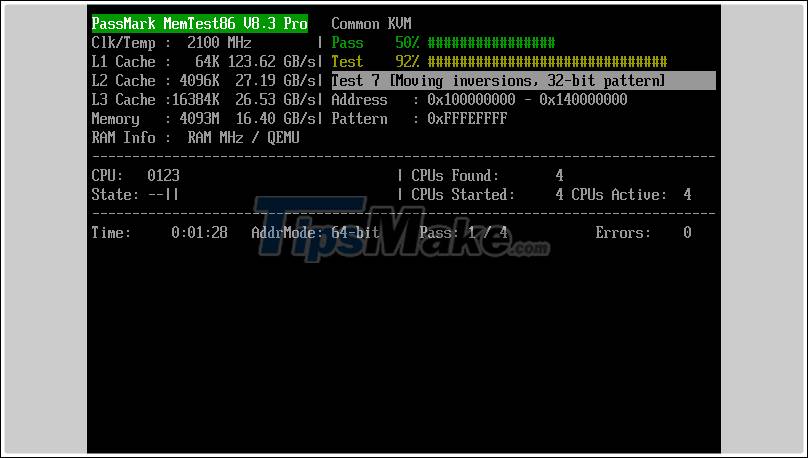
If the result does not detect any error then it means that the RAM on the system is still working properly. On the contrary, if there is an error then it is most likely that the RAM on your computer has a problem.
2. Instructions on how to check RAM on the computer
Test through Computer Properties
Right-click This PC> Select Properties.
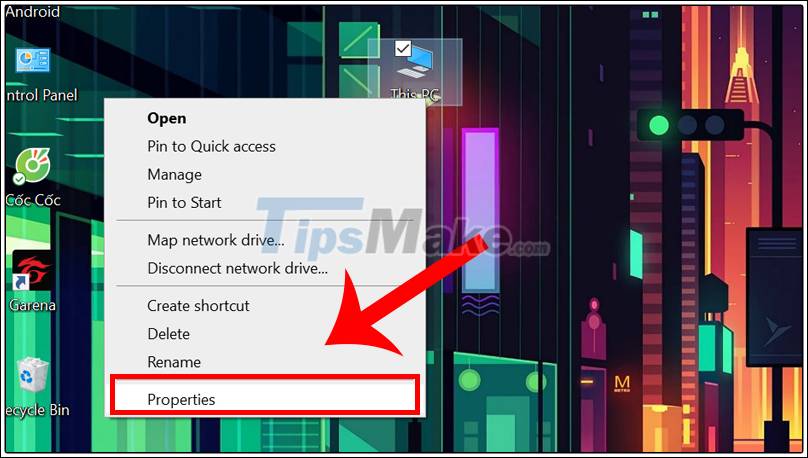
Information about your RAM capacity will be displayed.

Check computer information with the dxdiag command
Step 1: Press the Windows + R key combination and enter dxdiag> Select OK.

RAM information is shown in the picture.

Use the software CPU-Z
Step 1: Download the software CPU-Z: HERE .
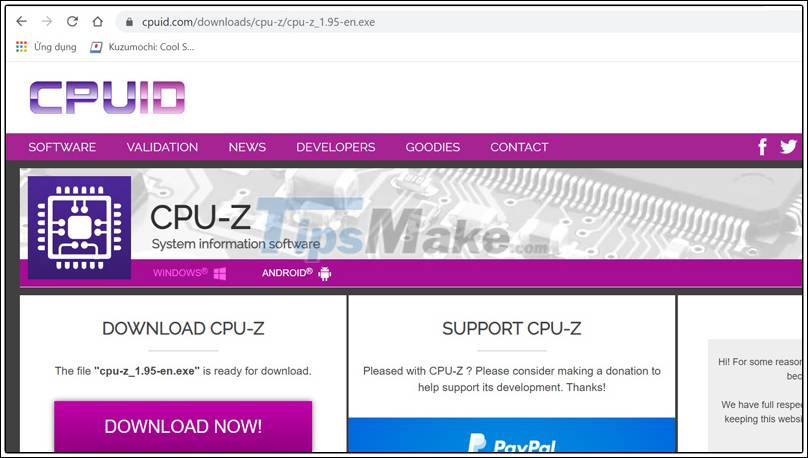
Step 2: Open the software and move to the Memory tab, RAM parameters will appear here.
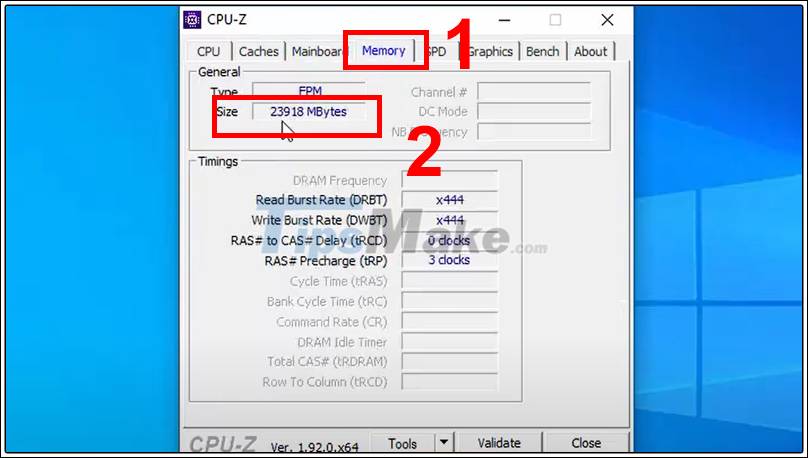
Hopefully the last article will give you the steps to test RAM and check your computer's RAM capacity easily and quickly. I wish you all success!
Key Takeaways
Use the information above as a practical reference for how to test RAM, check RAM on the computer is simple and. Review each step carefully, confirm any requirements, and choose the option that best fits your situation.
FAQ
What does this guide explain about Test RAM, Check RAM on the Computer Is Simple and?
It explains the main concepts, practical considerations, and useful steps related to test RAM, check RAM on the computer is simple and without requiring advanced knowledge.
Who can benefit from learning about Test RAM, Check RAM on the Computer Is Simple and?
This information is useful for readers who want a clear overview, practical guidance, and reliable steps related to test RAM, check RAM on the computer is simple and.
What should I check before applying this information?
Review the requirements, confirm that your device, software, or situation matches the instructions, and back up important data before making major changes.
Related Articles
 Tips to Check the Old iPhone 6s, iPhone 6s Plus When Buying10 minutes read
 How to Check Computer Speed, Test Computer Power4 minutes read
 View IP Website: How to Check Website IP Address // Domain Name5 minutes read
 Check Computer Performance with Sisoftware Sandra4 minutes read
 How to Fix Pxe-e61 Error: Media Test Failure, Check Cable6 minutes read
 How to Test SSD - Check SSD Speed3 minutes read
Reader Comments 0
Sign in with email or Google to join the discussion.