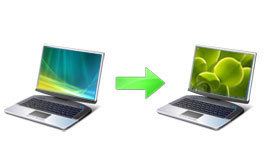
Upgrade Windows Vista to Windows 7
Depending on the hardware and the version of Windows Vista currently in use, we can choose to upgrade Windows Vista to the appropriate or higher version of Windows 7..
Network Administration - Depending on the hardware and the version of Windows Vista currently in use, we may choose to upgrade Windows Vista to the appropriate or higher version of Windows 7.
The process of upgrading from Windows Vista to Windows 7 is much easier than upgrading Windows XP.
If the currently used version of Vista is not supported to upgrade to any version of Windows 7, we will have to choose the Custom installation option. However, the Custom option does not retain settings, applications, or data. In this article we will perform the Vista upgrade process to Windows 7 with the Upgrade and Custom options.
Check application and device compatibility with Windows 7
Because the system is using Windows Vista, it has met the system requirements of Windows 7. However, we still need to download and install the free Windows 7 Upgrade Advisor tool. This tool will help us detect hidden problems in hardware, devices or applications on the system that may affect the installation of Windows 7, and offer some suggestions.

In addition, we need to access Windows 7 Compatibility Center to check what will work with Windows 7 and find direct links to drivers, updates and other downloads.
Which version of Windows 7 upgrade is suitable?
The table below shows the versions of Windows Vista that can be upgraded to Windows 7. The Upgrade option will work with an upgraded copy or a full copy of Windows 7.
Check the version of Vista you are using and then compare it to this table to find the appropriate version of Windows 7.
Version is using Upgrade toWindows 7 Home Premium Upgrade to
Windows 7 Professional Upgrade to
Windows 7 Ultimate
Windows Vista Home Basic

 Windows Vista Home Premium

 Windows Vista Business

 Windows Vista Ultimate

Choose to install 32 bit or 64 bit Windows 7?
If you are using a 32-bit version of Windows Vista, you can only update to 32-bit versions of Windows 7. Similarly, with 64-bit versions of Windows Vista we can only update to 64-bit versions of Windows 7. Otherwise we will have to choose Custom installation option to install Windows 7.
Both 32-bit and 64-bit installation disks are included in the Windows 7 installation package. 64-bit operating systems require a large amount of RAM, at least 4GB, which is faster than 32-bit operating systems. However, not all computers support 64 bit.
For more differences between 32-bit Windows 7 and 64-bit versions of Windows, click here .
In order to test which Windiws 7 installation disk can be used, we need to do the following:
1. Go to Start menu > Control Panel> System and Maintainance. Performance Information and Tools .
2. Click on View and print details .
3. In System , we can see the type of operating system we use next to the System type section, and 64-bit capable indicates whether we can use Windows 64 bit version.
If you're using a 64-bit version of Windows, you won't find 64-bit capable .
Upgrade to Windows 7 with the Upgrade option
 This upgrade process is the most convenient method to install Windows 7 into the system because every application, installation and data in Vista will be preserved.
Follow these steps to upgrade Windows Vista to Windows 7:
1. Open the computer.
2. After Windows Vista has started, perform the following actions:
- If you purchased and downloaded Windows 7 online, open its installation file. Buying and downloading Windows 7 online is the easiest way to install Windows 7 on netbooks.
- If you have a Windows 7 installation disc, then the installation process will automatically start. If not, go to the DVD drive and run the file setup.exe .
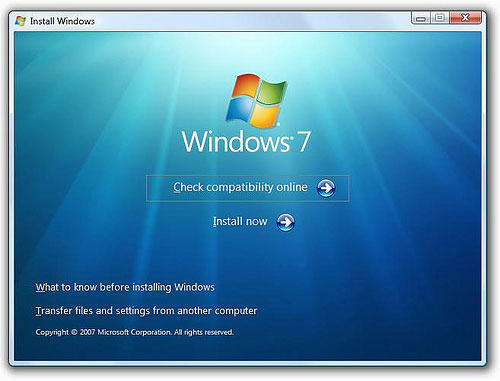
3. On the Install Windows page, click the Install now button.
4. On the Get important updates page for installation , we need to use the latest update to ensure a successful installation process, and help protect the system against security threats. Of course, the computer needs to be connected to the Internet during installation to be able to download these updates.
5. On the Please read the license terms page , select the option I accept the license terms and then click Next .
6. On the Which type of installation page do you want? Click Upgrade . Maybe then we will see a compatibility report.

7. Then continue to follow the instructions to complete the installation.
Upgrade Vista to Windows 7 with Custom installation option
 If you cannot upgrade Windows Vista to Windows 7 with the Upgrade installation option, we will have to select the Custom option. This means that all applications, data, and settings will not be preserved. Sometimes this process is also called 'new installation.' Therefore we need to backup the data or information needed before installing.
The custom installation process is much more complex, and sometimes this process takes hours to complete. We need to do the following steps:
Prepare
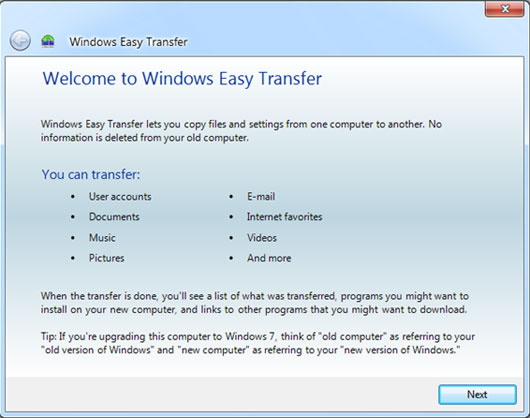
- An external hard drive. We will have to move the data from the PC before installing Windows 7. To simplify this process, we should use the Windows Easy Transfer tool, which requires the use of an external drive.
- Installation disk or file for applications that you want to use on Windows 7. We will have to manually reinstall the applications after completing Windows 7 installation. When you run Windows Easy Transfer, we will see a message. List the applications that are being used in Windows Vista.
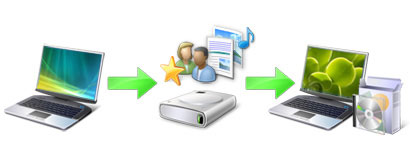
Move data, settings and collect application installation discs
With Windows Easy Transfer we can easily move data and settings to another location before installing Windows 7, then we can use it to move data and install it back to the computer after Installation process completed.
If you don't use Windows Easy Transfer, you'll need to manually copy the data to external storage devices like CDs, DVDs, external hard drives or USB drives.
Windows Easy Transfer will create a file containing the data and settings. This file will be quite large depending on the amount of data available, which is why we use an external hard drive and not a USB drive.
Before moving, note the following points:
- Windows Easy Transfer does not move applications, just move data and install. We will have to reinstall the applications manually. And this tool also lists the applications that are being used in Windows Vista.
- Windows Easy Transfer cannot move data from a 64-bit version of Windows to a 32-bit version. If you are using a 64-bit version of Windows Vista but want to install 32-bit versions of Windows 7, we will have to copy the data manually to an external hard drive before installing.
- Windows Easy Transfer moves video and music files, but it will not migrate licenses for DRM-protected files (Digital Rights Management). That means we will have to retrieve these rights for DRM protected files.
After downloading and installing Windows Easy Transfer, do the following to save data and settings:
1. Ensure that the external hard drive is connected to the computer.
2. Go to Start | All Programs | Windows Easy Transfer 7 .
3. On the screen that appears, click Next .
4. Select the option An external hard disk or USB flash drive .
5. Click This is my old computer , then wait for Windows Easy Transfer to check the system.
6. Uncheck the checkboxes of the user accounts that do not want to move the data in it and click Next .
7. Enter the password you set during installation and click Save .
8. On the dialog box that appears, browse for the external hard drive and click Save .
9. Windows Easy Transfer will then start saving data and settings. At this time, we should not manipulate the computer.
10. When you see the message These files and settings have been saved for your transfer , click Next .
Windows Easy Transfer will display the file name and address of the newly created Easy Transfer files.
11. Click Next and Close .
12. Make sure this file is saved to an external hard drive, then disconnect this device from the system.
After the necessary data and settings have been moved, we need to prepare the disk or application installer to use to install after the Windows 7 installation is complete. Note, if upgrading to a 32-bit or 64-bit version of Windows 7, we have to choose the appropriate installation because some programs designed to work only with 64-bit operating systems will not work on 32 bit operating system.
Install Windows 7
When selecting the Custom option during the installation process, we will install a new copy of Windows 7.
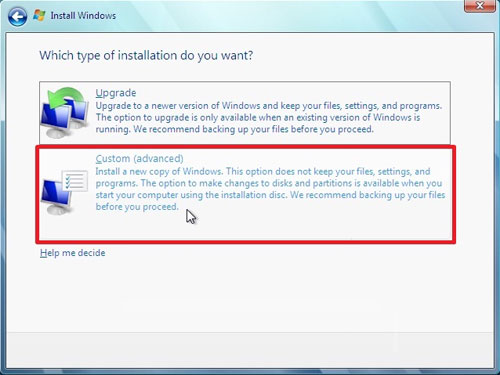
Note: Re-formatting the drive during Windows 7 installation is not required. If you want to format the drive, we will use an upgraded version of Windows 7, do not use a program from another software vendor to reformat the drive before installing Windows 7. Replace On that, we just need to start the PC with DVD upgrade Windows 7, click on Custom (Advanced) option and then select Drive options (Advanced).
Some notes before installing:
- Connect to the Internet for your PC so that we can download updates during the installation (if you don't have an Internet connection, you can still install Windows 7).
- Update antivirus software, run it and turn it off. After installation, it is necessary to re-enable this application or install a new antivirus software that can operate on Windows 7.
- Select the appropriate Windows 7 installation, 32 bit or 64 bit.
- Get the product key of Windows (located in the Windows Package of the installation disk).
Installation:
1. After Windows Vista has started, do the following:
- If you purchased and downloaded Windows 7 online, open its installation file. Buying and downloading Windows 7 online is the easiest way to install Windows 7 on netbooks.
- If you have a Windows 7 installation disc, then the installation process will automatically start. If not, go to the DVD drive and run the file setup.exe .
2. On the Install Windows page, click the Install now button.
3. On the Get important updates page for installation , we need to use the latest update to ensure a successful installation process, and help protect the system against security threats. Of course, the computer needs to be connected to the Internet during installation to be able to download these updates.
4. On the Please read the license terms page , select the option I accept the license terms and then click Next .
5. On the Which type of installation page do you want? choose Custom .
6. Select the partition containing Windows Vista and click Next .
7. In the Windows.old dialog box, click OK .
8. Then continue to follow the instructions to complete the installation.
Move data and install back to the computer
After finishing installing Windows 7, we will run Windows Easy Transfer and move the data and install it back to the computer.
Note, we need to re-run Windows Easy Transfer before reinstalling the applications. That's because Windows Easy Transfer will move the data back to the location where the previous applications saved them to the drive.

Perform the following actions:
1. Connect the drive containing the Windows Easy Transfer file to the system.
2. Access this external hard drive in the My Computer window.
3. Find the location to save the Easy Transfer file, named Windows Easy Transfer - Items from old computer and then double-click this file.
If you have a different name, we need to find the correct file.
4. Enter the password and then click Next .
Note: If you see a message saying there is not enough free space on the drive to move data back to the computer with Windows Easy Transfer, we can use the Disk Cleanup utility to delete the temporary files created in when installing Windows 7.
5. On Choose what to transfer to this computer page , we can choose the method of moving user accounts on Windows Vista to Windows 7.
To approve the current account mapping method, click Transfer.
To change click Advanced Options .
6. On Your transfer is complete page , click the See what was transferred link to check the list of user accounts and data that has been moved from Vista to Windows 7. Click on the See a list of programs you might Want to install on your new computer to check previous applications installed on Windows Vista.
7. Click Close . Maybe we will have to restart the system.
If you move multiple user accounts, you may be asked to change your password the next time you log in.
Reinstall the application
After running Windows Easy Transfer and all the data and settings have been moved back to the computer, we can reinstall the applications and update the driver.
Windows Easy Transfer will output a detailed report of the applications we have used on Windows Vista. Then we will have to use the installer or the installation disk to manually reinstall these applications.
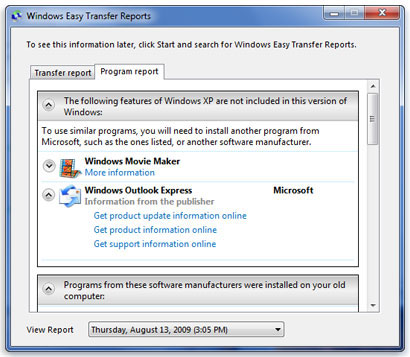
Also in this report, we will see very few or never used applications.
Note: Some applications like Windows Mail and Outlook Express are no longer integrated in Windows 7. If you've used Windows Mail or Outlook Express, we'll have to install a new mail application.
After installation
When installing Windows 7, if you do not format the partition, the files used in Windows Vista will be stored in the Windows.old folder.
After using Windows 7 for a certain time, we can confirm that the data and settings have been moved correctly, we can delete this folder to increase free space for the drive.
We can also delete this folder when we notice that there is not enough free space on the drive while moving data and settings back to the computer.
Important: Before using Disk Cleanup to delete this folder, make sure that all data and settings have been moved correctly to Windows 7, because when you delete the Windows.old folder we will not be able to restore it. OK.
Do the following to delete:
1. Go to the Start menu, in the Search Disk Disk Cleanup box. In the list of results click on Disk Cleanup .
If prompted to select a drive, select the drive on which we installed Windows 7.
2. Click Clean up system files . If you are prompted to enter an admin password or confirm, enter the password or the required confirmation information.
If prompted to select the drive again, select the drive containing Windows 7.
3. Select the Previous Windows installation item (s) and any other data you want to delete.
4. Click OK and then click Delete Files .
Update Driver
Driver is a software that allows the computer to communicate with hardware devices. Without drivers, the hardware connected to the computer, such as a video card, sound card, printer, . will not work.
In most cases, the drivers are included with that device, but when installing Windows 7 we need to update the latest drivers of these devices to suit the operating system. We can find these updates using the Windows Update service (go to the Start menu | All Programs | Windows Update ).
If Windows Update can not find the required driver, we can check in Windows 7 Compatibility Center , which contains direct links to driver downloads and the manufacturer's support page.
Netbook and driver
Some netbooks and laptops that are using Windows Vista may not have their own Windows 7 drivers for some features, such as function buttons. If Windows Update does not detect any drivers, we need to visit the manufacturer's Web site to search and download.
We can try installing the driver for Windows Vista on a Windows 7 PC. If the Windows Vista driver cannot be installed, we can use the Program Compatibility debugger to try to fix this problem.
1. Download or copy the driver installation file to the computer.
2. Right-click this file and select Troubleshoot compatibility .
3. Then follow the instructions to change the compatibility settings for this driver.
Here we have completed the upgrade process to Windows 7!