Transfer 'home' from XP to Windows 7 with Easy Transfer and USB
Your computer is running Windows XP and you want to skip testing Vista to use Widows 7.
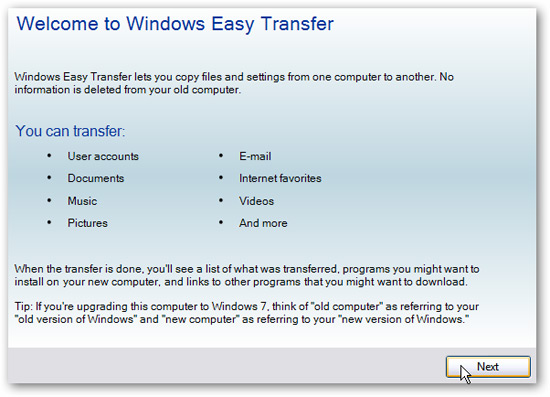
TipsMake.com - Your computer is using Windows XP operating system and you want to skip testing Vista to use Widows 7. However, one thing makes you hesitate to fully implement this change. is a problem with files and settings in use . This article will introduce you to Windows' Easy Transfer tool and with the help of a USB drive, you can completely transfer everything you need from XP to Windows 7 easily.
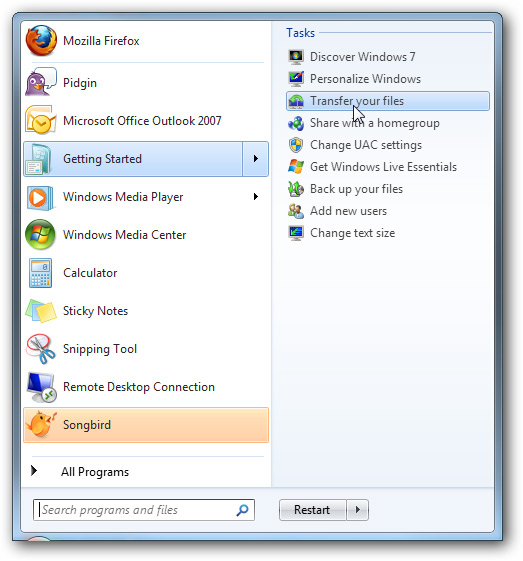
Launch Windows Easy Transfer
On Windows 7-based computers, go to the Start Getting Started Transfer your files section
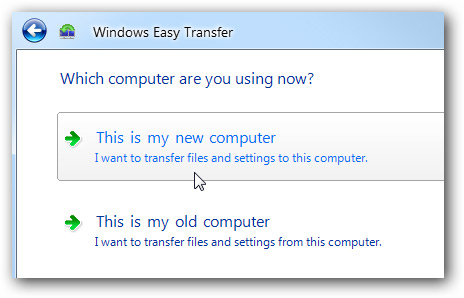
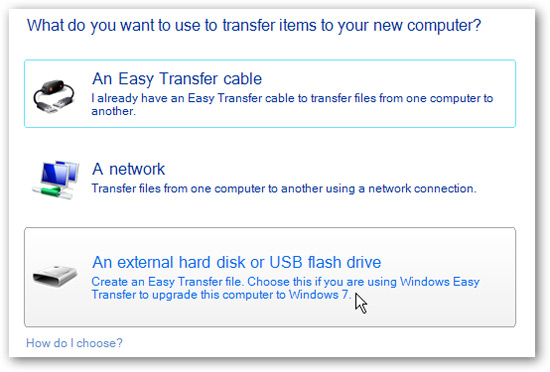
After the initial Welcome screen, select either an external hard disk or USB flash drive .

Next choose This is my new computer
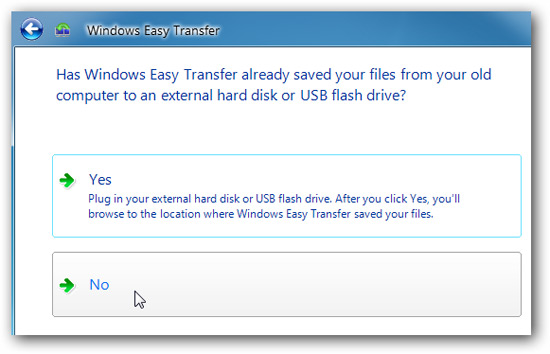
At the screen below, select No
Choose I need to install it now to install the latest version of Windows Easy Share (make sure you have the USB device ready to install on your computer)
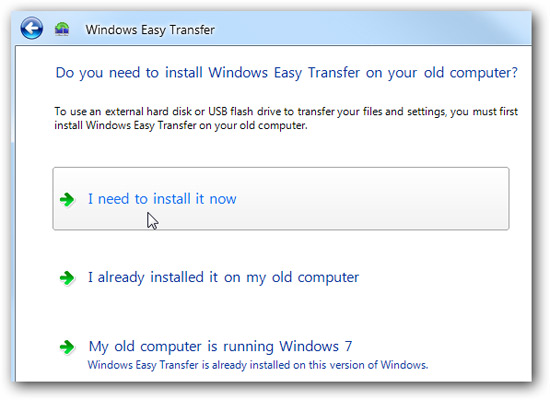
Then select External hard disk or shared network folder to copy the Easy Transfer program to the USB drive
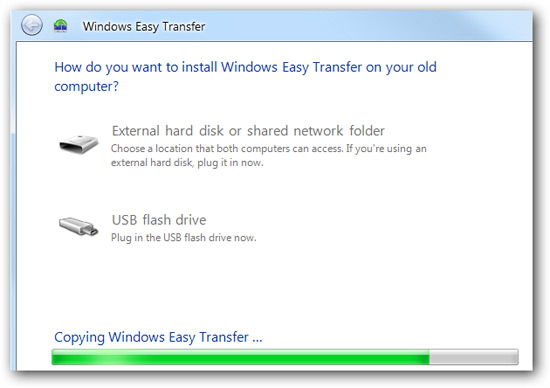
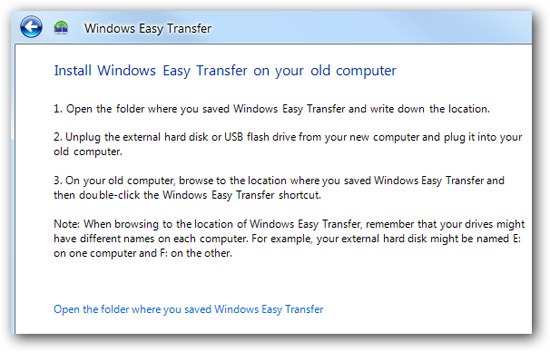
After the Easy Transfer file has been copied, you will receive the necessary operation message on the old computer (in this case, the XP machine).
Page 2: Configure the conversion process on XP
Configure the conversion process on XP
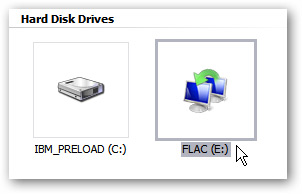
Plug the above created USB drive into your XP machine and launch the Easy Transfer program on the drive.
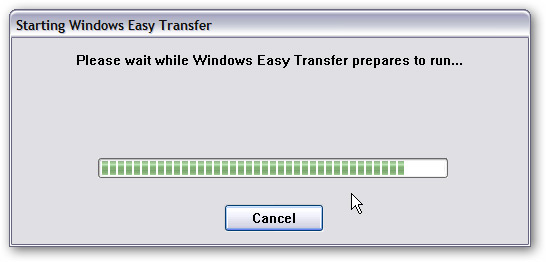
You will receive the preparation download process to run the program
Welcome screen displays the same interface as Windows 7, click Next to continue
Choose An hard disk external
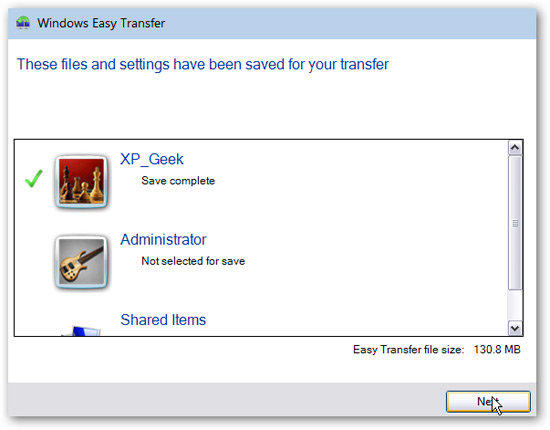
After scanning the accounts and user settings, you will get a general list as follows, in this list select the components you want to save and switch to Windows 7
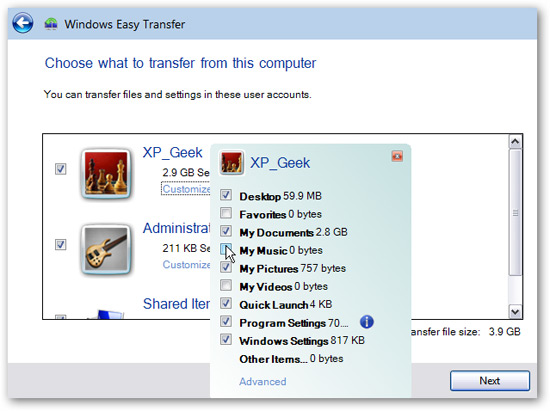
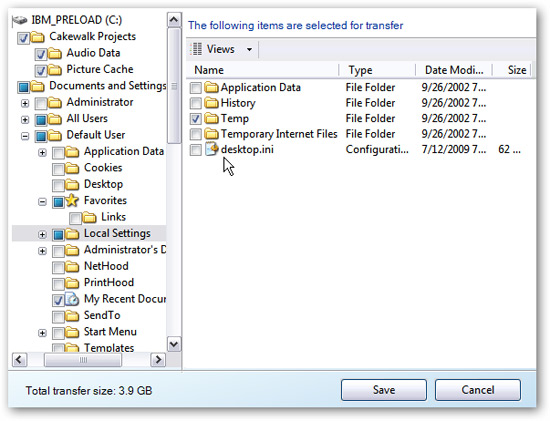
Click the Advanced link to open up more details about the files and folders you want to save, then click Save
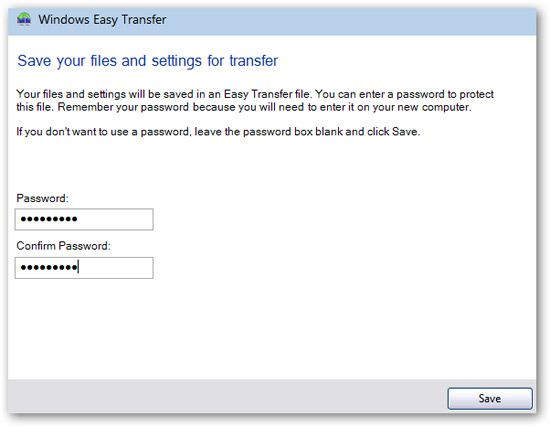
You must enter a password to protect the backed up data
After finishing saving the data, you can unplug the USB and plug it into your new Windows 7 computer.
Page 3: Restore settings
Restore settings
On a Windows 7 computer, click Yes on the following question:
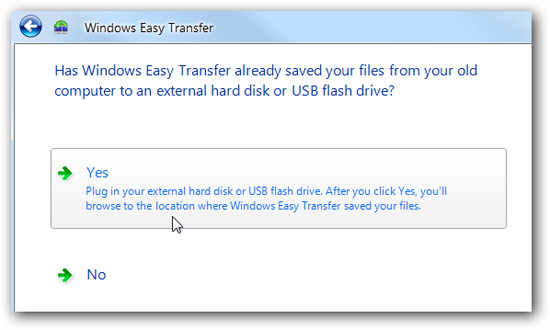
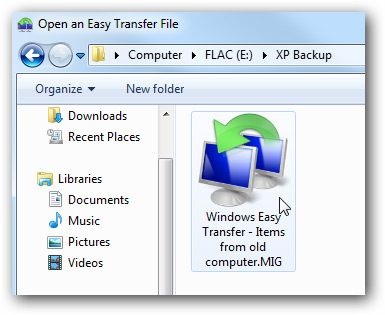
Open and navigate to the USB backup content storage
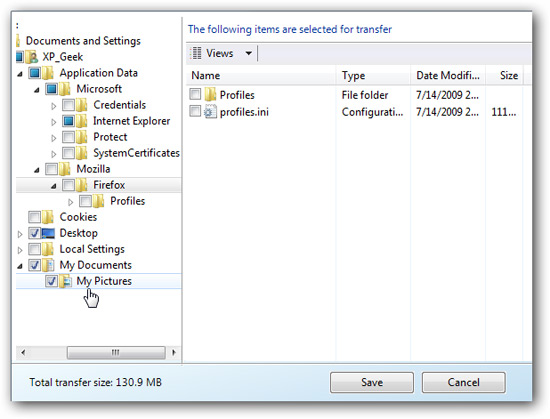
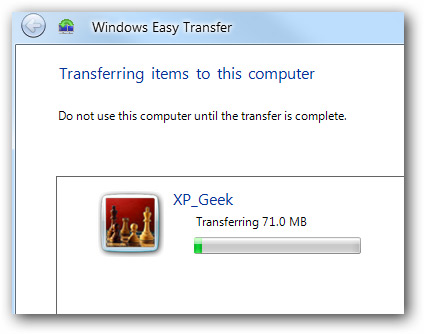
Restore the entire backup or select some specific file or folder, save the selection and start the transfer process.
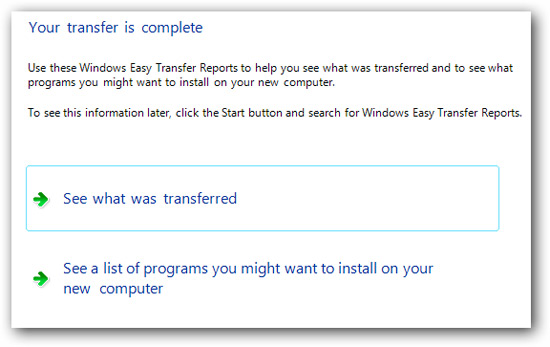
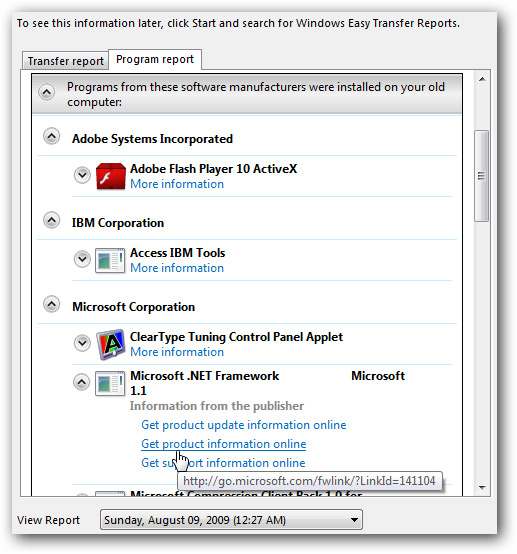
Once completed, you can view reports of components that have been transferred or see a list of added programs
So in this way, not only all programs and settings are transferred but even the program's own settings, important files, folders and documents are transferred to the new operating system computer.
- Transfer data between computers
- Compare Windows 10 Home and Windows 10 Pro
- How to use Wi-Fi Direct on Windows 10
- 5 Easy Upgrades That Actually Make Working From Home Fun
- How to transfer User Profile to another Windows 10 computer
- How to transfer data from Windows to Mac OS X quickly
- 10 ways to open Bluetooth File Transfer utility on Windows 11
- This Upcoming Windows Tool Will Make It Easier for Users to Switch to a New PC
- A simple, detailed, and safe guide to installing Windows on a laptop, perfect for beginners.
- 'Great way' attaches a Blu-ray player to your computer
- Install VirtualBox in USB and run the operating system
- Bring Windows XP in USB with Mojopack
- 10 things you can do with USB
- 10 'Portable' applications can run on USB drives
- Fix 'Generic Volume Cannot Be Stopped' error in Windows XP
- DataTraveler 150 USB capacity up to 64GB
- Control USB devices using Group Policy
- How to format an external hard drive to FAT32?


-
 Useful AI features in Windows 11
-
Laptop displaying a blue screen: Causes and effective solutions.
-
How to quickly split the screen on a Windows 10, 11, and macOS laptop.
-
How to connect Bluetooth devices on Windows 10, 8, and 7
-
Laptop Windows errors: Causes and how to fix them at home.
-
How to automatically log in to a user account on Windows 11/10
 Useful AI features in Windows 11
 Laptop displaying a blue screen: Causes and effective solutions.
 How to quickly split the screen on a Windows 10, 11, and macOS laptop.
 How to connect Bluetooth devices on Windows 10, 8, and 7
 Laptop Windows errors: Causes and how to fix them at home.
 How to automatically log in to a user account on Windows 11/10