Tutorial on How to Design Beautiful 3D Letters in Photoshop
Hoang Ha PC will guide you how to design 3D letters in Photoshop so you can create beautiful 3D letter logos, extremely simple and convenient..
Uses of 3D Text Design in Photoshop
3D lettering designs are very popular and are seen everywhere, partly because people are bored with normal 2D lettering designs . The use of 3D embossed letters is both beautiful, unique and dynamic, so the demand for products related to 3D embossed lettering design such as signs, advertisements, posters, etc. has become a trend in recent years.
If you plan to become a designer, learn how to design outstanding 3D letters in Photoshop. It will help you a lot in the design process later. Learning 3D letter design not only improves your Photoshop skills but also creates job opportunities. Isn't that great!

How to Design Outstanding 3D Letters in Photoshop for Computer Users
Step 1: Create a new file
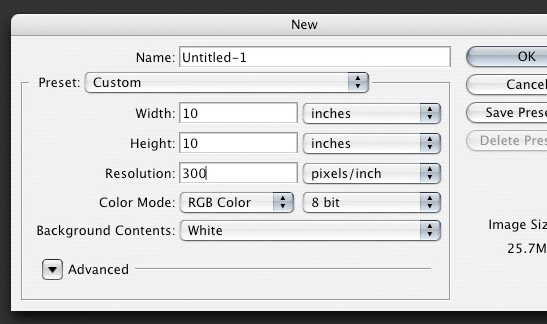
To start the process of making 3D letters, create a new file in Photoshop with Ctrl + N and adjust the following parameters:
- Width: 10 inches
- Height: 10 inches
- Resolution: 300 pixels/inches
Step 2: Set background color
With the newly created file, set the background color. Use dark colors to contrast with the subject that needs to be emphasized. Here I will choose dark gray ( #333333 ).
To do this, first set the background to dark gray. Then select the entire background frame by clicking on the background layer and using the key combination Ctrl + A ( Select > All ). Next, open the Fill dialog box by using the key combination Shift + F5 ( Edit + Fill ). Set Use for the Fill dialog box and click OK to complete the process.
Step 3: Create text
First, let's create the 2D text. Use the Horizontal Type Tool to initialize the desired text and change a few parameters:
- Text color: Yellow (#FFCC00)
- Font: Myriad Pro Black
- Size: depends on your adjustment.

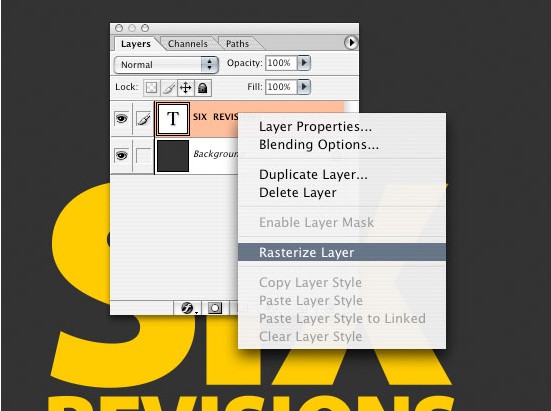
Step 4 : Rasterize the text
Rasterize the text once you've finished composing and editing the content. After Rasterizing , the text will be easier to work with, but it will no longer be editable.
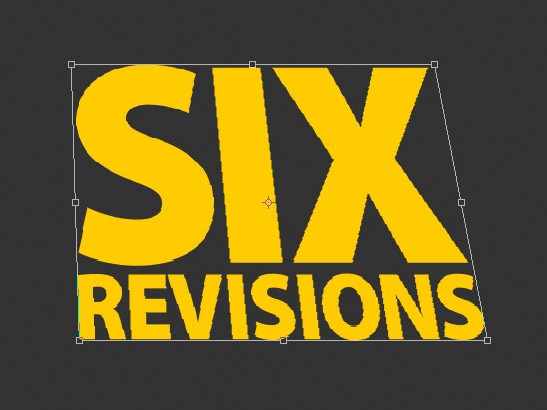
Step 5 : Create a tilt for the text
Now to continue designing outstanding 3D text in photoshop we will use Free Transform to create tilt and make the 3D image look more realistic. Use the key combination Ctrl + T ( Edit + Free Transform ), then hold down the Ctrl key and use the mouse to drag the top points of the tilted text.
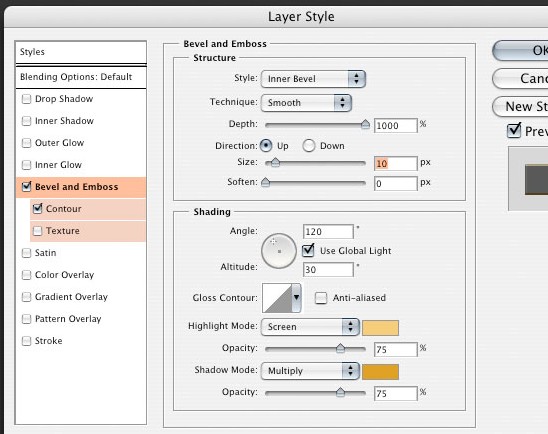
Step 6 : Add layer style
Make sure the text layer is selected in the Layers Panel , click on the Add a layer style icon located at the bottom of the Layers Panel . Select Bevel and Embossi . Set the parameters and choose the colors for the highlight and shadow with #FFCC66 for the highlight and #DFA125 for the shadow.
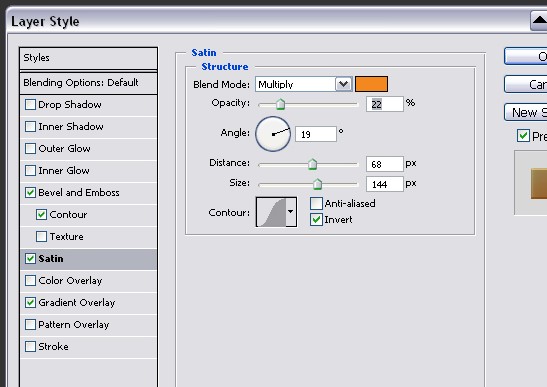
Step 7 : Create depth
To give the text some depth, go back to the Layer Styles dialog and set the layer style to Satin . Then change the color to #F3881F .
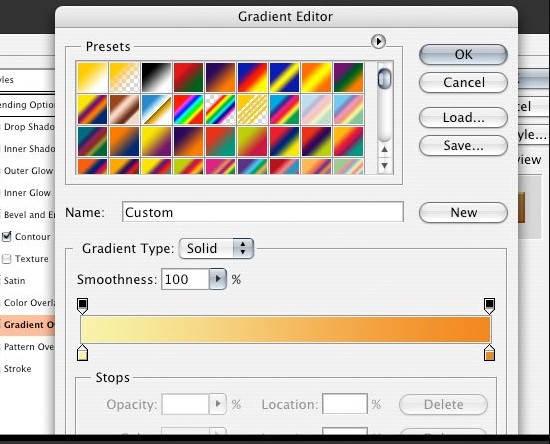
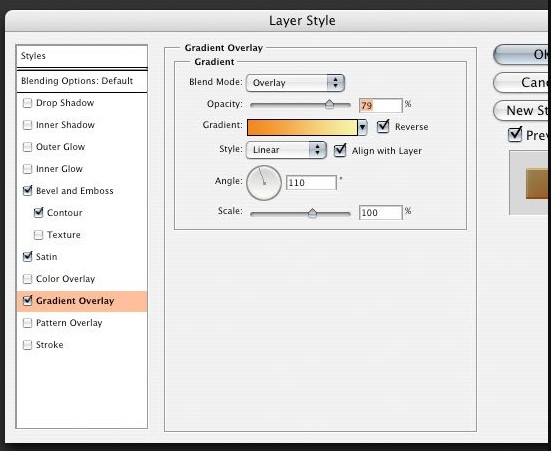
Step 8 : Adjust text color
Here's the last thing we'll do to the text surface - add a Gradient Overlay layer style . Click on the gradient and replace the color points, with the left one replacing to #F7F3A7 and the right one replacing to #F3881F .

Step 9 : Duplicate layer
In this step, select the layer and use the key combination Ctrl + J to duplicate the layer . Click and drag the duplicate layer to the trash icon at the bottom right of the Layer panel to delete the layer style .
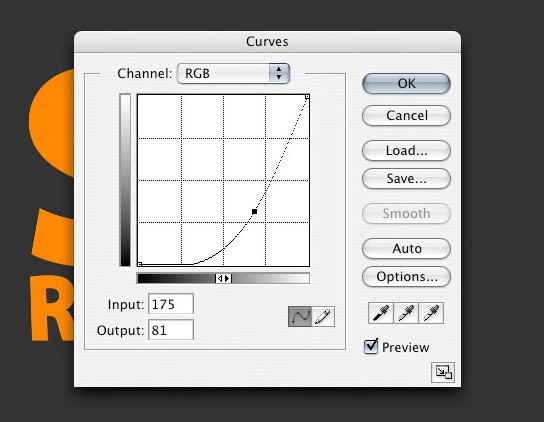
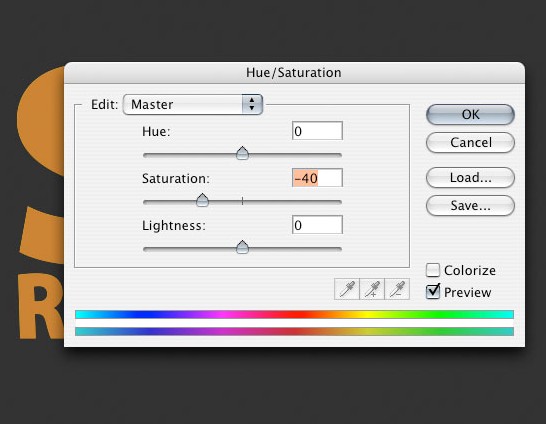
Step 10 : Make shadow
The next step of designing outstanding 3D text in photoshop is to adjust the color of the logo layer without layer style. Use Curves by pressing Ctrl + M ( Image > Adjustment > Curves ) then adjust the parameters. Reduce the brightness of the color to make a shadow. Go to Hue / Saturation by pressing Ctrl + U ( Image > Adjustments > Hue/Saturation ) and adjust again.
Step 11 : Create 3D interface
Click and drag the layer below the original yellow text layer and move it a little to the left with the arrow keys. Then hold down the Alt key and push the down and left arrows repeatedly. With each click you will duplicate the brown layer. Do this until the depth of the image is right.

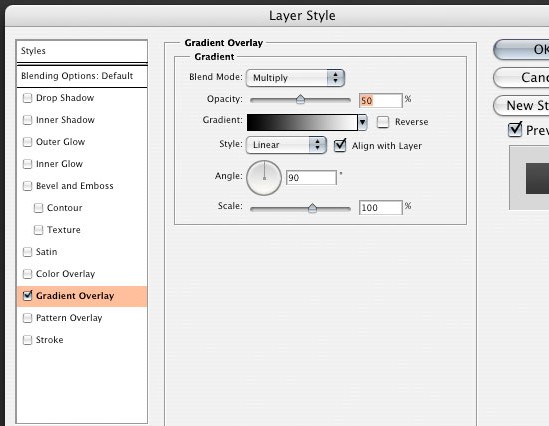
Step 12 : Combine the cloned layers
Select all the brown layers, link them and use Ctrl + E to merge them into a single layer . Add a Gradient Overlay layer style to the text edges and adjust the color.
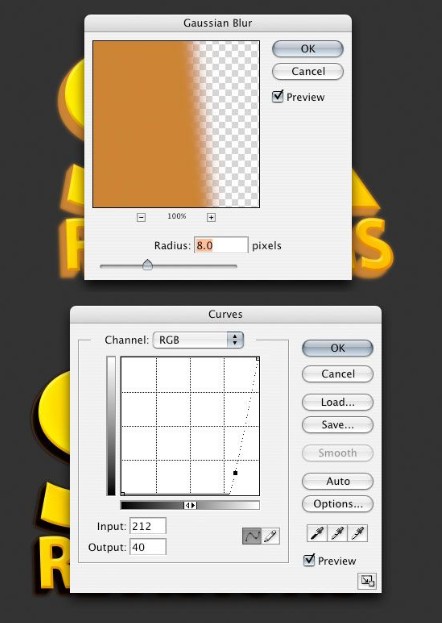
Step 13 : Create shadow
Duplicate the text alignment layer by pressing Ctrl + J. Go to Filter > Blur > Gaussian Blur then adjust the Radius option to 8px . Use Curves by pressing Ctrl + M to create a shadow.
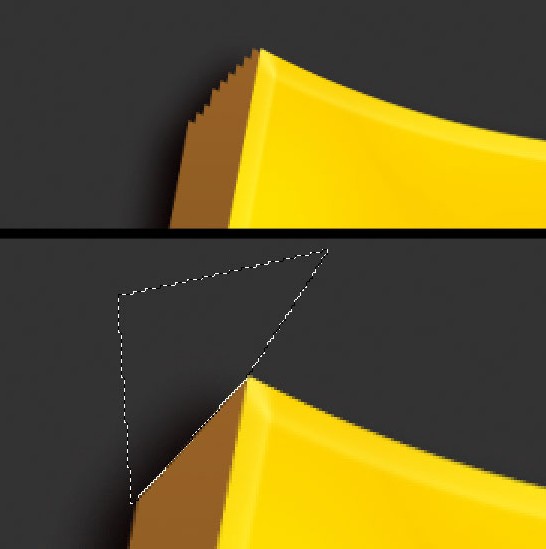
Step 14 : Flatten the edge
Using the Polygonal Lasso Tool , select the area you want to delete and press Delete . Repeat on all the letters.
And that's it, we have the result. Let's apply the same method to other designs and change some parameters to learn more about the tools used. Review the lesson and learn more new photoshop knowledge.
Step 15:
At this step, if you are satisfied with your 3D letter, you can stop, because it is basically done.
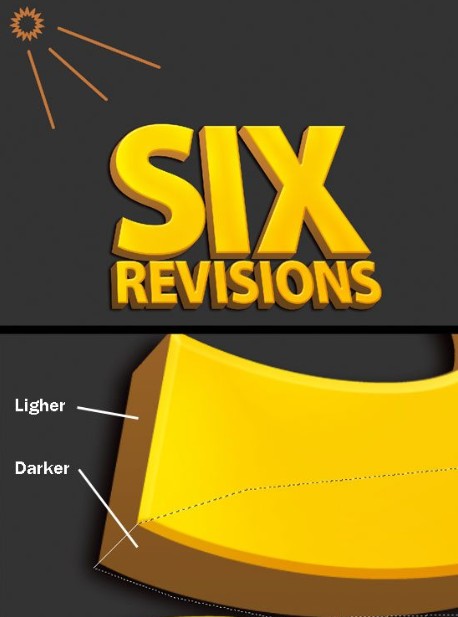
However, if you want to make it more beautiful, add some shadow. The light is coming from the top left, so we should have our shadow at the darkest place from the bottom right. To get the shadow right, we will use the Burn Tool on the brown text edge layer to darken it. Before adding the shadow, we need to use the Polygonal Lasso Tool to create some edges of the text. Hold down the Shift key and drag to add to the selection.
Step 16: Burn Tool
Now we can start burning the selected areas. Change the Burn settings in the Options bar to Ranges option with Highlights and Exposure at 50%. We will be using a brush with the main diameter set at 125px with Hardness at 0%.

Step 17 :
Do the same with the areas that need shading. Since you still need to select areas, we can do an inverse selection, Select > Inverse (Ctrl + Shift + I), then we can burn the unfinished areas without burning the whole thing.
Step 18 :
You can also do some highlights with the Dodge Tool. Use the same brush, same settings, and same method as we did with the Burn Tool.

Done! Looks a lot like a 'real' TV show logo, right?

In addition, you can refer to the configuration below to meet the minimum photoshop rendering needs, ensuring image rendering.
Configuration for Designer: HHPC GAMING - INTEL CORE i3 10100 | RAM 16G | GTX 1050Ti
- MAINBOARD: GIGABYTE H410M-H
- CPU: INTEL CORE i3 10100 up to 4.3G | 4 CORE | 8 THREAD
- DESIGN: JONSBO CR-1000 RGB
- RAM: COLORFUL BATTLE AX 16GB BUS 3000 DDR4 (1x16GB)
- VGA: NVIDIA GTX 1050Ti 4GB GDDR5
- SSD: GIGABYTE SSD 240G SATA III
- HDD: YOUR OPTIONS ACCORDING TO YOUR NEEDS
- SOURCE: COOLERMASTER PC700 700W
- CASE: JETEK KAMADO (NO FANS)