Transforming a USB drive into RAM for Windows 10 can make your computer run faster.
You want to use Windows 10 because of its great features, but your RAM is limited. Using Windows 10 for a long time can easily lead to lag and freezes, so what can you do? Why not try turning a USB drive into RAM for Windows 10 to make your computer run faster? While this isn't the optimal solution, it's the best temporary fix..
What do you think about turning a USB drive into RAM for Windows 10? TipsMake doesn't recommend this trick for new, expensive, or high-capacity USB drives. But if you have old, unused USB drives, or those with around 2GB or 4GB of capacity, why not turn them into RAM for Windows 10?

Not everyone can afford a powerful computer, but their usage needs often exceed their budget. Windows 10 is a powerful operating system with many highly-rated features, but it also consumes a significant amount of RAM. So, if your computer needs more RAM to run more smoothly, try turning a USB drive into RAM for Windows 10 – use those old, discarded USB drives for that purpose!
Guide to turning a USB drive into RAM for Windows 10, increasing your computer's RAM.
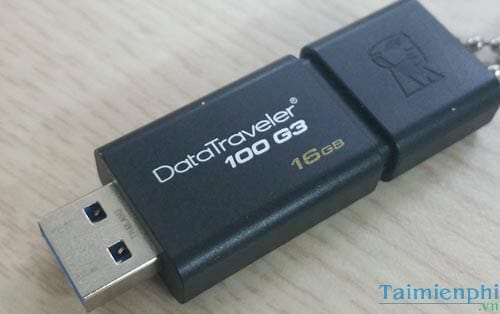
Step 1: The most essential ingredient to turn a USB drive into RAM for Windows 10 is a USB drive itself. Prepare an old, unused USB drive.
Step 2: Plug the USB into the computer or laptop that needs more RAM.

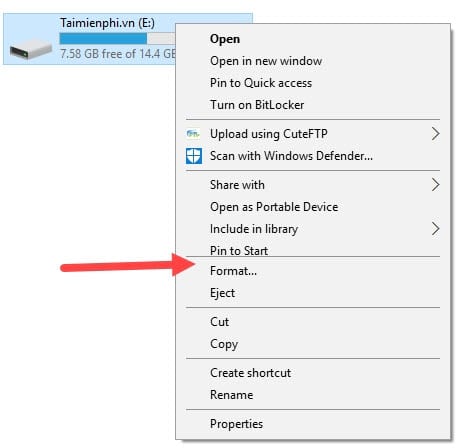
Step 3: In the Explorer window, where hard drives are located, right-click on the USB drive and select Format . Remember to copy all data before proceeding to turn the USB drive into RAM for Windows 10.
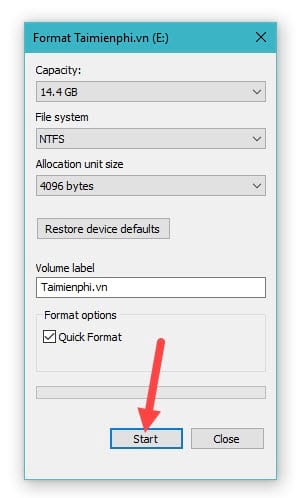
Step 4: Click Start to begin formatting ; leave other parameters as default.
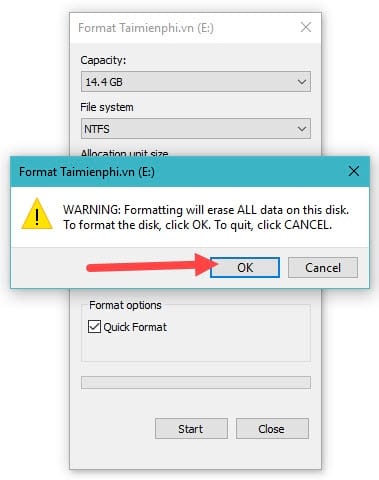
Confirm once more about formatting the USB drive, then select OK to proceed.
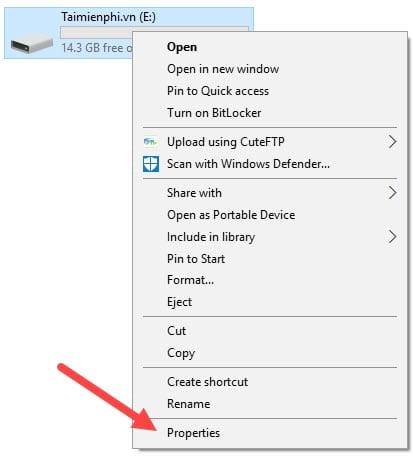
Step 5: After formatting the USB drive, right-click on the USB drive and select Properties .
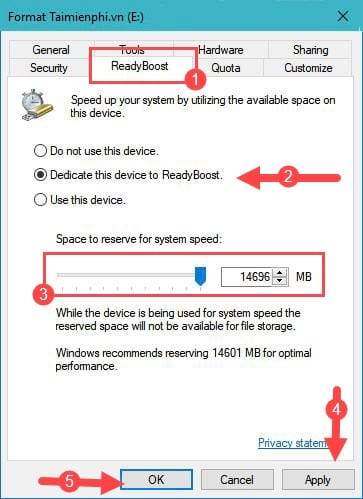
Step 6: In Properties, go to the ReadyBoost tab , select Dedicated this device to ReadyBoost , then adjust the RAM for Windows 10 according to the available space on the USB drive, confirm, then click Apply and OK .
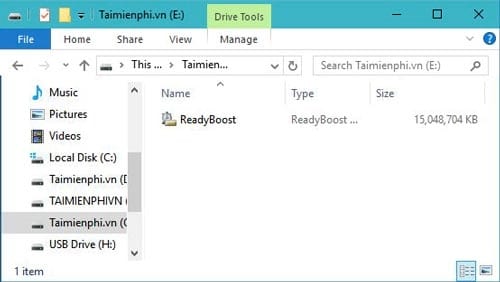
Step 7: At this point, you will see that your USB drive is almost full. Double-click on the USB drive to check.

Step 8: Inside, you will see a ReadyBoost file weighing up to 15GB , as TipsMake set from the beginning. The process of turning the USB into RAM for Windows 10 has been successful.
Note: TipsMake does not recommend using this method on new USB drives or for extended periods as it can easily damage the USB drive. The ReadyBoost feature only provides partial support as it is not true RAM.
Above, TipsMake has guided you on how to increase RAM for Windows 10 by turning a USB drive into RAM for Windows 10 and other Windows versions. Besides using the method above, you can also set up virtual RAM before performing this trick. Setting up virtual RAM uses a portion of your hard drive space, making your computer less burdened by tasks that require RAM. However, just like turning a USB drive into RAM for Windows 10, you won't achieve 100% efficiency because it's not real RAM.
Additionally, you should regularly free up RAM on your computer; this is also an effective way to maintain your computer. If you don't know how to do it, the following guide on freeing up RAM will be a good reference for you.