The simplest way to install Windows using WinToHDD without a disk or USB
WinToHDD is software that helps users install Windows quickly and simply without having to use USB Boot or a Win installation disc. Below is the simplest tutorial on how to use and install Win using WinToHDD without a disk or USB.
Table of Contents
CDs or USBs are high-tech products that serve many different purposes or jobs, especially USBs when USB is still widely used, unlike drives that are gradually being discontinued. For IT people, they often use USBs with integrated windows or ghost versions to reinstall the computer through software like Grub4dos or Ultra iSO. Especially Grub4dos is already very familiar to you in creating Boot for USB.
However, you don't always have a USB or disk to install Windows, or for some reason you can't bring a USB to install Windows, so WinToHDD is the most effective solution for this. With its compact size but still full of Windows installation software elements, it will help us reinstall Windows at any time, including installing Windows 11 . Let's explore WintoHDD with TipsMake, software to install windows without a disk.
Install Windows without disc or USB using WinToHDD
You download the latest version of WintoHDD:
=> Link to download WinToHDD for Windows
And proceed with the installation as software
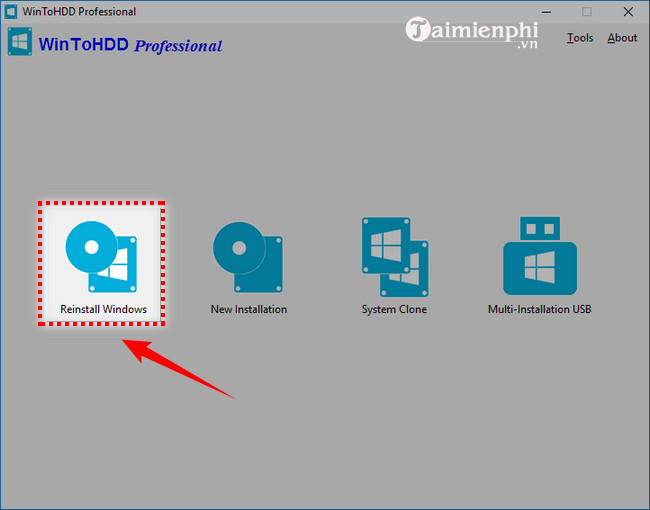
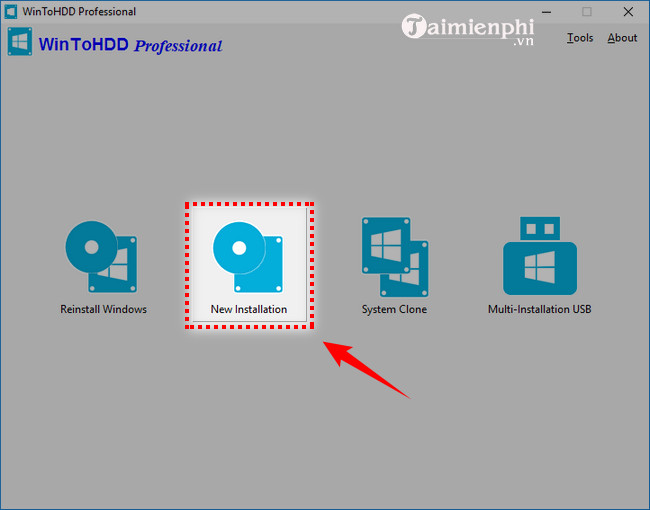
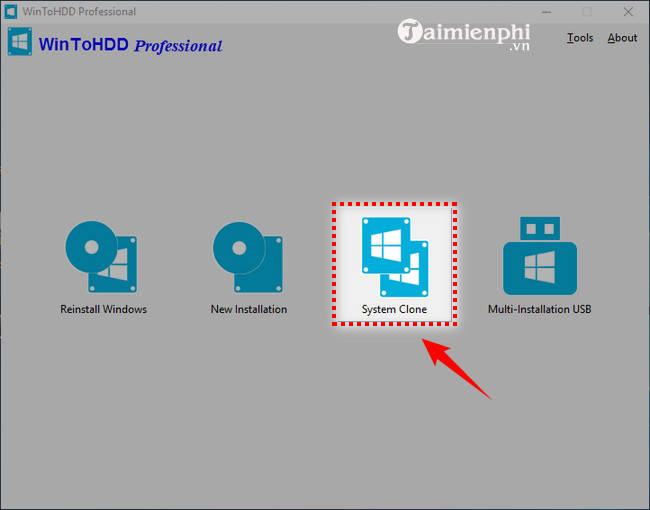
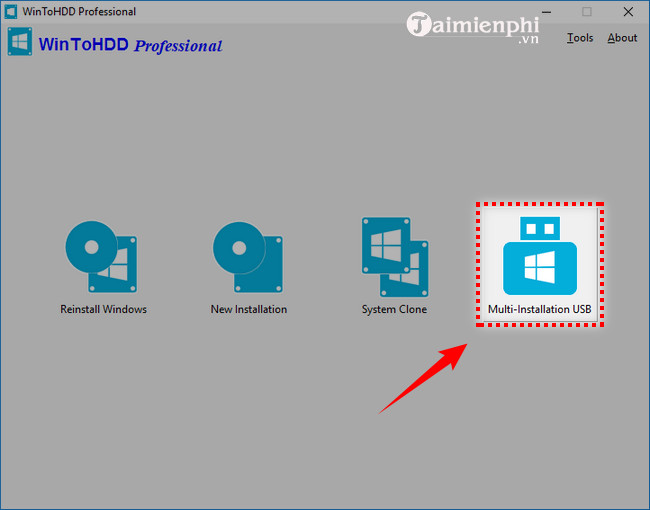
Open the software interface, we will see 4 optional items:
- Reinstall Windows : Reinstall Windows without using a CD/DVD or USB drive.
- New Installation : Install Windows on a second hard drive without using a CD/DVD or USB drive.
- System Clone : Clone current Windows installation to another disk (HDD/SSD).
- Multi-installation USB : Install any version of Windows 10/8/7/Vista from the same USB drive on both BIOS and UEFI computers.
1. Reinstall Windows
Step 1 : Run WinToHDD then click the Reinstall Windows button
Step 2 : Prepare the installation source
- If choosing to install from files such as ISO / WIM / ESD / SWM / VHD / VHDX: Click on the Image to HDD menu and select the path to the folder containing the file.
- If you choose to install from a DVD drive : Insert the Windows installation CD/DVD into your drive. Once received, click on the CDROM to HDD menu and select the CD/DVD drive in the drop-down list. If your CD/DVD drive is not recognized correctly by WinToHDD, you need to click the Refresh icon for the program to recognize the CD/DVD drive.
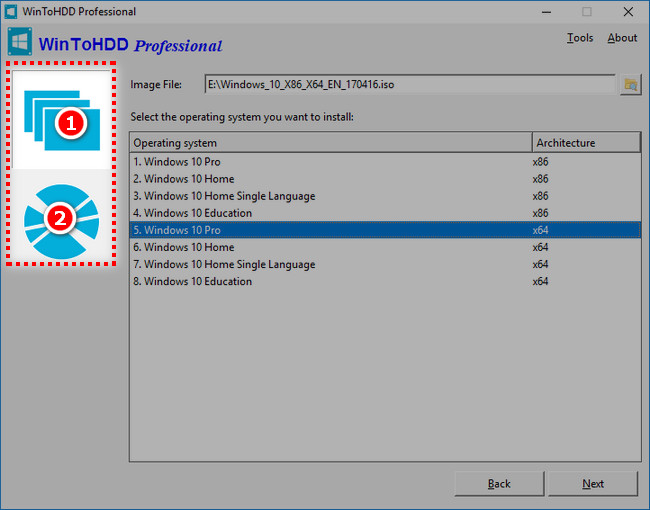
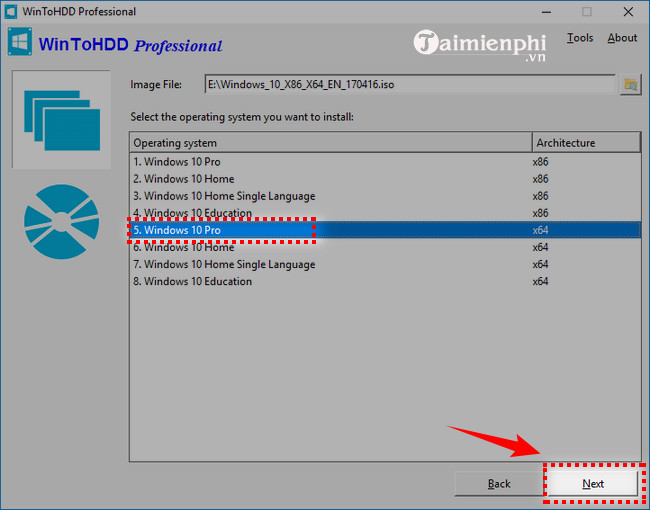
Step 3 : WinToHDD scans and lists installable operating systems. Select the version of Windows you want to install, then click " Next ".

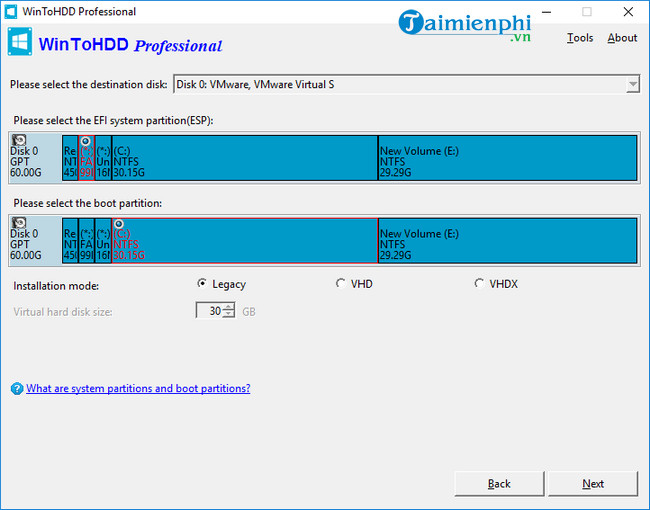
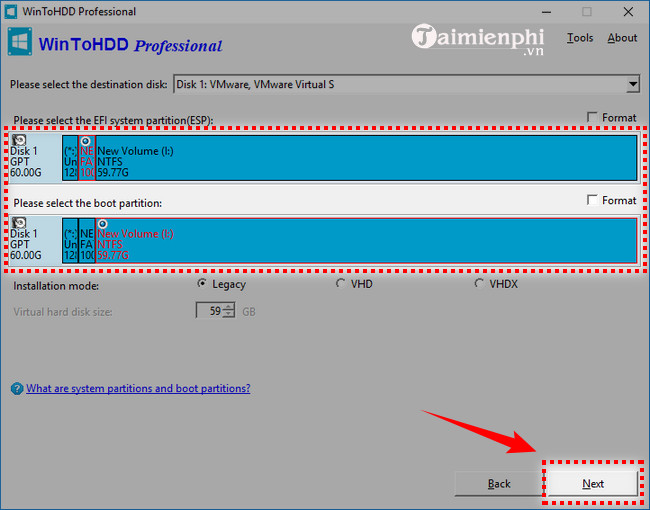
Step 4 . WinToHDD will automatically select the target boot partition and system partition from the partition list, and the selected partitions will be marked as red. Click " Next " to continue
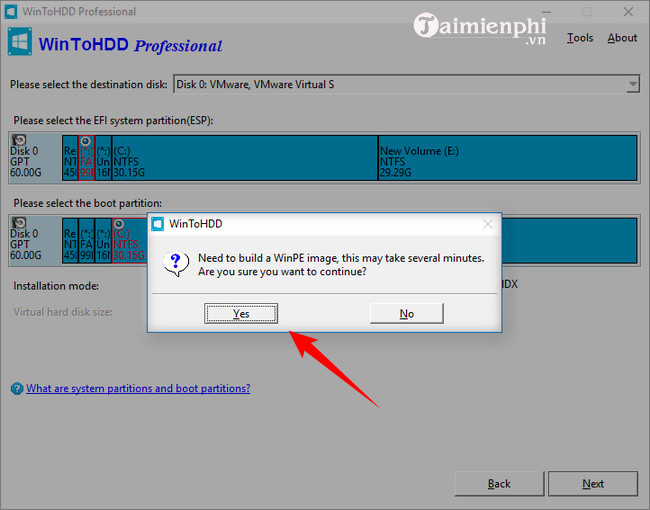
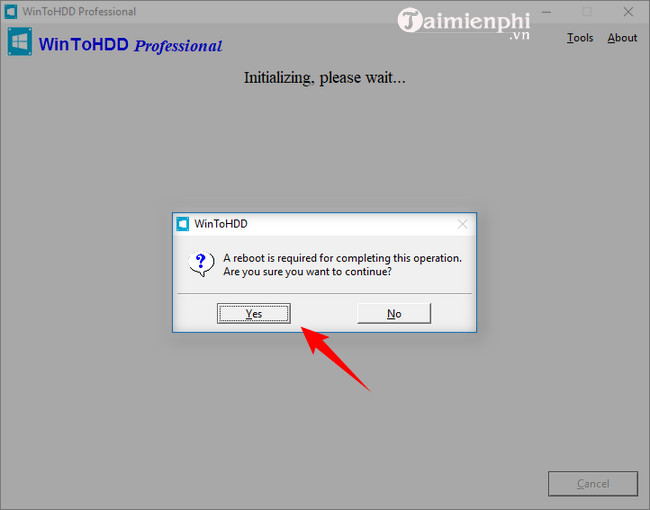
Step 5 . After clicking " Next ", a pop-up will appear asking if you want to create a WinPE image to continue. Click " Yes ".
Step 6 . After successfully creating the WinPE image, WinToHDD will prompt you to restart your computer, click the " Yes " button to allow WinToHDD to restart your computer.
Step 7 . It takes a while to set up. After successful reinstallation, restart your computer. And the Windows installation process proceeds as usual.
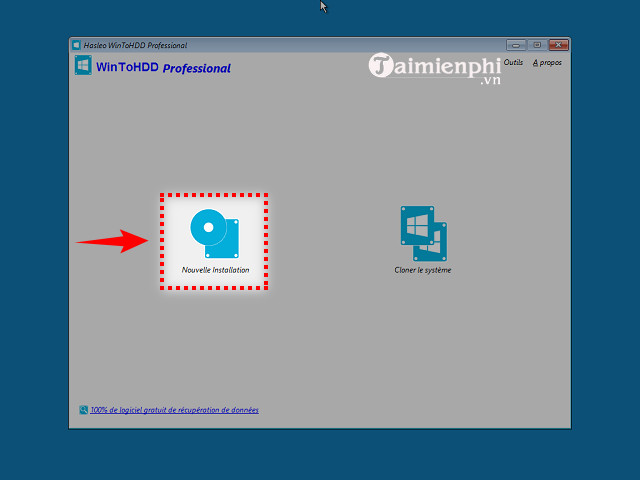
2. New Installation
Step 1 : Start WinToHDD and click the New Installation button
Step 2 : Prepare the installation source
- If choosing to install from files such as ISO / WIM / ESD / SWM / VHD / VHDX: Click on the Image to HDD menu and select the path to the folder containing the file.
- If you choose to install from a DVD drive : Insert the Windows installation CD/DVD into your drive. Once received, click on the CDROM to HDD menu and select the CD/DVD drive in the drop-down list. If your CD/DVD drive is not recognized correctly by WinToHDD, you need to click the Refresh icon for the program to recognize the CD/DVD drive.

Step 3 : WinToHDD scans and lists installable operating systems. Select the version of Windows you want to install, then click " Next ".
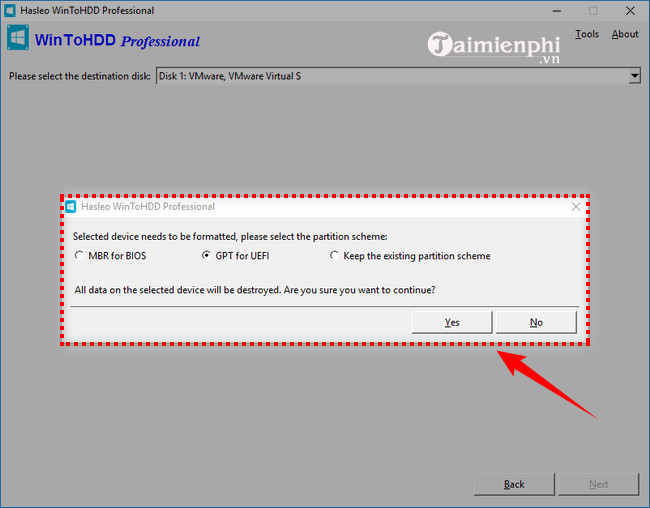
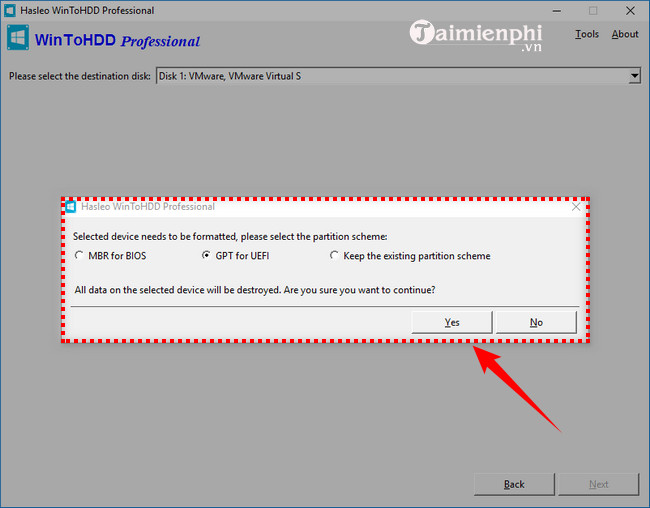
Step 4 . Select the target disk in the drop-down list, a pop-up will appear asking if you want to format it to continue, select the partition scheme you want to use and click " Yes " to format.
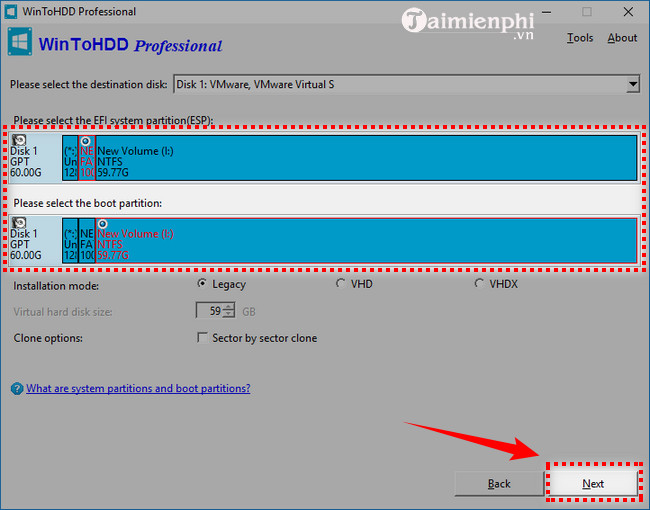
Step 5 . Select the boot partition and system partition from the partition list, the selected partitions will be highlighted in red. Click " Next " to continue
Step 6 . After clicking " Next ", WinToHDD starts installing Windows.
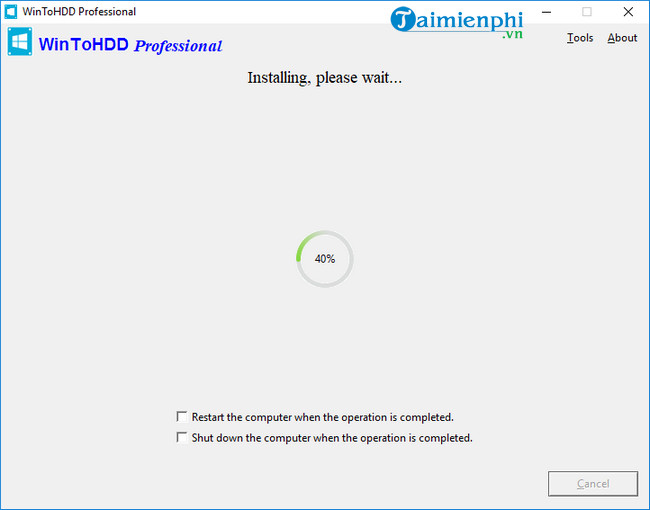
Step 7 . It takes some time to install. Once completed, restart your computer and change the BIOS to boot the Windows installation from your hard drive. The Windows installation process proceeds as usual.
3. System Clone
Step 1 : Run WinToHDD, then click the System Clone button
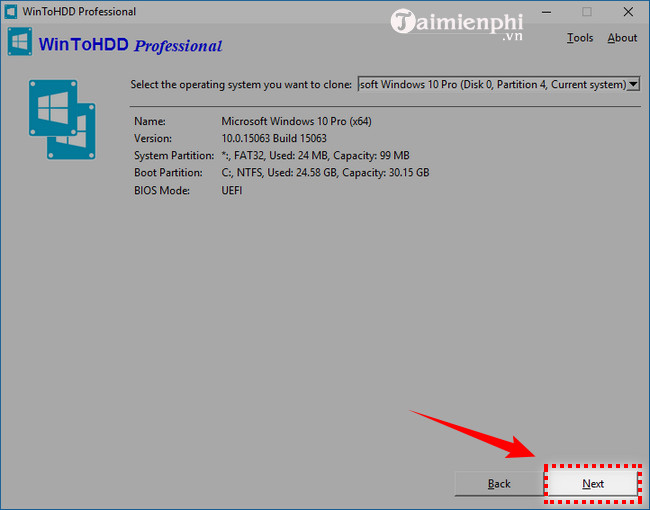
Step 2 . Select the Windows operating system settings you want to copy in the drop-down list, you will see detailed system information below, click " Next " if you make your choice.
Step 3 . Select the target disk in the drop-down list, a pop-up will appear asking if you want to format it to continue, select the partition scheme you want to use and click " Yes " to format.
Step 4 . Select the boot partition and system partition from the partition list, the selected partitions will be highlighted in red. Click " Next " to go to the next step
Step 5 . After clicking " Next ", WinToHDD starts copying Windows to the target disk. Note that if the target disk is currently in use, WinToHDD needs to create a WinPE image and reboot into WinPE to complete the copy operation.

Step 6 . It takes some time to copy. After successful copying, restart the computer and change the BIOS to boot from your hard drive.
4. Multi-installation USB
Step 1 : Run WinToHDD and Click on Multi-installation USB
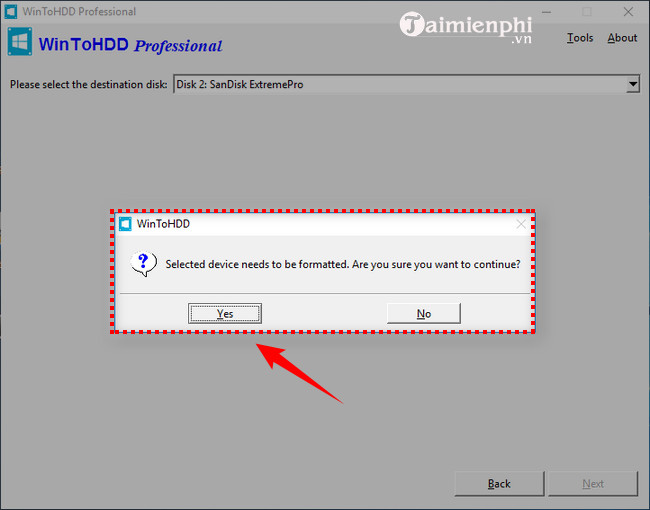
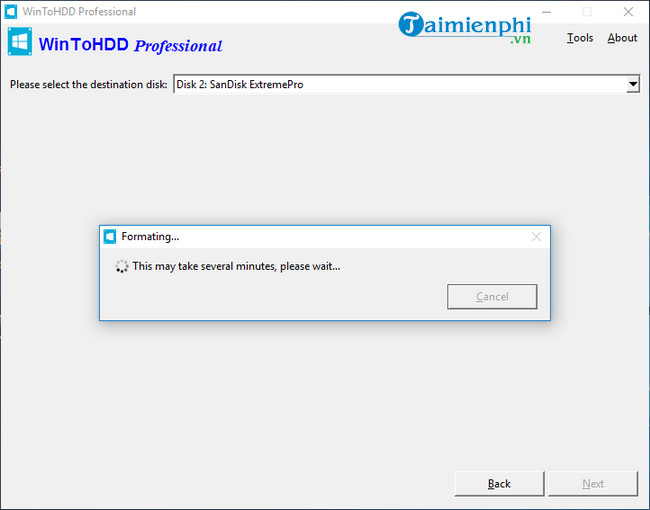
Step 3 . Select the USB drive in the drop-down list. If your USB drive is not recognized correctly by WinToHDD, you need to click the Refresh icon for the program to recognize the USB drive. After you select the USB drive, a pop-up will appear asking if you want to format it to continue. Click " Yes "
Step 4 . After clicking " Yes ", WinToHDD starts formatting. You need to wait until that formatting operation is completed.
Step 5 . After successfully formatting the USB drive, click " Next ", WinToHDD starts creating the Windows installation USB drive.

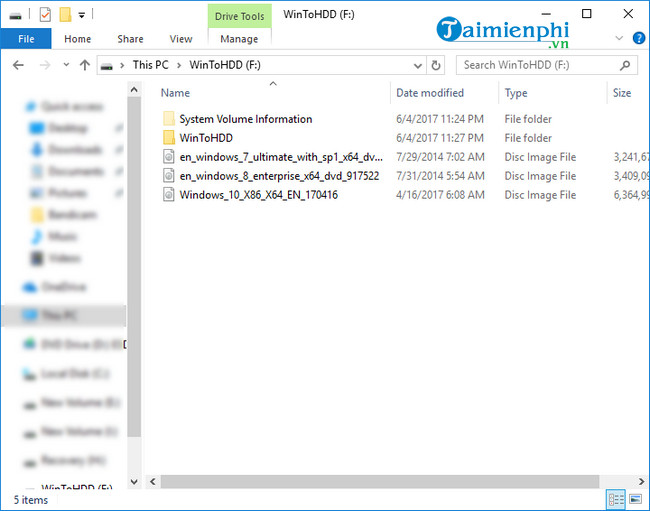
Step 6 . It will take some time to create multiple Windows installation USB drives. Once created, you can copy any number of Windows installation ISO files to the target USB flash drive, as long as the USB drive is large enough, and then remove the USB drive.
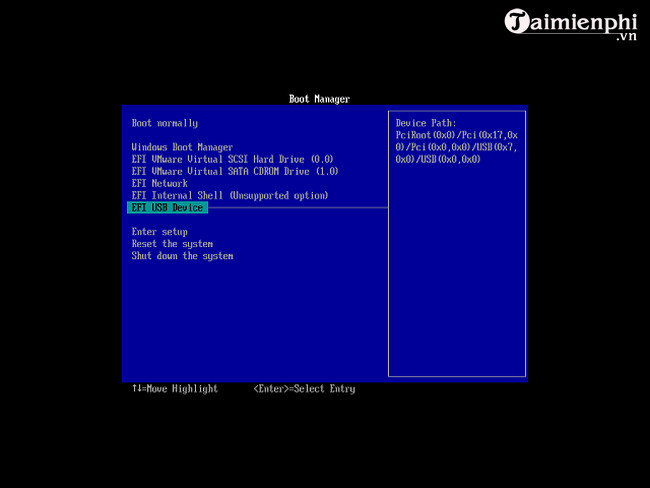
Step 7 . Connect the USB drive to the computer where you want to install Windows. Power on the computer and change the BIOS to boot from the USB drive.
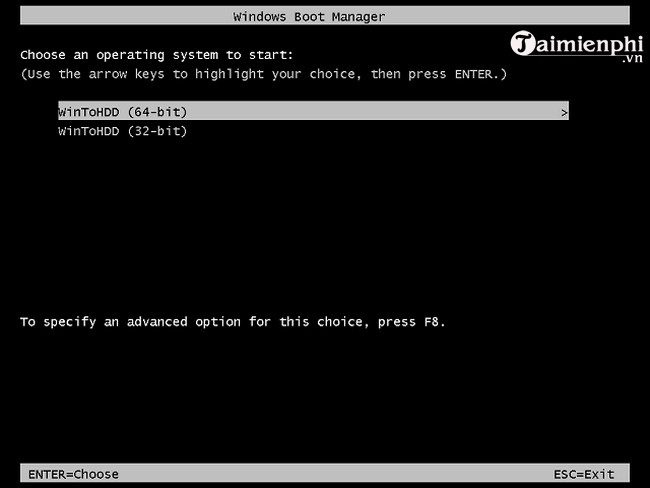
Step 8 . If your computer is 64-bit, select " WinToHDD (64-bit) ", otherwise run "WinToHDD (32-bit)".
Step 9 . The computer will boot into the Windows PE environment and automatically run WinToHDD. Click on the New Installation button . Then you install Windows as usual.
All of the above tasks require restarting the computer after running, and the system will run as if you used a disc or USB to reinstall Windows. With WintoHDD, from now on you will easily install Windows 11 without USB in the simplest and most effective way. Hope this article helps you, wish you success!
Was this article helpful?
Your feedback helps us improve.
Related Articles
 How to install Windows with WinToHDD without USB, DVD4 minutes read
 Download WinToHDD Professional 2.8, a simple Windows installation software that doesn't need a USB cable for $ 30, free2 minutes read
 Installing Windows without USB with WinToHDD Professional V3.2 software, priced at 29.95 USD is free2 minutes read
 How to install Windows using WinToHDD without USB or DVD - Just use the ISO file4 minutes read
 Instructions for downloading and installing WinToHDD, installing Win without USB3 minutes read
 How to install Windows from a hard drive with WinToHDD without USB or DVD3 minutes read
Reader Comments 0
Sign in with email or Google to join the discussion.