How to Create an OS X El Capitan Install Disk on a Flash Drive
Through this guide you will learn how to create a bootable OS X install disk using the DiskMaker X Application. You will also download the OS X El Capitan Installer from Apple's website. The installer you create can be used to install OS X...
Table of Contents
Part 1 of 3:
Preparing the Software
-
 Download a program, such as DiskMaker X, which allows you to make a bootable OS X disk. Install it on your computer.
 -
 Go to https://support.apple.com/en-us/HT206886
 -
 Click on Download OS X El Capitan. A file named InstallMacOSX.dmg will download.
 -
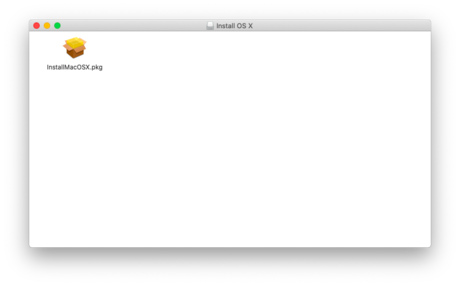 After it has downloaded, open the .dmg file and then open the InstallMacOSX.pkg file.
 -


 From here, follow the onscreen instructions to install the installer.
 -
 After installation, the installer named "Install OS X El Capitan" will be in the Applications folder.
Part 2 of 3:
Creating the Disk on the Flash Drive
-
 Plug your 8 GB flash drive into one of the USB ports on your Mac.
 -
 Open DiskMaker X or your chosen equivalent program.
- This can be done by going to Launchpad and clicking the app icon.
- Or by pressing ⌘ Cmd and the space bar key on the keyboard and typing DiskMaker X.
-
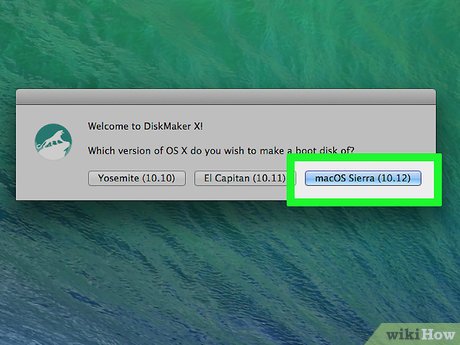 Select the 'El Capitan (10.11)' option when asked what type of installer you plan to make.
- It will say it found the OS X installer in the '/Applications' folder. Click the 'Use this copy" option.
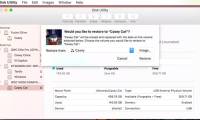
- Select 'An 8 GB USB thumb drive' when asked what kind of disk you will want to use.
-
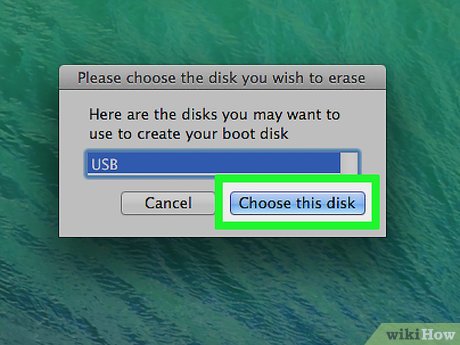 Select the name of the drive you wish to use (in this guide it is named 'El Capitan Installer').
 -
 Wait for the warning that the content on the disk will be erased.
- You must select 'Erase then create disk' to continue the creation of the install drive.
-
 Click "Continue".
- Enter administrator password and click "Ok."
-
 Wait for the creation. The drive is now being created and will take some time depending on the speed of your computer (about 20 minutes).
- Do not remove the flash drive during this process.
- Do not let the computer shutdown during this process.
Part 3 of 3:
Finishing Up and Using Your Disk
-
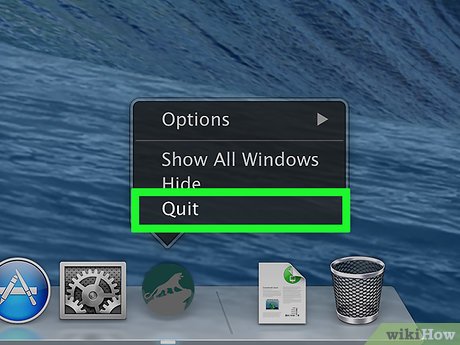 Once the installation is complete, quit the installer.
 -
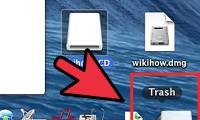
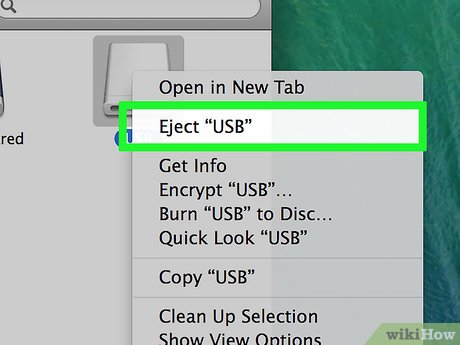 Make sure to eject the disk before you remove it from the computer.
- To do this right click on the drive and select 'Eject," or click and hold on the drive and drag to the trash icon to eject, or select the disk on the desktop or in the Finder window and press the ⌘ Cmd+E keys on the keyboard.
-
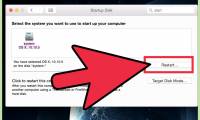
 Plug your drive into any eligible Mac to install El Capitan.
- To do this, shut down the mac you want to install El Capitan onto.
- Plug the Flash Drive into the computer.
- Reboot by pressing the power button and holding down the ⌥ Option key while it starts up.
- Follow the onscreen instructions to install OS X El Capitan.
Was this article helpful?
Your feedback helps us improve.
Related Articles
 How to Use an Operating System from a USB Stick9 minutes read
 WinSetupFromUSB - a simple way to install Windows XP from a USB flash drive3 minutes read
 How to Make Windows Detect a USB Flash Disk7 minutes read
 Use Disk Utility to copy the drive on Mac8 minutes read
 How to create a USB flash drive to install Windows 82 minutes read
 How to Create Disk Images with Disk Utility (Mac OS)3 minutes read
Reader Comments 0
Sign in with email or Google to join the discussion.