Table of Contents
Preparation Before Installing Windows 7

This guide provides a clear overview of install windows 7 with usb, including Preparation Before Installing Windows 7, Download Windows 7 ISO File. Use it to understand the topic, compare the available options, and make a more informed decision.

Find the Windows 7 product key. To download the Windows 7 installation file (ISO), you need to enter the Windows 7 product key on the Microsoft site.
The product key is usually on the packaging of the Windows 7 installation disc. If you have Windows 7 installed on another computer, you can find the product key there.
The product key of most computers with Windows 7 pre-installed is not recognized by Microsoft as a valid key.
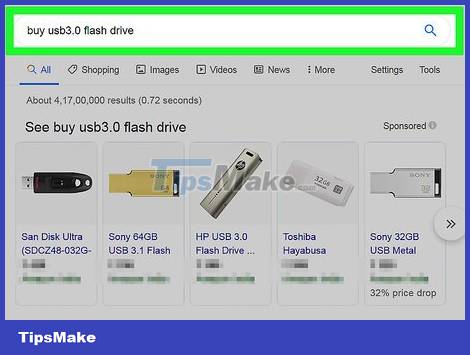
Prepare USB. You can buy or look for USB 3.0 with at least 8GB of free space.
This is the USB that you will use to install Windows 7.

Download and install the installation USB creation tool. Microsoft has a separate USB installation tool that you can use to copy Windows 7 installation files to USB:
Visit the Windows installation USB creation tool page.
Click Download in the bottom-right corner of the page.
Check the box next to the installation language (for example, the "US" box is English).
Click Next in the bottom right corner of the page to begin the download process.
Install the tool by double-clicking on the downloaded file and following the on-screen instructions.
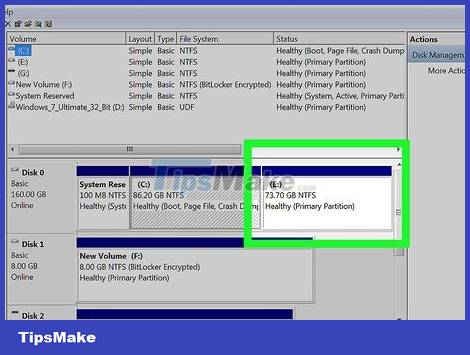
Partition the hard drive if you like. If you want to install Windows 7 without removing your current operating system, you can make space (or "partition") for the Windows 7 installation on your hard drive. You will use the built-in Disk Management program to do this.
Make sure your hard drive has enough space to partition. Hard drive must have at least 50GB free space to be able to install Windows 7, but 100GB or more is better.
You can also buy an external hard drive and install Windows 7 on it.

Find your computer's BIOS key. You need to press the BIOS key when restarting your computer to open the BIOS - an important step in installing Windows 7. To find your computer's BIOS key, perform the following steps:
Find your computer's manufacturer name.
Open a search engine (such as Google).
Type your computer's manufacturer name followed by "bios key", then press ↵ Enter.
Click on the results on the manufacturer's website.
Identify the key used by the computer by finding the computer's number (if necessary).
You can find your computer's number by right-clicking the Start icon, clicking System, and looking for the number displayed under "Device specifications".
Download Windows 7 ISO File
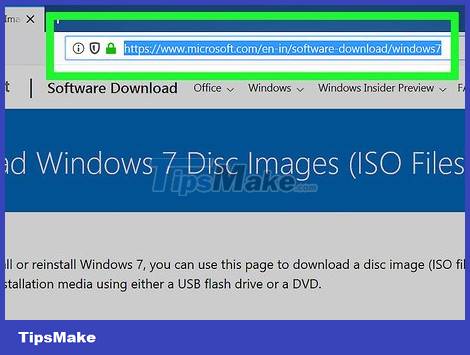
Open the Windows 7 download page. Go to https://www.microsoft.com/en-us/software-download/windows7 using your computer's browser.

Enter your Windows 7 product key. You'll enter your 25-character product key in the data entry box near the bottom of the page.
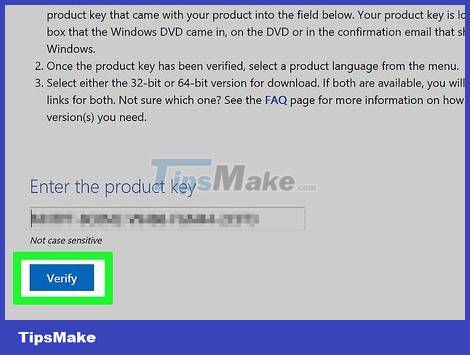
Click Verify. This is the option below the data entry box.
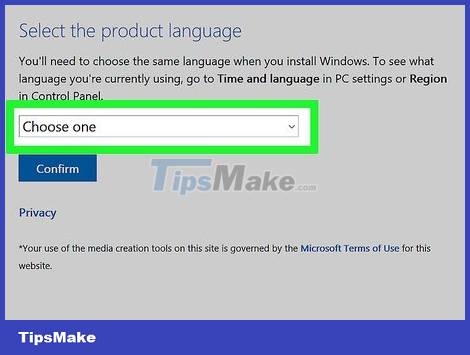
Select language. Click the language selection box at the top of the page, and then click the language you want to use to install Windows 7.

Click Confirm. This is the option below the language selection box.

Click 64-bit Download. This option is in the middle of the page. This is the operation to download the Windows 7 ISO file to your computer.
The Windows 7 ISO file is large, so it will take a long time to download.
Depending on your browser's settings, you may need to select a download folder before downloading the ISO file.
Create Installation USB

Plug the USB into the computer. You need to insert the USB into one of your computer's rectangular USB ports.

Open the Windows installation USB creation tool. Double-click the Windows 7 DVD USB Download Tool application, and then click Yes when prompted.

Add Windows 7 ISO file to the tool. Click Browse on the right side of the window, then click the Windows 7 ISO file and click Open.
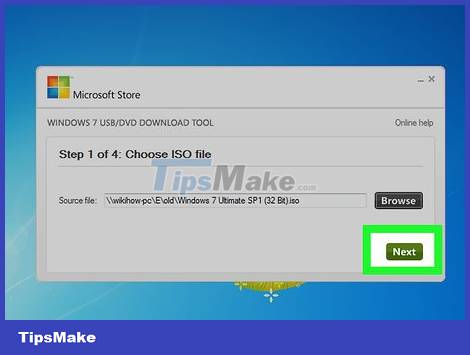
Click Next. It's the button in the lower-right corner of the window.
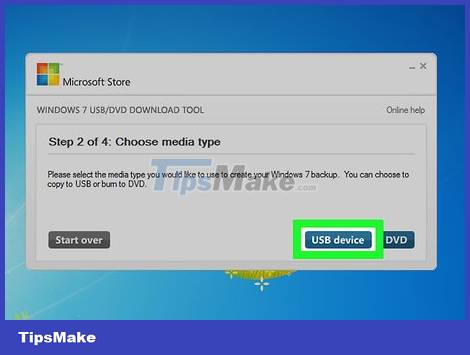
Click USB device. This option is at the bottom of the window.

Select USB (if necessary). If you see another drive shown in the selection pane, click it and choose the name of the USB.
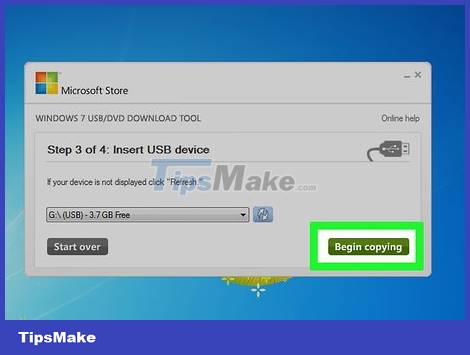
Click Begin copying. This is the option in the lower right corner of the window.
If asked, you need to click Erase USB and click Yes before continuing.
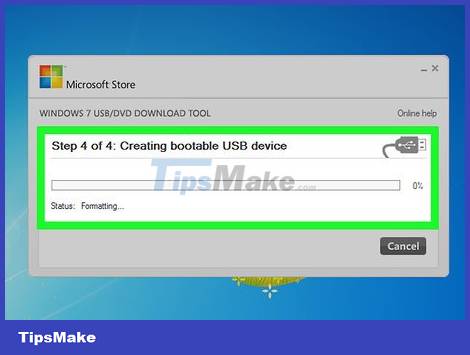
Wait for the USB to finish copying. You may have to wait an hour for Windows to finish creating the installation USB. After the tool notices that the installation is complete, you can continue to work.
Change the Computer's Boot Order
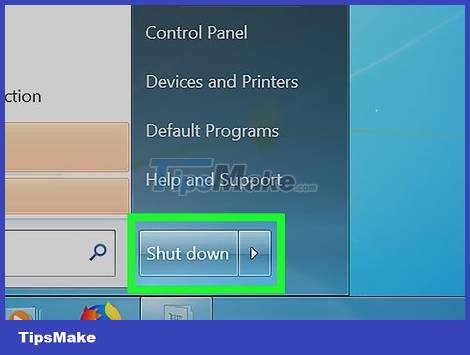
Turn off the computer. You can also do this by pressing and holding your computer's "Power" button, or clicking Start, clicking the Power icon, and clicking Shut Down.
Make sure your computer is powered off before continuing.

Restart the computer. Press your computer's "Power" button to do this. Your computer immediately restarts.

Press the BIOS key. As soon as the computer starts to boot, you need to quickly press the key to open the computer's BIOS. Stop pressing this key when the BIOS screen is displayed.
If the computer restarts before you press the BIOS key, you must shut down and restart the computer, and then try again.

Find the "Boot Order" section. Use the left and right arrow keys to scroll through the BIOS tabs until you find a list of boot drives.
You must select Boot Order or something similar and press ↵ Enter to open the menu.
Every computer has a different BIOS; You should consult your computer's online documentation if you cannot find a boot order menu.
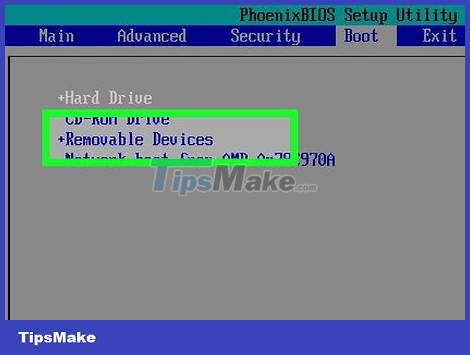
Select the name of the USB. Use the arrow keys to scroll down until the name of the USB is selected.
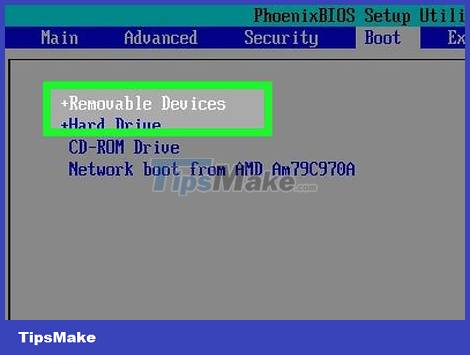
Move the USB to the top of the list. In most cases, you will press the + key until the name of the USB appears at the top of the list; If this doesn't work, refer to the comments below or on the side of the BIOS screen for instructions.
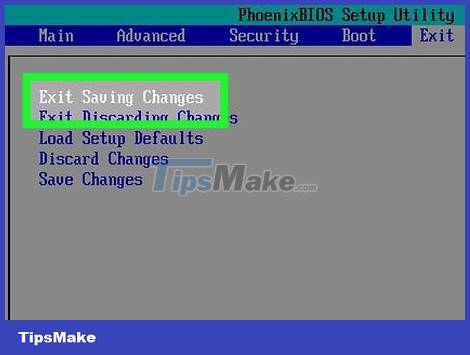
Save and exit. Press the "Save and Exit" key according to the instructions. This will save your changes to the BIOS and exit the BIOS screen.
You may have to confirm your selection by pressing another key before continuing.
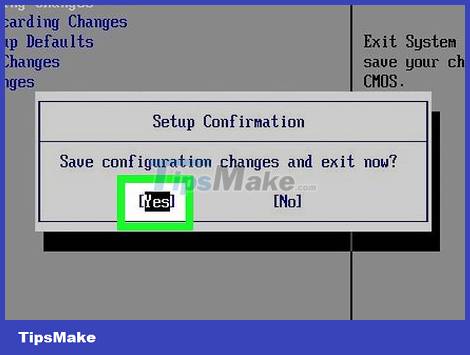
Restart the computer if necessary. If the computer has finished booting, you'll need to restart it before continuing. This is to open the Windows 7 installation page so you can install Windows 7.
Install Windows 7
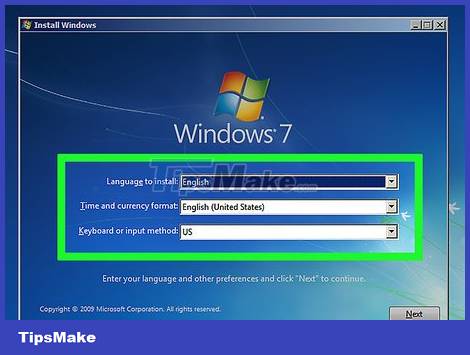
Select language and region. Click the "Language" selection box and click the language you want to use for Windows 7, then do the same for the "Country" box.

Click Next. This is the option in the lower right corner of the window.
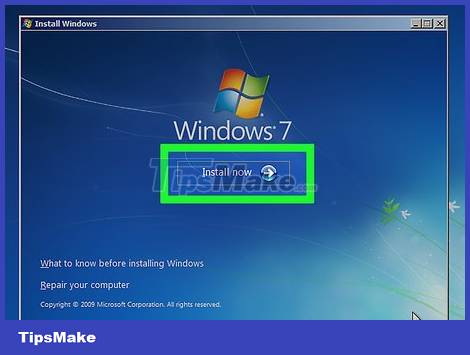
Click Install now. This option is at the top of the page.

Agree to the terms of use. Check the "I accept" box, then click Next.
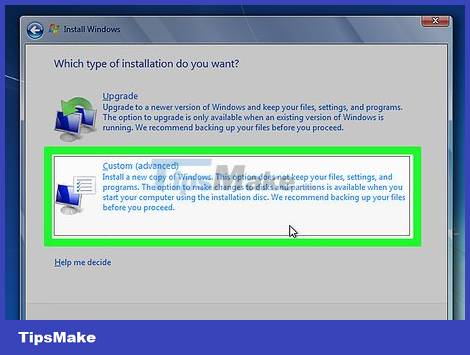
Click Custom (advanced ). This is the option at the bottom of the window.
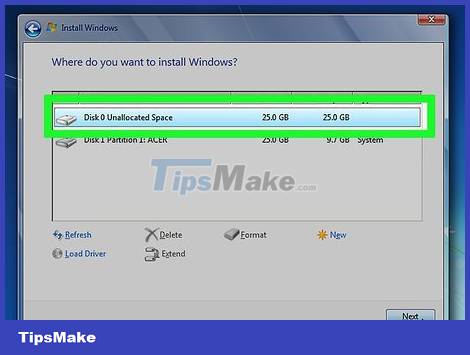
Select partition. Click the partition (such as "0") that you want to use to install Windows 7.
If you get "Windows cannot be installed to [partition]" error message, click the Disk options path, click Format. and click OK when asked before continuing (this will delete the partition).
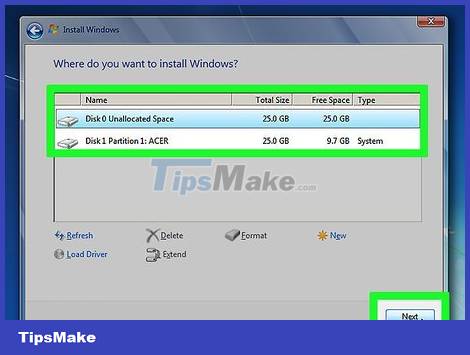
Click Next. This is the option in the lower right corner of the window. The Windows 7 installation will begin shortly.
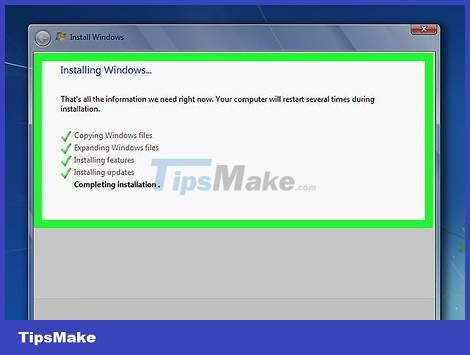
Wait for the Windows 7 installation to complete. This can take a long time, so make sure your computer is in a well-ventilated area and that the battery is charged. When the "Set up Windows" window is displayed, you can continue working.
Your computer will reboot several times during the process.
Windows 7 Setup

Enter the username and the name of the computer when prompted. Add the username you like in the input field above, and enter the name you want for the computer in the field below, and click Next.

Create a password. Enter a password of your choice in the two fields above, then click Next. The password must be entered the same in both fields to be valid.
If you'd like to add a password hint in case you forget your password, enter it in the "Hint" field at the bottom of the window.
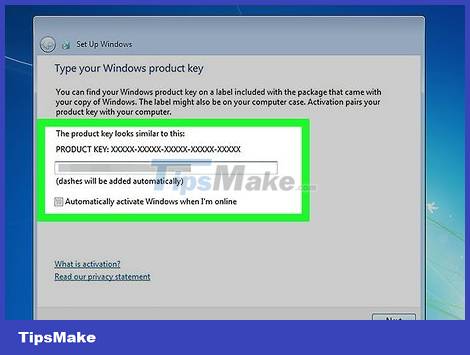
Enter the Windows 7 product key. Enter the 25-character product key in the field in the center of the window, and then click Next.
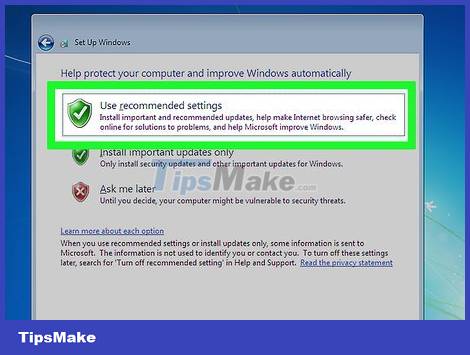
Click Use recommended settings. This option is at the top of the window. This is an operation that uses the default security settings of Windows 7 for the computer.
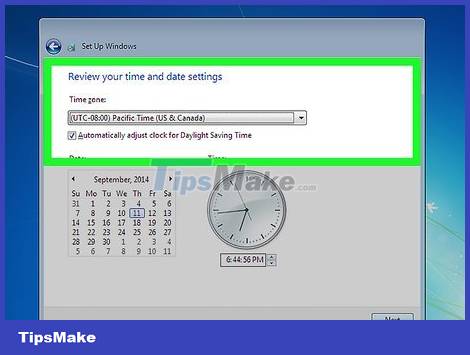
Select time zone. If the time zone is incorrect, you will click the selection box at the top of the window and click the correct time zone. Click Next to complete the setup.

Wait for the Windows 7 setup to complete. When Windows 7 finishes setting up the account, a screen will appear and you can use Windows 7.
Remember to remove the USB from the computer so that the computer does not boot into the Windows 7 setup menu the next time it boots.
You may need to reopen the BIOS and move the name of the USB to the bottom of the boot order menu.
Conclusion
Understanding Install Windows 7 with USB makes it easier to compare options, avoid common mistakes, and apply the information in this guide more effectively. Review the relevant requirements before making changes or choosing a solution.
FAQ
What is Install Windows 7 with USB?
The product key is usually on the packaging of the Windows 7 installation disc.
Why is Install Windows 7 with USB important?
Understanding Install Windows 7 with USB helps you evaluate features, compatibility, performance, and potential limitations before you choose a product or follow a procedure.
What should you consider when using or choosing Install Windows 7 with USB?
Consider your specific goal, compatibility requirements, available features, cost, security, and the practical recommendations described in this guide.
Related Articles
 Install Win from USB, How to Create USB to Install Win 7,8x6 minutes read
 The Easiest Way to Install Windows from USB15 minutes read
 How to Install and Use Screensavers of 'Classic' Versions of5 minutes read
 How to Install Windows 8.1 from USB7 minutes read
 How to Install Windows 10 from USB with ISO File8 minutes read
 This Is the Easiest Way to Reinstall Windows 11 and Fix the Problem!: Explained5 minutes read
Reader Comments 0
Sign in with email or Google to join the discussion.