Take screenshots with Screenshot Tool in Word 2013
In the process of editing documents in Word, you want to quickly add an image of an application that is being opened on your computer screen to the document.
Microsoft Word 2013 supports a lot of useful features, and one of them is a screenshot. With the Screenshot Tool, you can quickly take screenshots of your computer and insert them into Word documents.
The following article shows you how to take screenshots with the Screenshot Tool and edit images after taking them in Word 2013.
Take screenshots with Screenshot Tool in Word 2013
First you need to open the programs, applications that need to take photos.
Method 1: On the Word interface, select the Insert tab on the Ribbon, in the Illustrator section, select Screenshot .
Here will display the applications, programs opened on the desktop, select the program, the application needs to take a picture.

Photos of programs and applications you choose will be displayed in Word.

Method 2: Select Insert -> Screenshot -> Screen Clipping .

At this point, the screen will display a translucent white color, you move the mouse to the starting position, then press and hold the mouse and drag to the end of the location to take a picture.
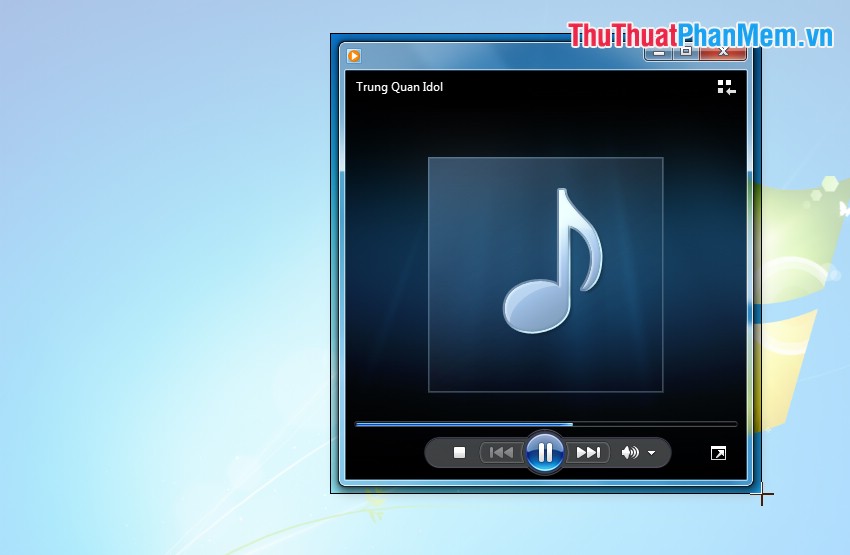
When you release the mouse pointer, the image you selected will be displayed in Word.
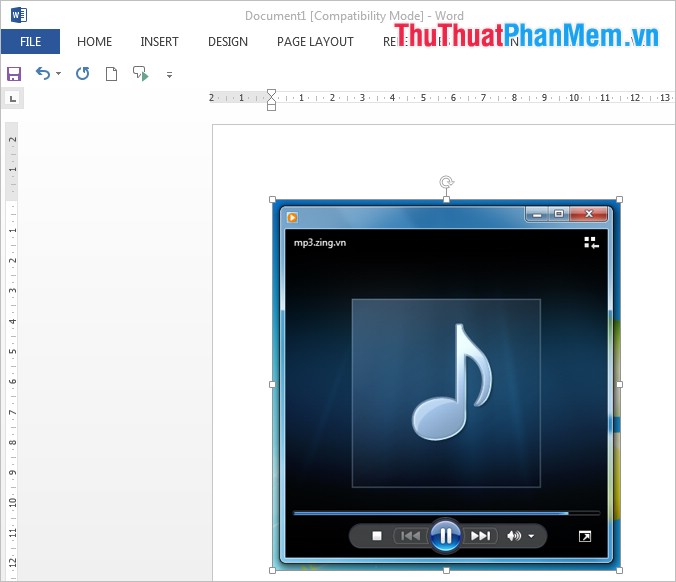
Photo editing after shooting
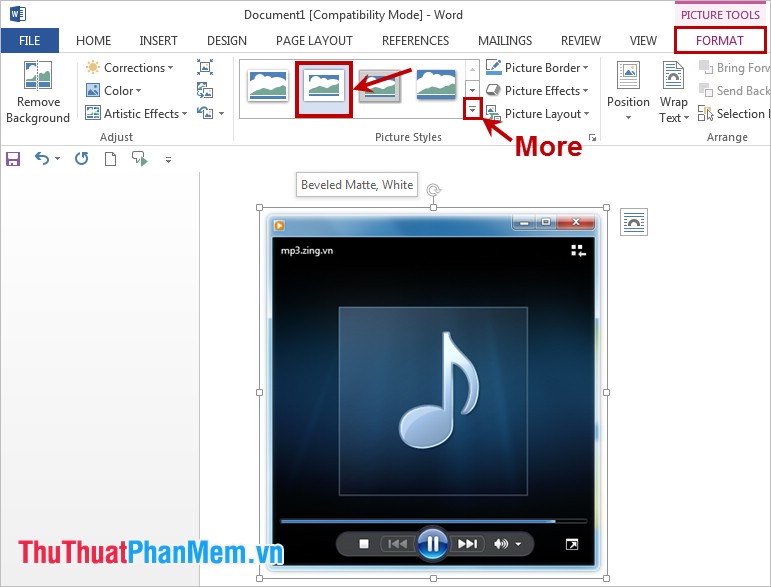
When you select the image just taken with the Screenshot Tool , on the Ribbon appears the Format tab of Picture Tools . The Format tab contains many tools to help you edit photos more beautifully.
Picture Styles: you can choose the style for the image in this section, in addition you can click the More icon to display more image styles.
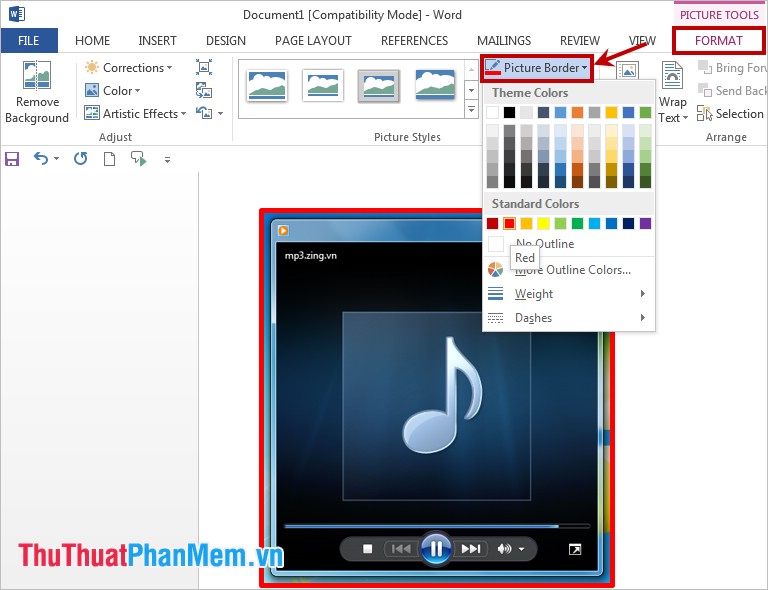
Picture Border: to create a border for the image you choose Picture Border and select the color for the border ( Theme Colors ), the thickness of the border ( Weight ), the type of border ( Dashes ).
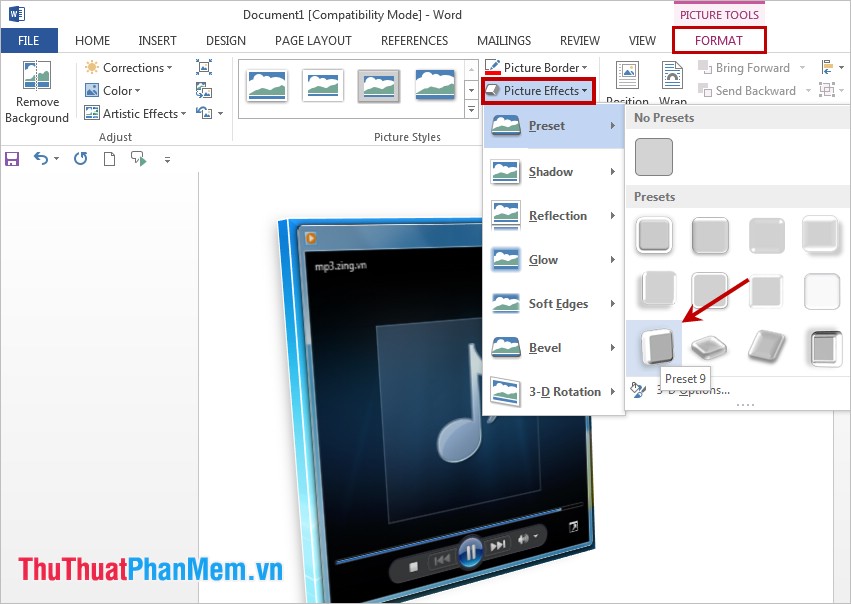
Picture Effects: Microsoft Word 2013 supports you a lot of effects for images in Word, you choose Picture Effects and choose the type of effects such as: Shadow (shadow), 3D Rotation (3D effect) .
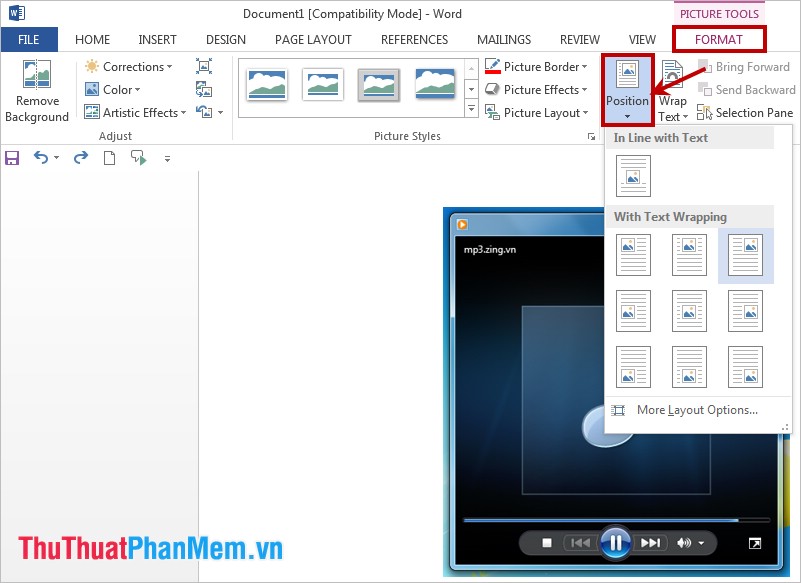
Position: Here you select the image position in the text page, you have a lot of options in the With Text Wrapping section.
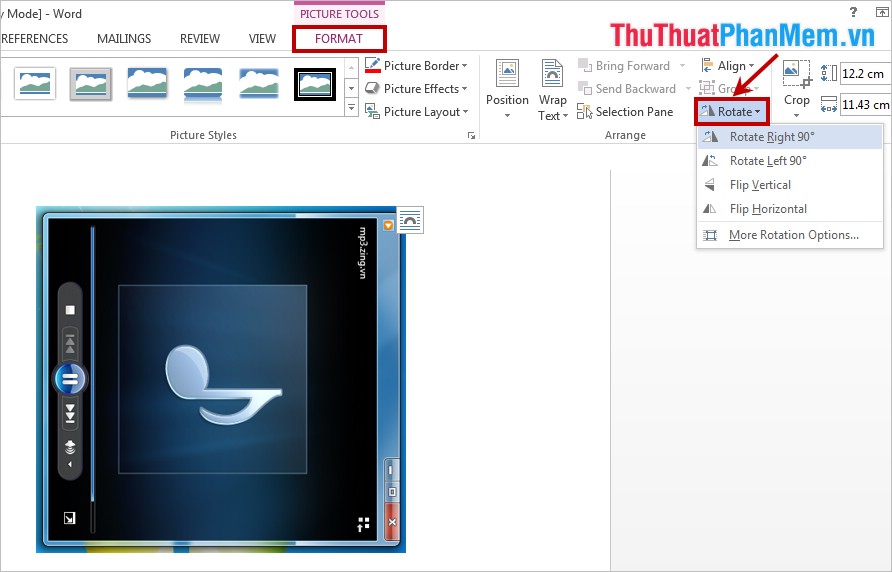
Rotate : This tool helps you rotate images with different types of rotation: Rotate Right 90o ( 90 ° right rotation), Rotate Left 90o ( 90 ° left rotation), Flip Vertical (vertical flip), Flip Horizontal (horizontal flip). If the rotation style is not suitable for your purpose, you can choose more rotation options in the More Rotation Options section .
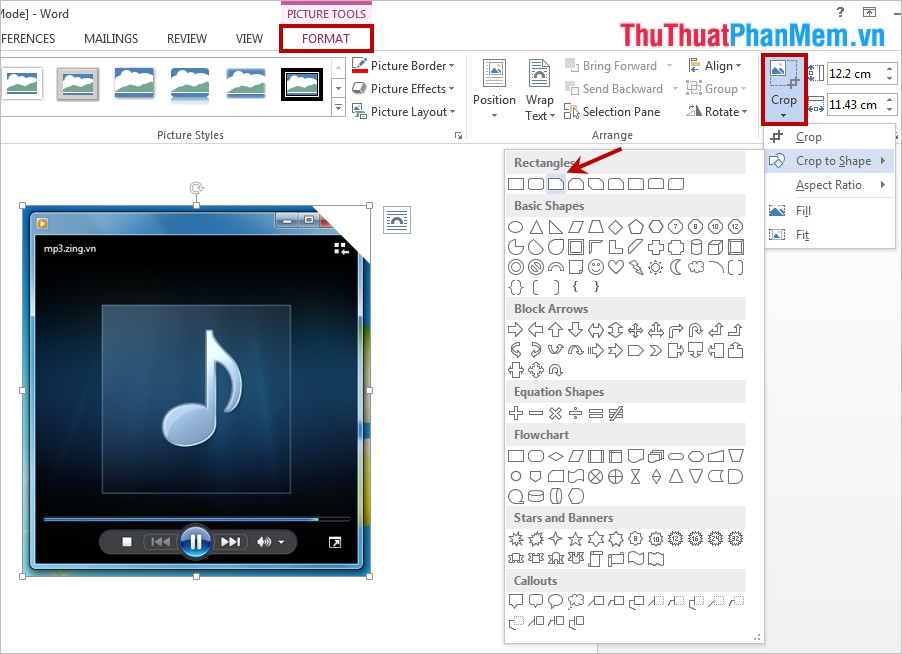
Crop: You can crop the image as you like by selecting Crop in the Crop section , or you can crop the image to any shape you choose in the Crop to Shape section .
Thus, you do not need the help of other applications and can still quickly take screenshots with the Screenshot Tool tool in Word 2013. I wish you success!