Sync Desktop, Document, ... on Windows 10 with OneDrive
Each account on Windows 10 is integrated with a default folder, folders like Desktop, Documents, Downloads, Music, Pictures, and Videos so you can categorize your files. Also on the operating system includes a OneDrive folder to store the sync files, which are set to automatically update.
However, if you want to "combine" these 2 folders, understand that Desktop is still Desktop but synchronized into OneDrive cloud service instead of having to back up manually, you can still do this.
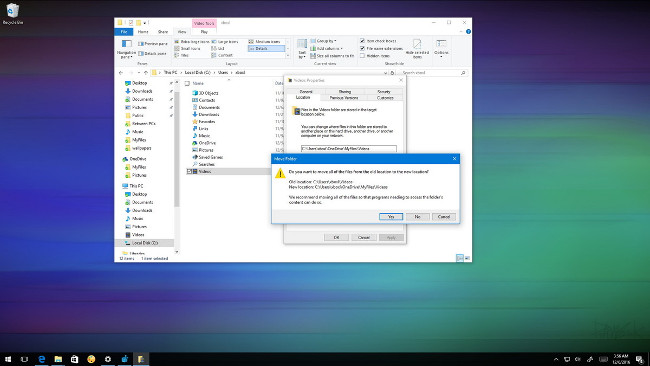
1. How to move the default user directory to OneDrive?
1. Open File Explorer .
2. Next navigate by path:
C: Users
Good tip :
Alternatively, you can press the Windows + R key combination to open the Run command window, then enter % HOMEPATH% , then click OK to open the current Home folder location.
3. Open the OneDrive folder.
4. Create a new folder and place a name you want (such as MyFiles) to "collect" the folders you want to sync with OneDrive.
5. Inside the folder you just created, proceed to create a folder for each location you want to move into OneDrive. For example, if you want to move the Documents folder, then you create a new Documents folder inside OneDrive.
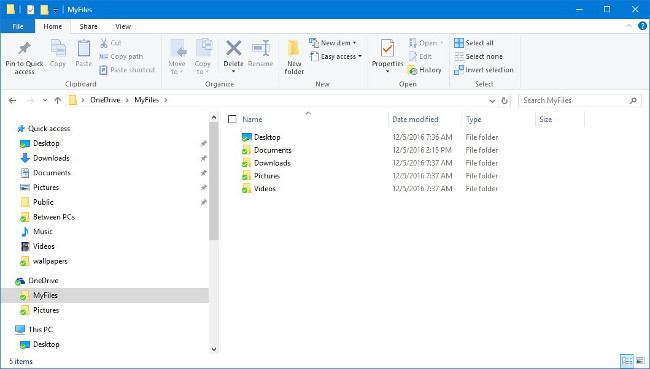
6. Go back to your account name folder - where all the default folders are stored.
7. Right-click Documents and select Properties .
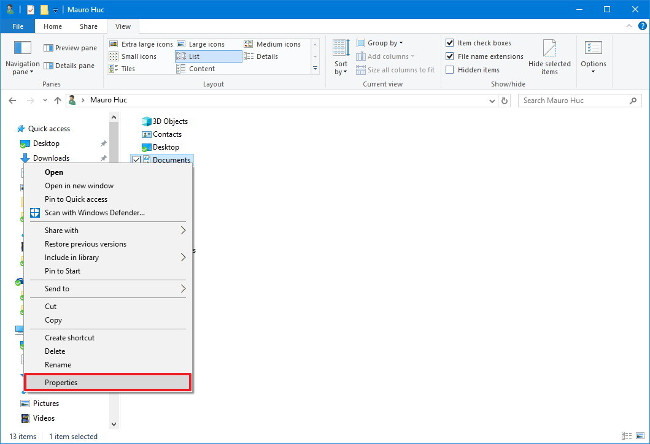
8. On the Properties window, find and click the Location tab.
9. Click the Move button.
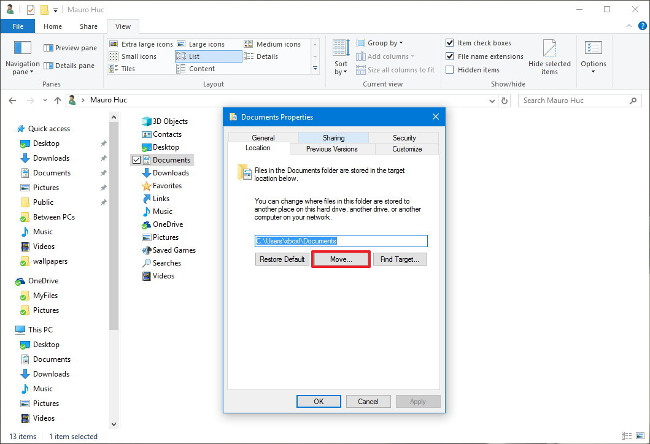
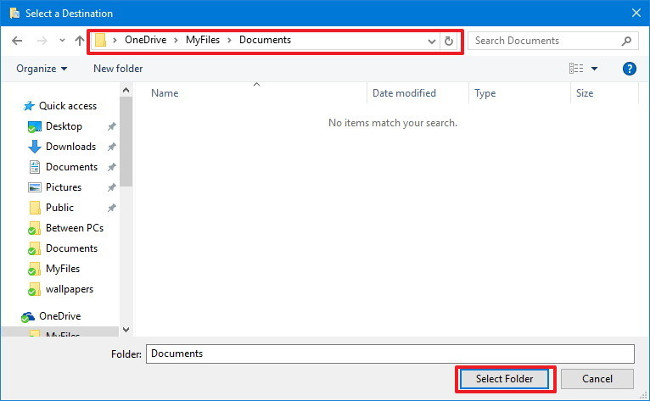
10. Browse to the OneDrive folder and open the Documents folder you just created.
11. Click the Select Folder button, and if you notice you will see the default path location has changed.
12. Click Apply .
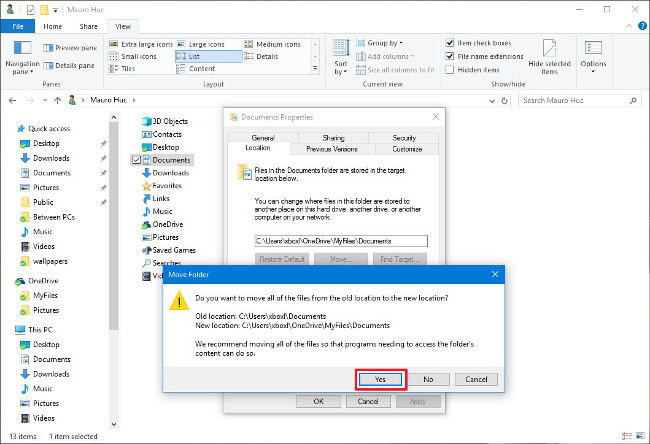
13. You will be notified to move any content from the old location to the new location. Click Yes to continue.
14. Click OK to complete the process.
If you download too many programs, applications, music, . from the Internet, then you should consider skipping the Downloads folder by the data in that folder does not matter, you You can download it at any time.
If you change your mind, you can "switch back" the process back to the original settings. Follow the steps below:
1. Open OneDrive .
2. Navigate to the folder you want to restore to the old location.
3. Right-click the folder and select Properties .
4. On the Properties window, click the Location tab.
5. Click Restore Default .
6. Click Apply .
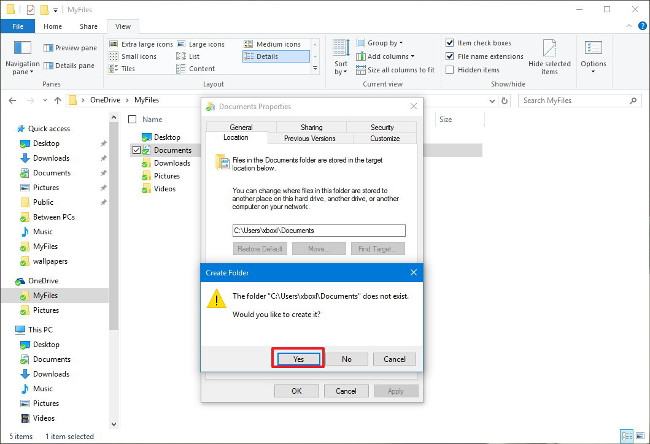
7. You will be notified to recreate the root directory in the old location. Click Yes to continue.
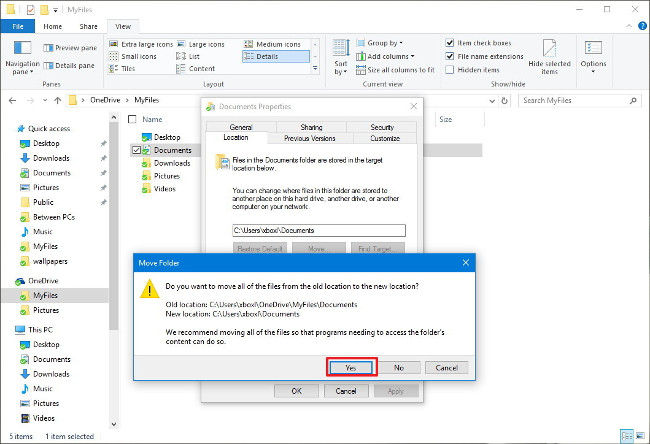
8. Click Yes to confirm that you want to move the directory and content in that folder.
9. Click OK to complete the process.
10. Follow the same steps for each folder you want to move back to the original location.
Refer to some of the following articles:
- 5 ways to share files and folders from OneDrive in Windows 10
- Collection of the best free online data storage websites today
- Complete how to use all backup and restore tools on Windows 10
Good luck!
You should read it
- ★ Change the account and default storage folder of OneDrive on Windows 10
- ★ How to sync Microsoft OneDrive with Linux
- ★ How to delay starting OneDrive on Windows 10/8/7
- ★ Steps to disable or completely remove the Onedrive application on Windows 10
- ★ How to fix the problem of syncing OneDrive on Windows 10