Stable Diffusion Web UI
Stable Diffusion Web UI (SDUI) is a user-friendly browser interface for the powerful Generative AI model called Stable Diffusion..
What is Stable Diffusion Web UI?
Stable Diffusion Web UI (SDUI) is a user-friendly browser interface for the powerful Generative AI model called Stable Diffusion. This is an advanced AI model capable of generating images from text descriptions or modifying existing images based on text prompts. The web interface, developed by AUTOMATIC1111, provides users with an engaging platform to interact with Stable Diffusion models without requiring any advanced technical or programming skills.
You can use the Web UI locally on a laptop or desktop that supports both CPU and GPU. Alternatively, you have the option to deploy your own model on a server, allowing others to explore and experiment. It supports most operating systems and GPUs, including Nvidia, AMD, and Intel. This revolutionary tool has changed how artists create high-quality artwork on their personal computers, enabling AI-powered creativity in a private and accessible way.
Download and install CUDA for Nvidia GPUs.
You can use Stable Diffusion Web UI without a GPU or CUDA installation. The web interface can run on the CPU and produce quick results. However, for even faster results, you should use GPU acceleration if possible.
This guide focuses solely on users with Nvidia GPUs and Windows operating systems.
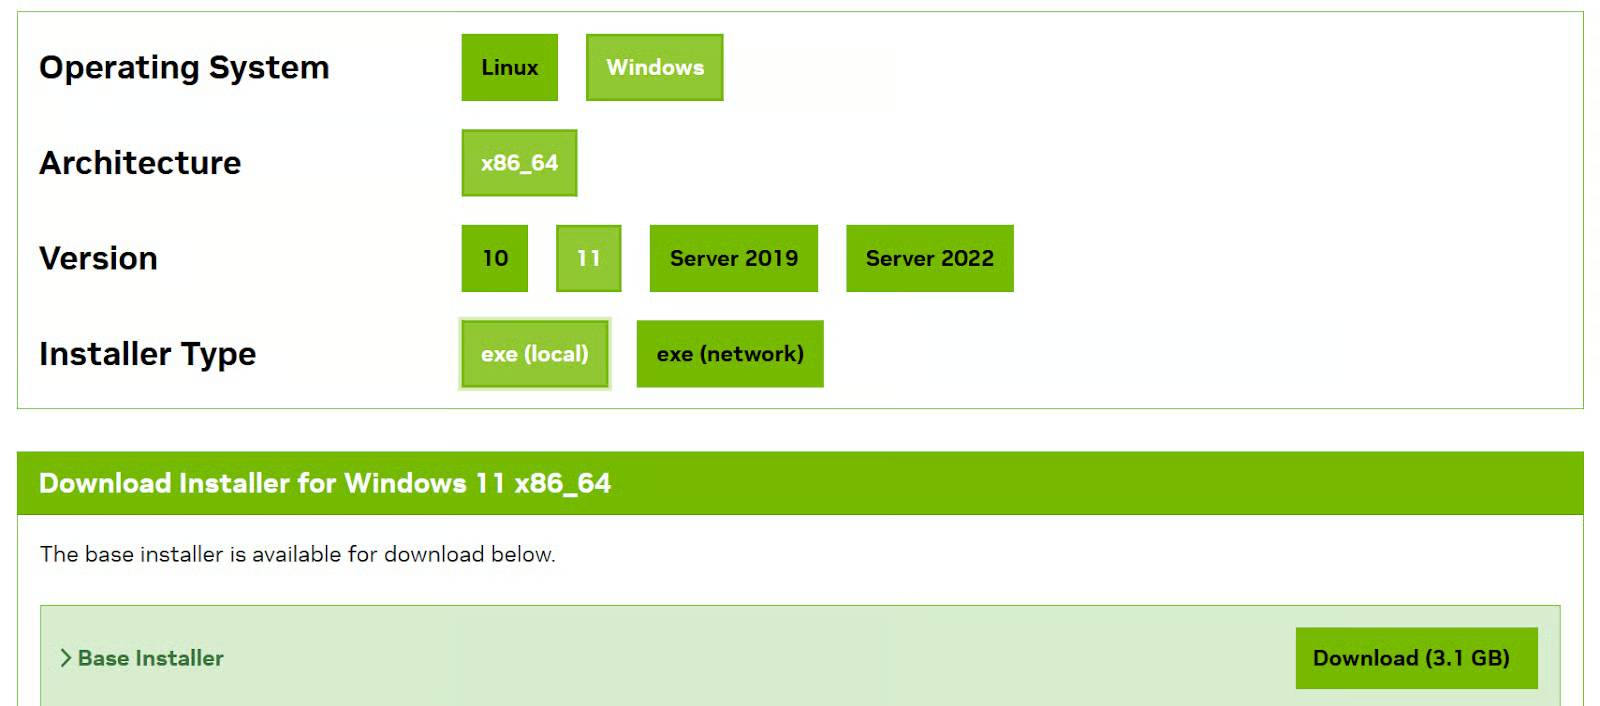
First, download and install the latest version of CUDA Toolkit 12.3 . You need to select the appropriate options based on your operating system and download the basic installer.
Next, install the latest version of cuDNN. You can download the zip file from Nvidia cuDNN . Make sure it matches the correct CUDA Toolkit version.

Extract all folders from the zip file, open it, and move the contents to the CUDA toolkit folder. In this case, the folder is C:Program FilesNVIDIA GPU Computing ToolkitCUDAv12.3 ; however, the folder may be different for your computer. If you receive a message asking about duplicate files, select Replace All .
Note : Always ensure you have the latest Nvidia drivers installed on your computer for optimal performance.
Install on Windows 10/11 with NVidia GPU using a release package.
- Download sd.webui.zip from v1.0.0-pre and extract the contents.
- Run update.bat.
- Run run.bat.
Automatic installation on Windows
- Install Python 3.10.6 (newer Python versions do not support the torch), then select Add Python to PATH .
- Install Git .
- Download the stable-diffusion-weUI repository, for example, by running
git clone https://github.com/AUTOMATIC1111/stable-diffusion-webui.git. - Run webui-user.bat from Windows Explorer as a regular user, not an administrator.
Automatic installation on Linux
1. Install the dependencies:
# Debian-based: sudo apt install wget git python3 python3-venv libgl1 libglib2.0-0 # Red Hat-based: sudo dnf install wget git python3 gperftools-libs libglvnd-glx # openSUSE-based: sudo zypper install wget git python3 libtcmalloc4 libglvnd # Arch-based: sudo pacman -S wget git python3If your system is very new, you need to install python3.11 or python3.10:
# Ubuntu 24.04 sudo add-apt-repository ppa:deadsnakes/ppa sudo apt update sudo apt install python3.11 # Manjaro/Arch sudo pacman -S yay yay -S python311 # do not confuse with python3.11 package # Only for 3.11 # Then set up env variable in launch script export python_cmd="python3.11" # or in webui-user.sh python_cmd="python3.11"2. Navigate to the folder where you want to install the web interface and execute the following command:
wget -q https://raw.githubusercontent.com/AUTOMATIC1111/stable-diffusion-webui/master/webui.shOr simply copy the archive to wherever you want:
git clone https://github.com/AUTOMATIC1111/stable-diffusion-webui3. Run webui.sh.
4. Check webui-user.sh for options.
Instructions for using Stable Diffusion Web UI
Tab Txt2img
In your default browser, you'll see a user interface with many options. Try each option to create high-quality images.
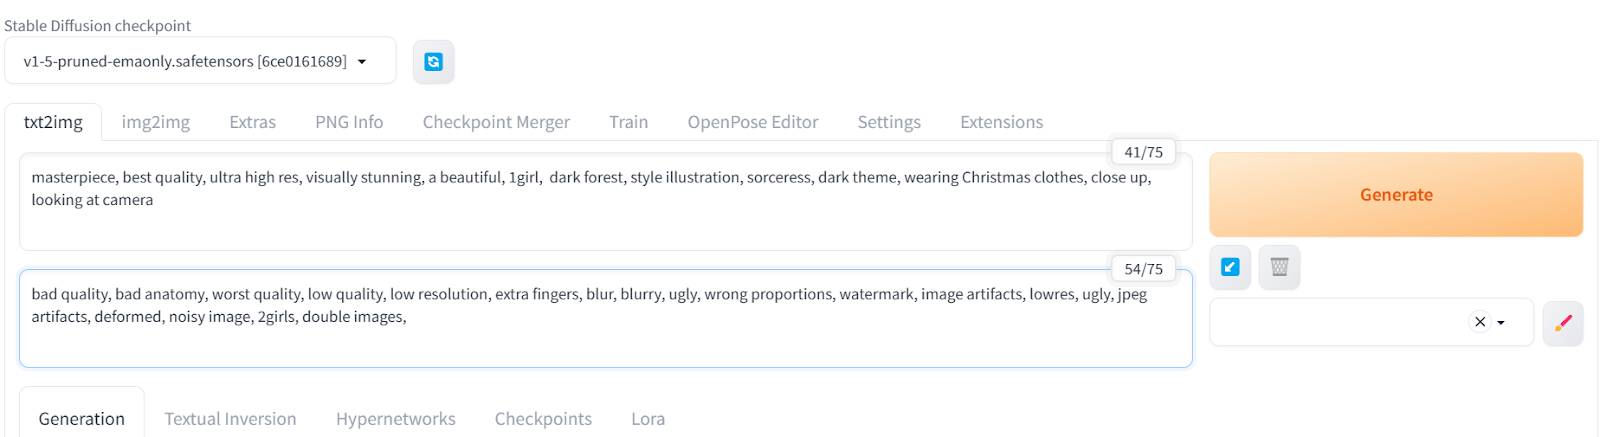
First, click on the txt2img tab and enter the affirmative and negative prompts to generate the image. Additional keywords can be added to improve the quality and style of the image.
Start with a negative limit prompt and continue adding more keywords to eliminate recurring errors in the image.
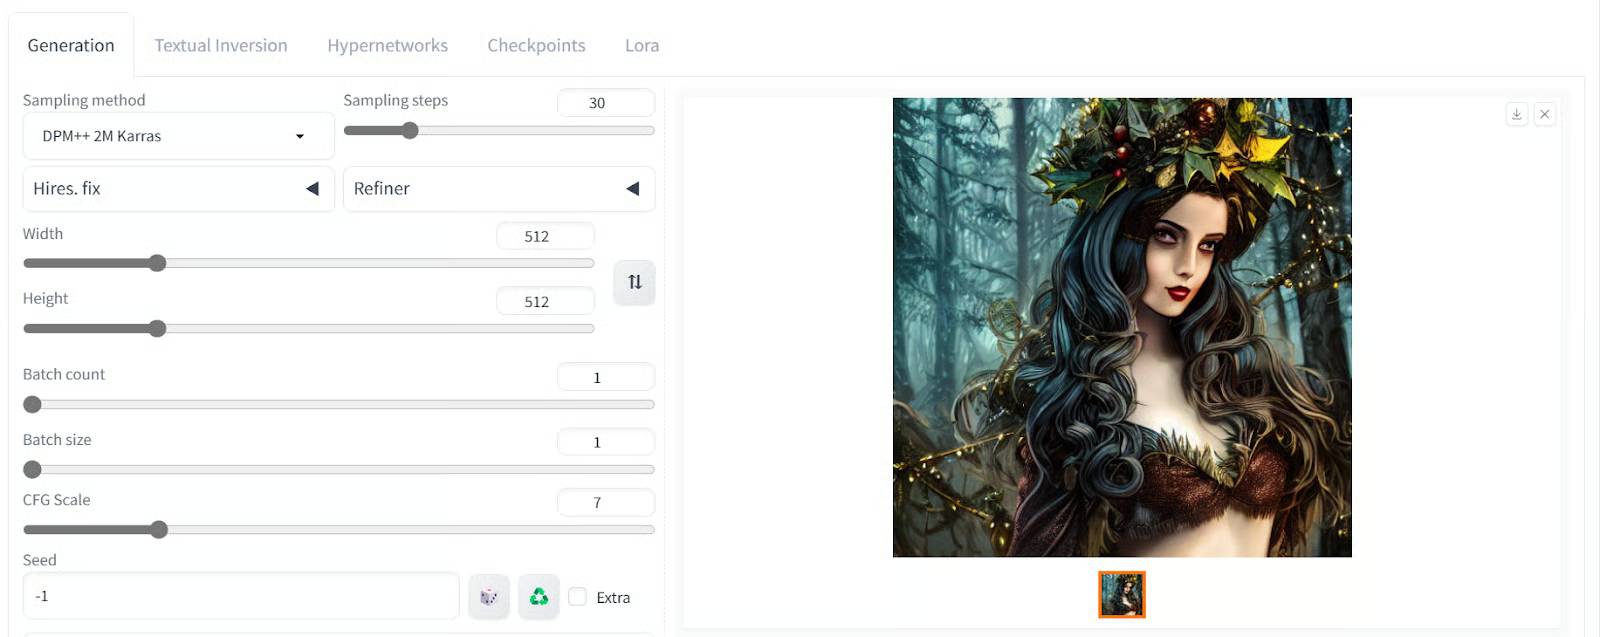
Next, adjust the advanced settings. You can resize the image and increase the sampling step to add more detail.
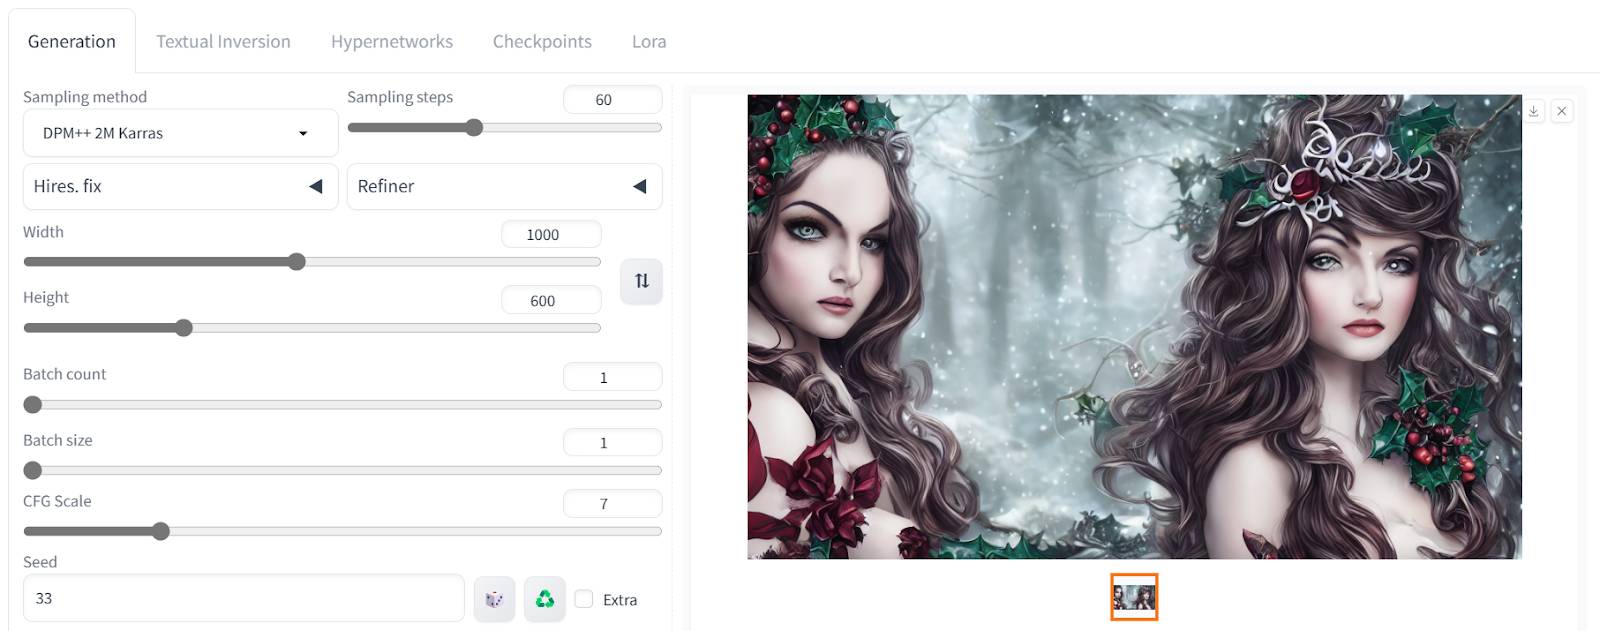

All generated images come with metadata including positive and negative prompts as well as advanced settings. You can use this to create similar results.
Tab Img2img
The img2img tab allows you to upload reference images to create similar images using prompts for different styles. If you want to create multiple images with a single prompt, you can do so by adjusting the number of batches in the creation settings.


The resulting images look stunning, with a variety of styles and props.
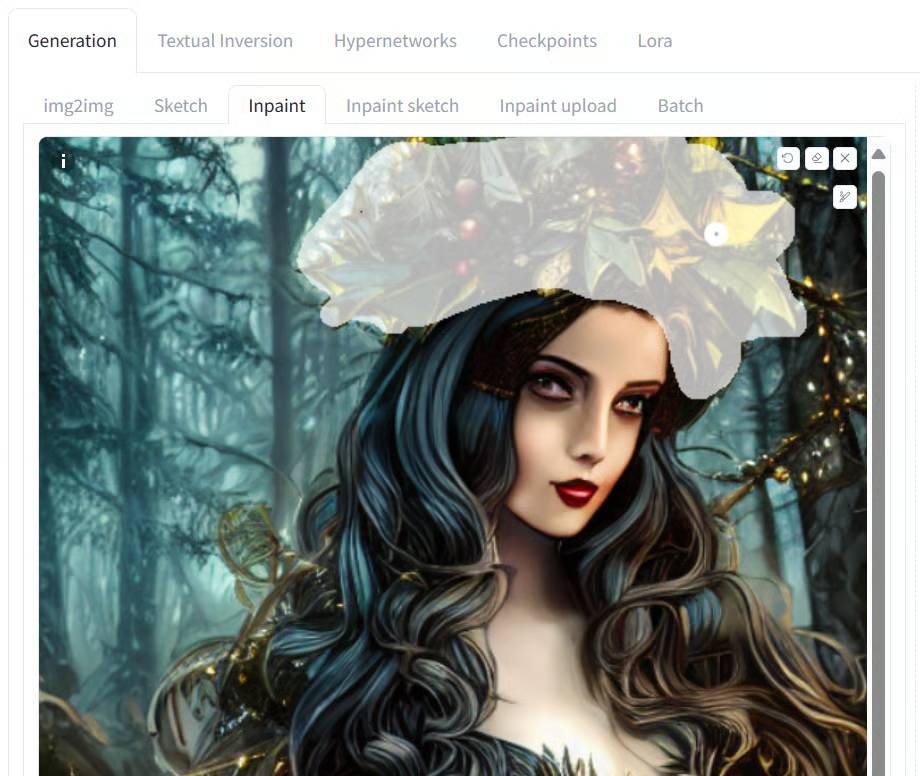
The Inpainting tool allows us to edit only the selected parts of an image.

By using the highlighting tool and a simple operation, we were able to edit a part of the image.
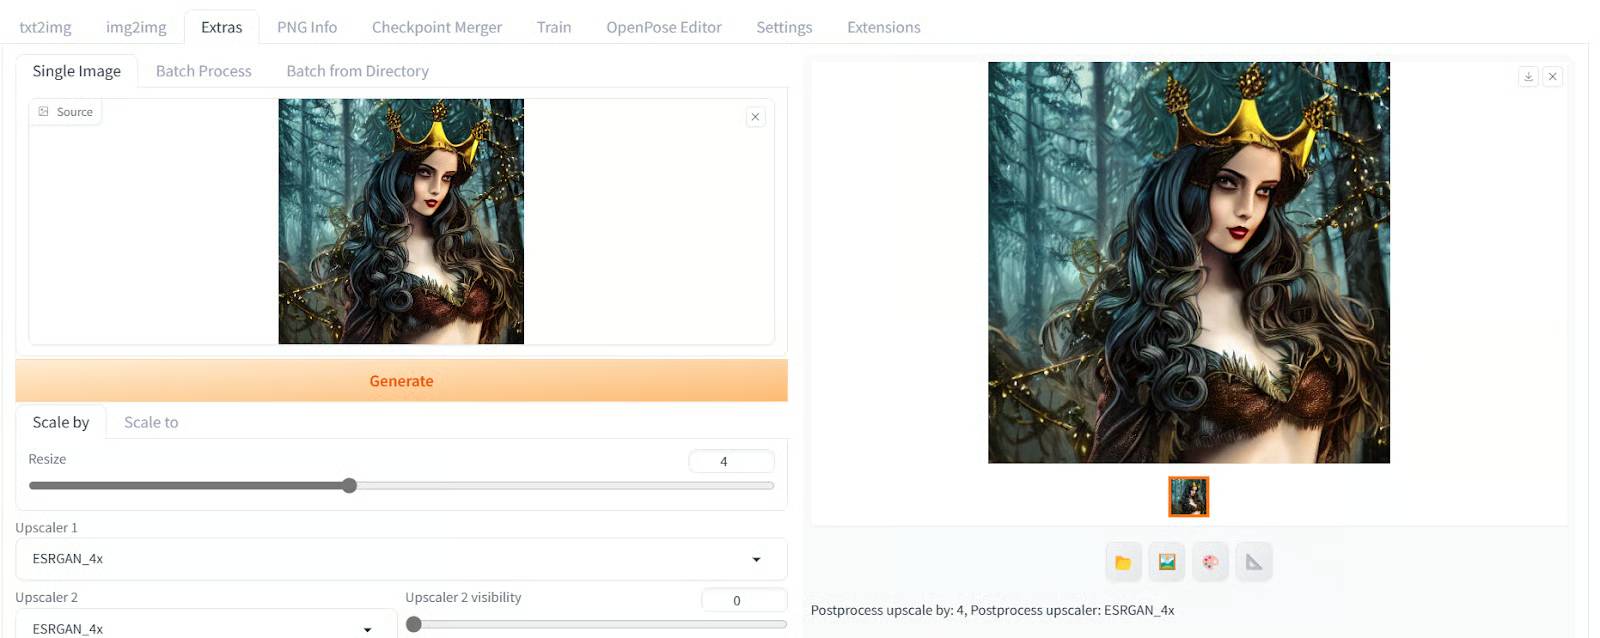
Tab Extras
To enlarge the created image, move the image to the Extras tab.
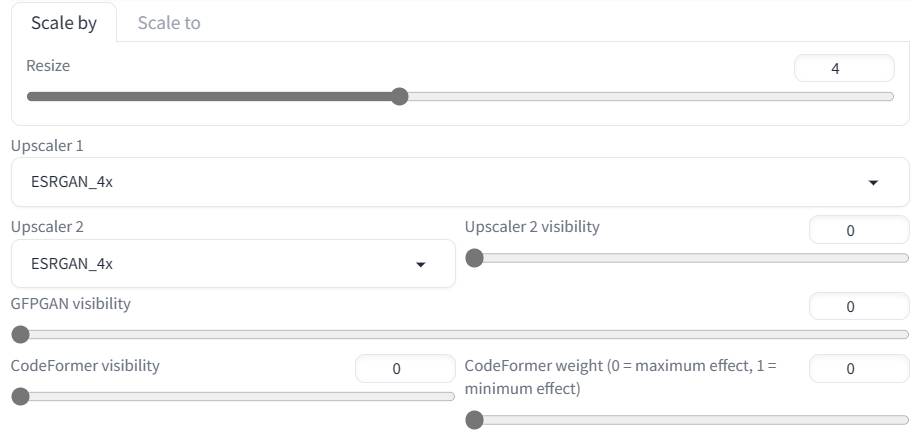
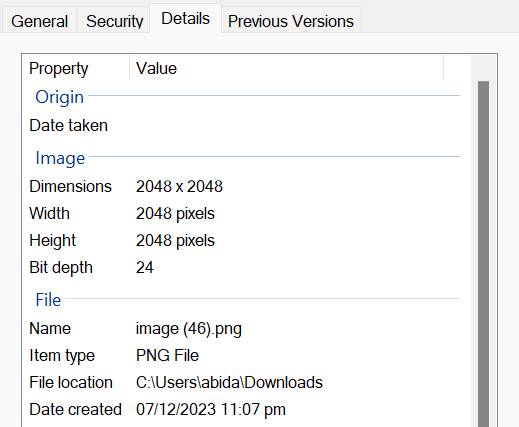
Then, click the Generate button to convert '512x512' to '2048x2048' in seconds without losing image quality.
You can check the image size by downloading it to your computer and accessing the image file properties.
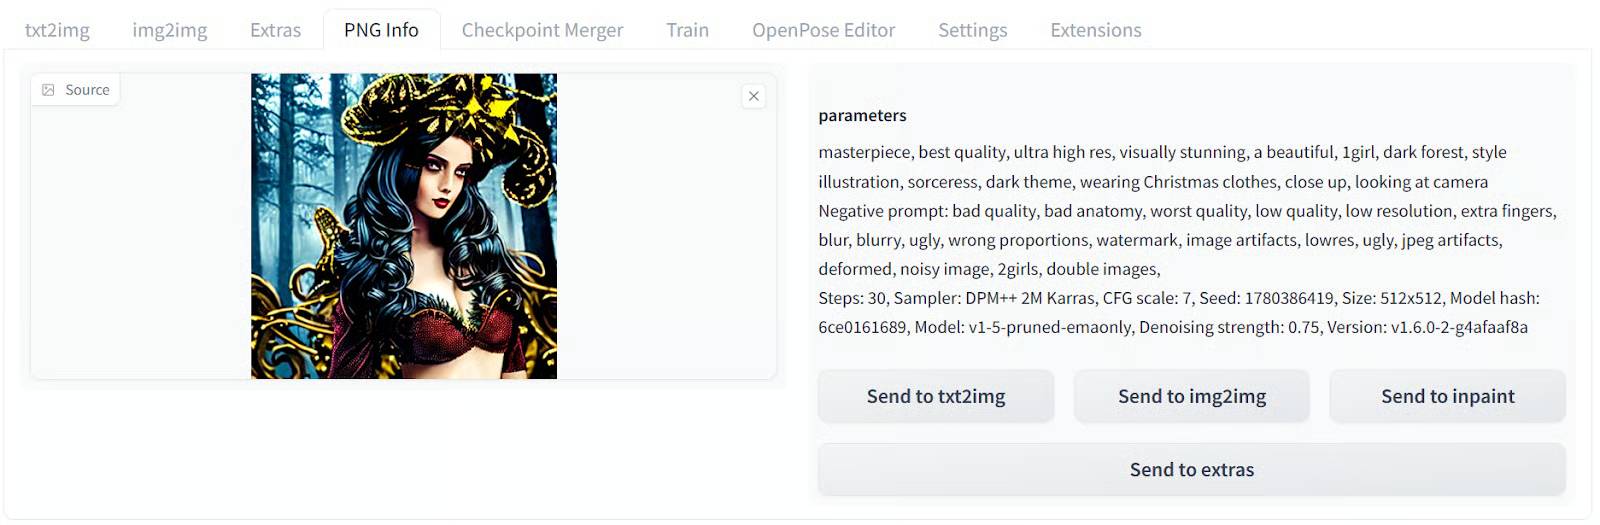
Tab PNG Info
Each image contains metadata indicating how it was created. If you want to view information about a previously created image, you can upload it to the PNG Info tab. From there, you can view affirmative and negative prompts, as well as advanced settings.
Stable Diffusion Web UI (SDUI) provides an easy approach for anyone to harness the power of AI-powered imaging . This user-friendly interface makes interacting with advanced diffusion models like Stable Diffusion easy, even for non-technical users.
Clearly, web user interfaces have unlocked creative potential that was previously inaccessible without advanced programming and AI skills.