The best methods for creating free AI images with Stable Diffusion.
Try Stable Diffusion, a free, open-source AI image creation tool that lets you create images at home without restrictions..
Have you ever wanted to create your own AI images without resorting to complicated online tools? While free, most online options limit the number of images you can create and often require a paid subscription after a few uses. Try Stable Diffusion , a free, open-source AI image creation tool that lets you create images at home without limitations.
1. Use the Automatic1111 web interface.
The first method involves using the AUTOMATIC1111 web interface program to access Stable Diffusion. This program is available on all major desktop operating systems.
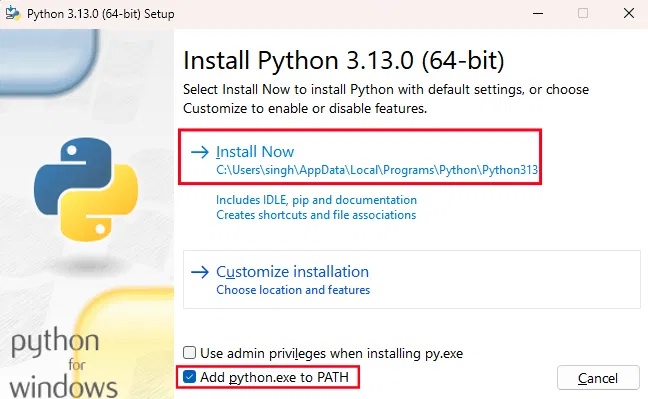
Download the latest stable version of Python . After downloading, run the Python installer and make sure you select Add python.exe to PATH before clicking Install Now .
Access the AUTOMATIC1111 web interface repository on GitHub , click on Code , then click on Download ZIP . Wait for the download to complete, extract the file, and note down the location where you installed the web interface program.
Install the model
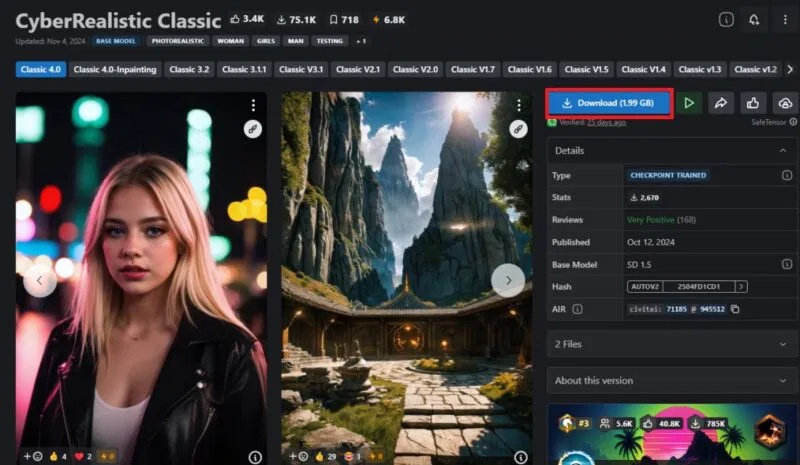
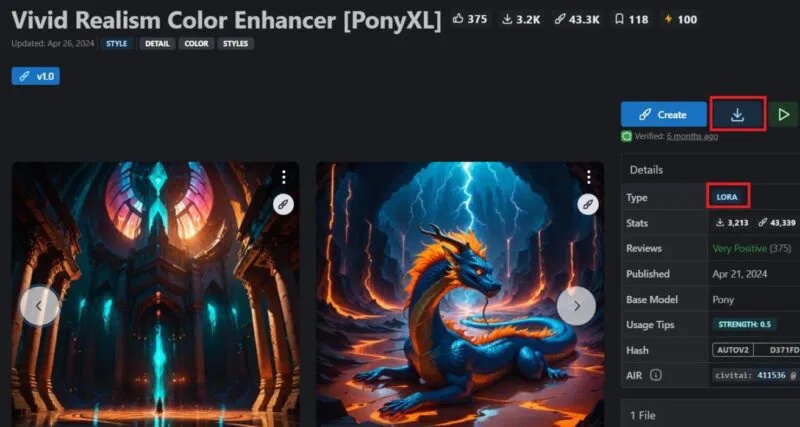
You still need at least one model before you can start using the web user interface. Models are pre-trained checkpoints that dictate how images are generated in a specific style. To install any model you like, go to CIVITAI and select one.
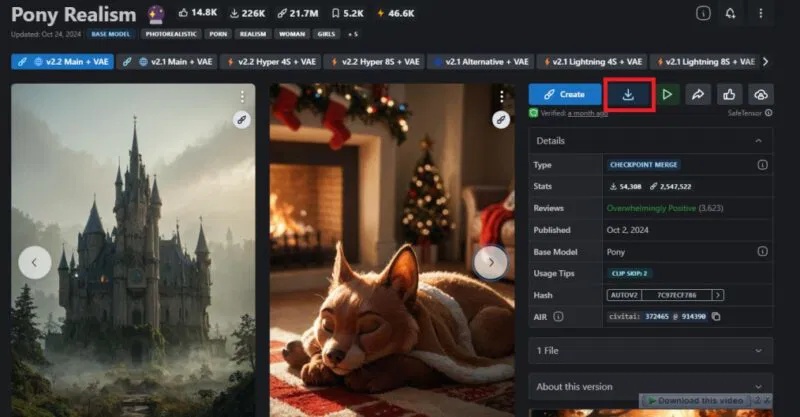
After finding a model with an art style you like, press the download button. Once the download is complete, move the checkpoint '.safetensors' file to the correct location. To do this, find the download folder for your Automatic1111 web UI. Then, go to webui -> models -> Stable-diffusion . Simply paste the downloaded model there and you're done.
Run and configure WebUI
At this point, you are ready to run and start using the Stable Diffusion program in your web browser.
On macOS, open the 'stable-diffusion-webui' folder in Terminal and enter the command ` ./webui.sh --xformers` . For Windows, you need to enter `./webui-user.bat`. Once complete, select and copy the URL next to 'Running on local URL' , which will be in the format http://127.0.0.1:7860.
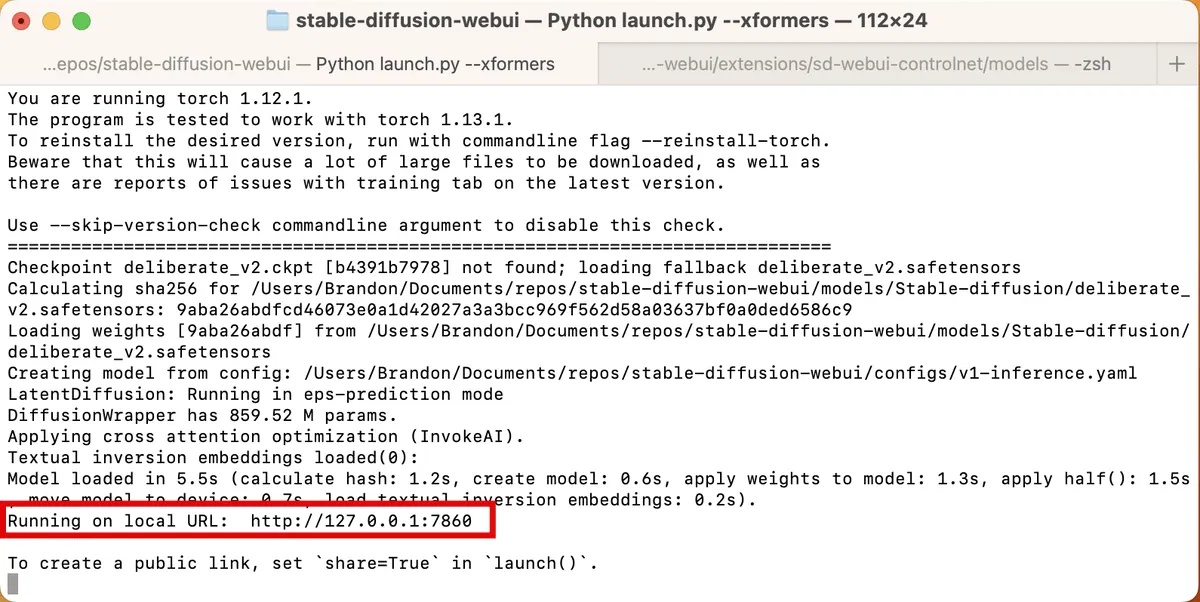
Paste the link into your browser's address bar and press Enter . The web user interface will appear, running locally on your computer's default internet browser. Although the initial interface may seem complicated, you don't need to adjust too many settings right away.
First, you can set the Width and Height settings and then change the batch size to 4. This will create 4 separate images for each prompt.
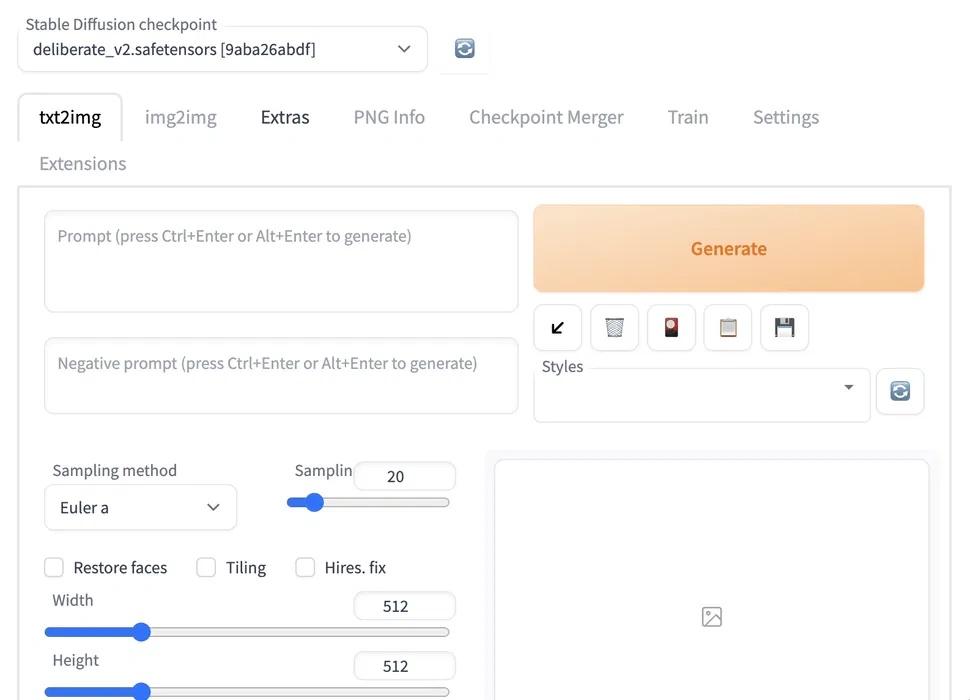
Now for the fun part: Creating AI images. You can type any prompt you can think of into the txt2img tab. Make sure you describe the image you want, separating different descriptions with commas. Also, describe the style of the image, using words like 'realistic', 'detailed', or 'close-up portrait'.
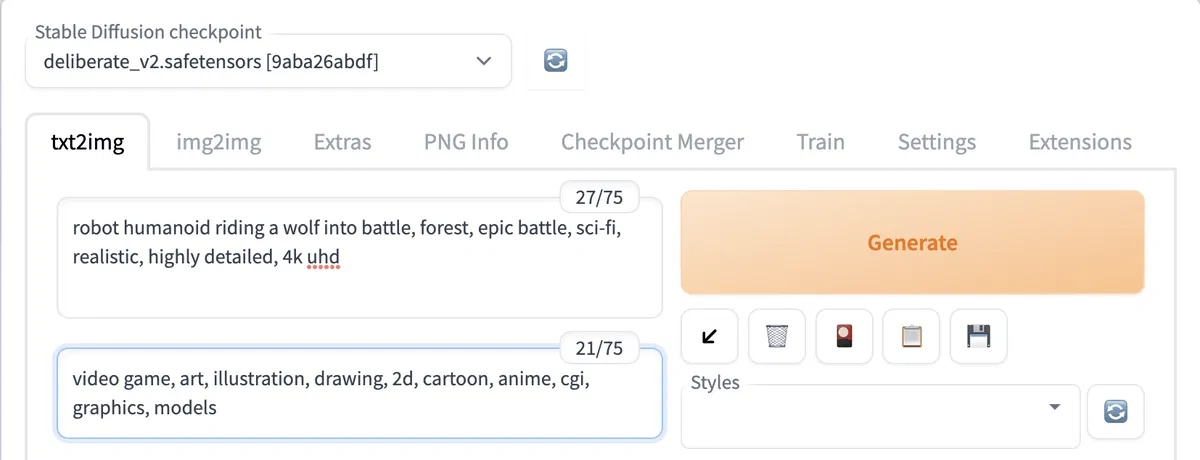
In the negative prompt text box below, enter the keywords you don't want your image to look like. A good setting to change is 'CFG Scale'. The higher the CFG Scale value, the closer the image generator will adhere to your prompt. Conversely, lower values will produce more creative images.
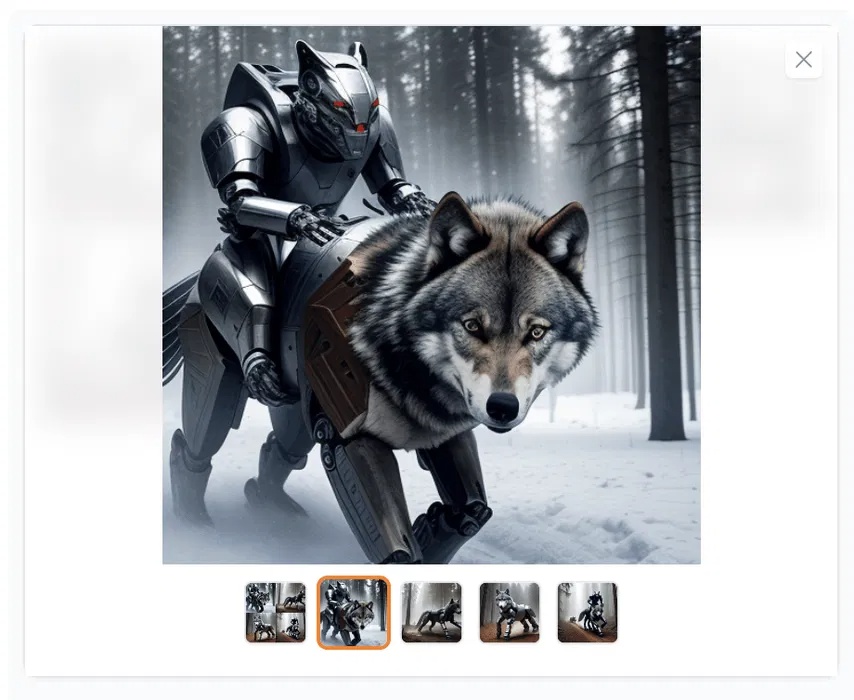
Keeping all other settings unchanged, click Generate at the top to start Stable Diffusion. Once complete, click the thumbnail to preview and decide if you like the image. If not, simply adjust your CFG Scale and prompt options. It is during this image generation phase that your GPU will be pushed to its limits.
If you like an image but want to edit or fix a problem (distorted face, anatomical issues, etc.), click Send to img2img or Send to inpaint . This will copy the image and your prompts to the corresponding tabs so you can edit the image.
2. Use Footus, the simplest AI image generator.
Fooocus is one of the simplest and most effective AI image generators available. Its user-friendly interface makes image creation easy to get started with and master, making it the perfect program to begin your AI image creation journey before trying more advanced methods.
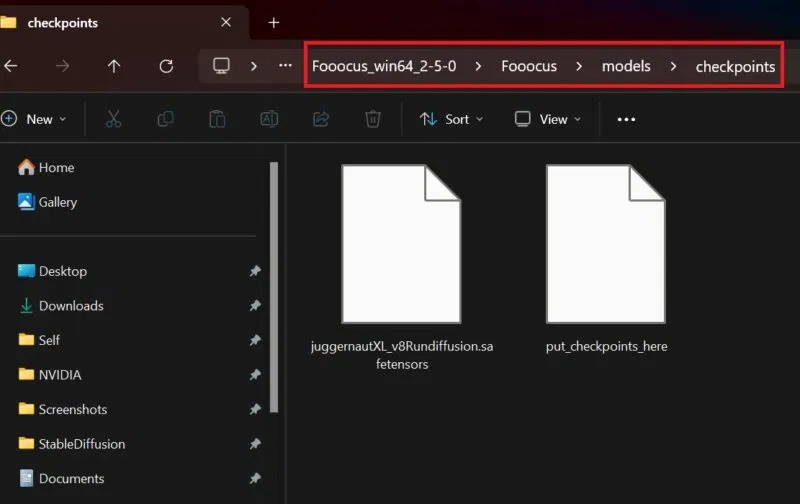
Download Fooocus from its Github page. This will download a compressed Fooocus file, which you must extract after the download is complete. Next, go to CIVITAI and download a checkpoint of your choice. After downloading the checkpoint, go to your Fooocus folder. From there, click on Fooocus -> models -> checkpoints and paste the checkpoint file you just downloaded.
You can download LoRA files from Civitai – small files that adapt large language models with just a new concept or style. Unlike checkpoints that are several gigabytes in size, LoRA files work on an existing checkpoint to add unique touches to the final image.
If you download a LoRA file to enhance your AI image style, navigate to the same models folder within your Fooocus folder and paste the LoRA file into the loras folder.
Run Focus
It's time to start creating images in Fooocus. Go to the folder where you extracted the software and click run.bat. Wait for the command line window to appear and load. It will automatically open the Fooocus interface, running locally in your web browser.
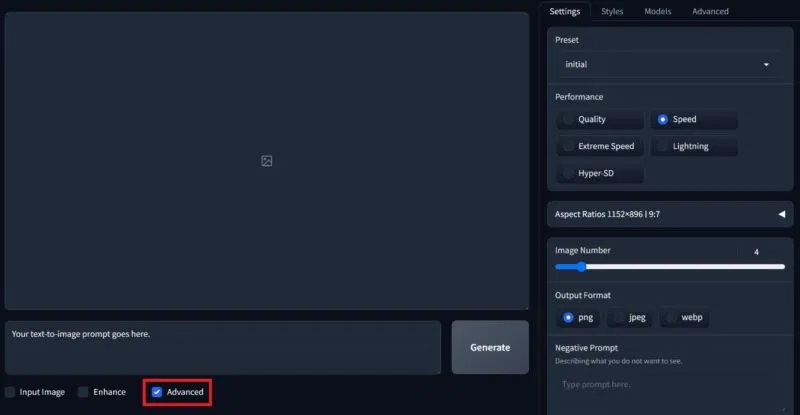
From the initial screen, select the Advanced box at the bottom, which will open the advanced settings. Here, choose the aspect ratio you want for your images and the number of images Fooocus will create for each prompt. You can also choose the image file format.
First, keep the performance option set to Speed . This is what allows Fooocus to create images extremely quickly. The option to remove unwanted elements from the image is located at the bottom.
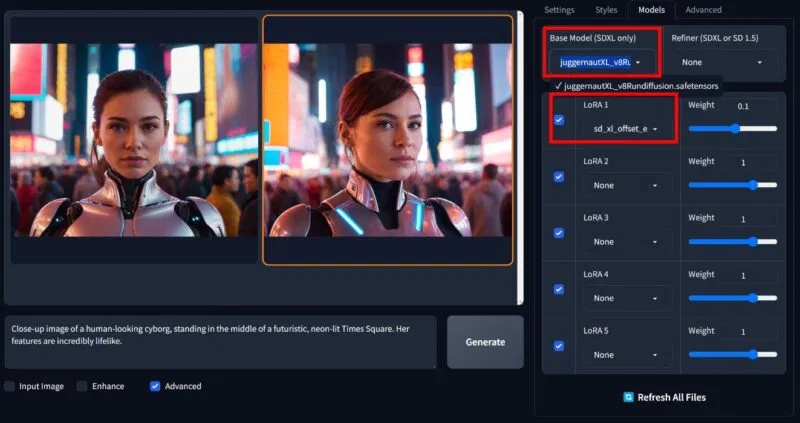
After selecting Advanced , you can view the Styles tab to choose different styles you want to apply to your image. Hover over each style to preview it. Next, go to the Models tab and select the base model. This will select the checkpoint you set in the Fooocus folder. Just below that, select a LoRA you want from that folder.
All that's left is to press the Generate button and watch Fooocus work its magic. Undeniably the simplest method available for creating and editing images, Fooocus may not be the most powerful. However, it's clearly the most effective. With Fooocus as an AI image generator, you can freely adjust styles, checkpoints, and LoRA to create images exactly as you like.
Use the AI FaceSwap feature in Fooocus.
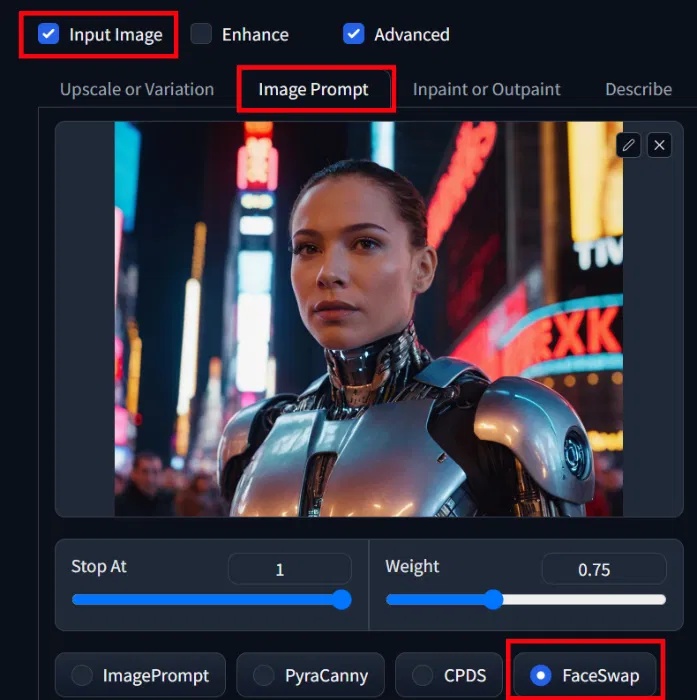
Fooocus even includes a FaceSwap feature, which lets you swap faces in one photo with another. To do this, select the Input Image box at the bottom and choose Image Prompt . Here, upload the image you want to swap faces with your AI image. Scroll down, click Advanced again, and from the options available below the face you uploaded, select FaceSwap .
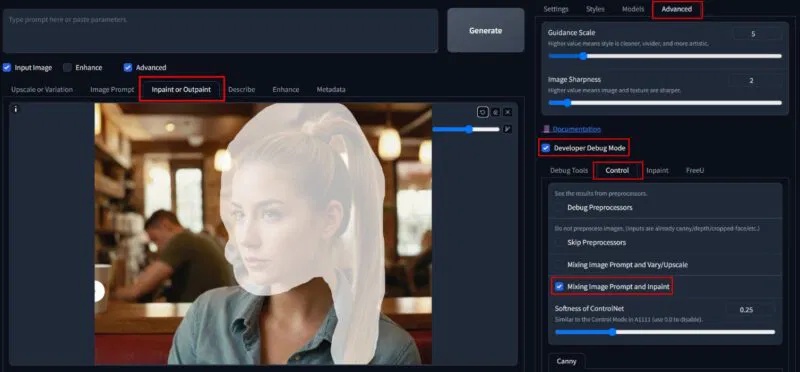
Now, next to the Image Prompt tab , click the Inpaint or Outpaint tab , and upload the image you want to swap faces with. Draw on the face and hair, then switch to the Advanced tab in the upper right. Select Developer Debug Mode , click Control , and choose Mixing Image Prompt and Inpaint .
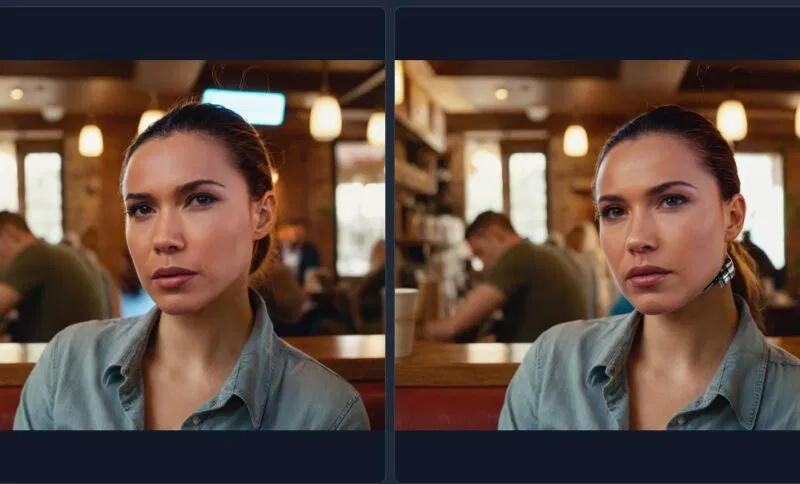
Then, simply clear the prompt box and press Generate . This will swap the faces in your photo with the target image, resulting in different outcomes.
Once you have the images, you can always use some of the best AI image enhancement tools to process them. This helps increase the resolution of the generated images.
3. Use ComfyUI to create AI images.
ComfyUI is another popular method for using Stable Diffusion to generate AI images. The ComfyUI workflow can be the most interesting, but also the most complex. To get started, download and extract ComfyUI from Github.
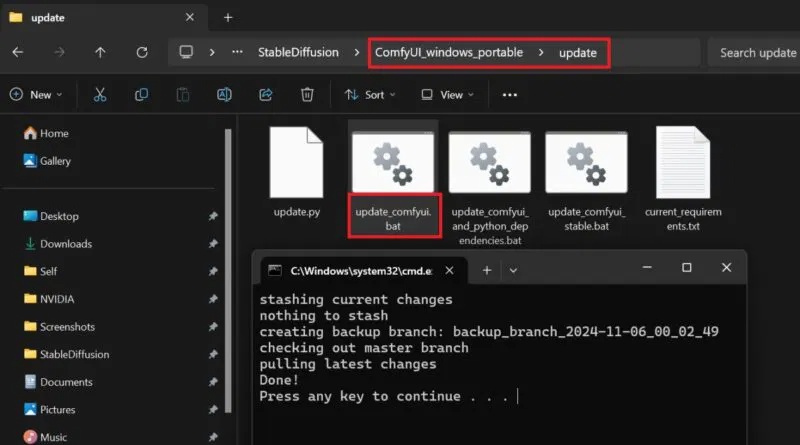
By now, you should be familiar with checkpoint and LoRA. As explained in the other methods, download the checkpoint file (and the LoRA file if you want), then place it in the appropriate folders within the models directory inside ComfyUI. After entering the ComfyUI directory, the first thing to do is open the Update folder . Run update_comfyui.bat and you're done.
Now, it's time to run the ComfyUI AI image generator. Go to the ComfyUI folder, and you'll see two batch files. If you have an Nvidia GPU in your system, double-click the run_nvidia_gpu.bat file. Otherwise, select and run run_cpu.bat.
After ComfyUI loads into your browser, you'll see the default ComfyUI workflow. There are several interconnected nodes. While it might seem confusing at first glance, these nodes are simply visual representations of each step in the AI image creation process.
Many nodes allow you to create your own workflows, combining different nodes, models, LoRAs, and filters. This gives users maximum control over the final result. However, it also makes ComfyUI difficult to understand and master.
Run ComfyUI
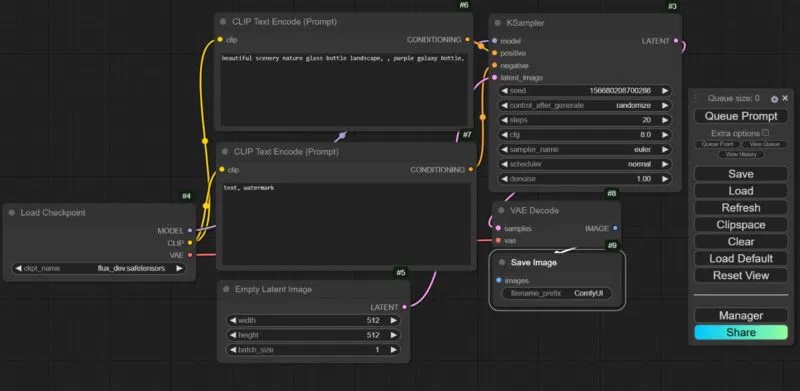
To begin, select a checkpoint in the Load Checkpoint node . Next, go to the CLIP Text Encode (Prompt) node . This is where you enter the text prompt for the image. Right below that, there's a node with the same name. This is the negative prompt, describing unwanted elements. In the Empty Latent Image node , you can select the width, height, and number of images.
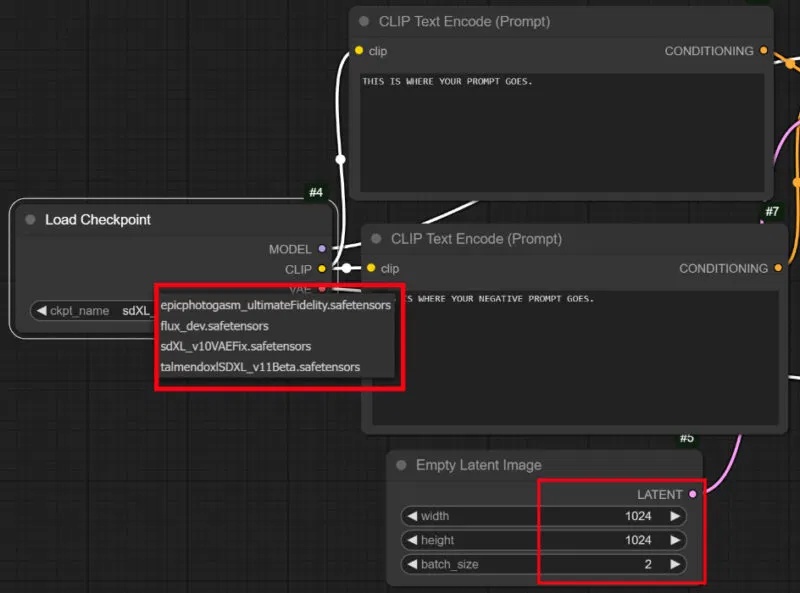
After entering the prompts, adjust the image size, batch size, and select the number of steps. Any number of steps between 20 and 30 is sufficient to produce a good quality image. Finally, simply press the Queue Prompt button and wait for ComfyUI to complete.

Using LoRA in ComfyUI
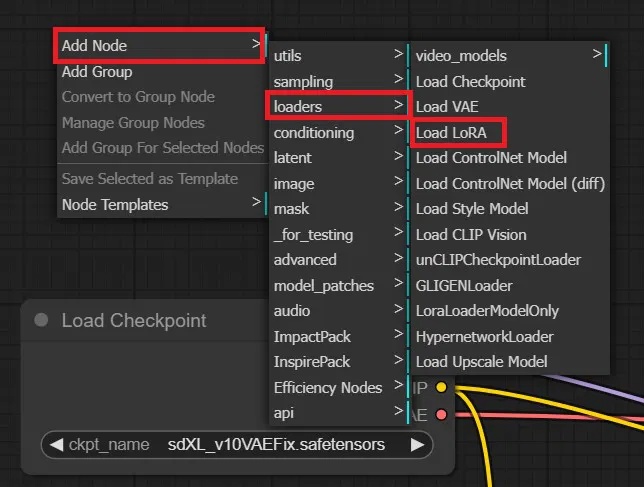
If you want to use specific LoRAs in ComfyUI, simply right-click anywhere near the checkpoint button. Select Add Node -> Loaders -> Load LoRA , and choose any LoRA from your LoRAs folder within the directory.
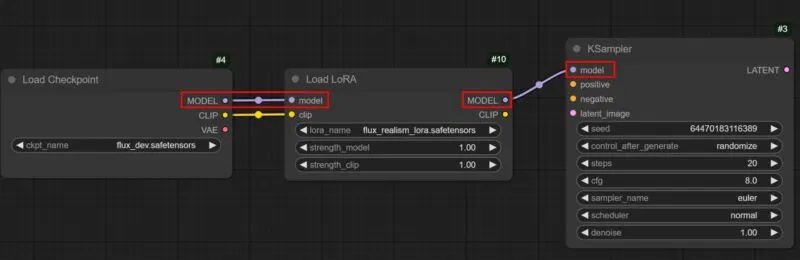
However, in ComfyUI, every time you load a new LoRA node, you have to move the objects around. Carefully click and drag the line from the Checkpoint node titled Model . Now, instead of letting it go into KSampler, move the line to attach to the model point of the LoRA node on the left. Then, click on the exit Model point of the LoRA node and connect it to the input model point of KSampler.
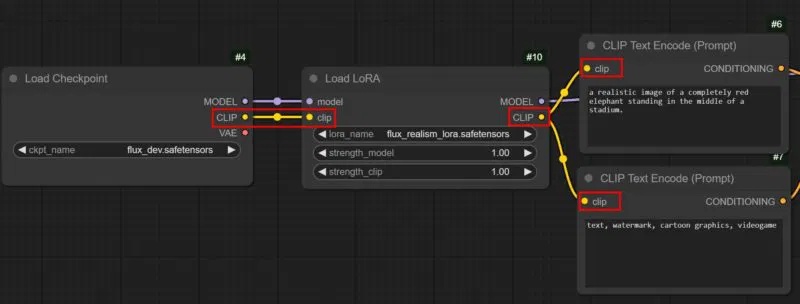
Now, there are two Clip paths exiting the Checkpoint node into each Prompt node. Make both of those paths attach to the LoRA Clip entry point on the left. Then, simply follow what you've seen, drawing a straight line from the LoRA Clip into both Prompt nodes.
With all these nodes combined, you can familiarize yourself with the default workflow, simply adding custom nodes one by one as you learn and progress.