Instructions on how to add and use HTTP Request Nodes in n8n
This guide explains how to use the HTTP Request Node in n8n to connect to any API and automate your workflow in the most professional way..
In the world of automation, the HTTP Request Node is known as the "universal key" of n8n . It allows you to connect to almost any application, web service, or API on the internet, even if n8n doesn't have a built-in node specifically for that application.
This article will help you master this powerful tool to expand your automation capabilities without limits.
What is an HTTP Request Node and what is it used for?
An HTTP Request Node is a core node in n8n that acts as a data request sender. It allows your workflow to interact with external servers via standard HTTP protocols.
Main uses in the job
- Custom API connection: You can send data to or retrieve data from any service that supports APIs (such as KiotViet, e-commerce platforms, or your company's internal system).
- Implement CRUD methods: Fully supports GET (retrieve data), POST (send new data), PUT/PATCH (update data), and DELETE (delete data) commands.
- Download and send files: You can use this Node to download an image file or PDF from a URL and pass it to the next processing steps.
- Flexible webhooks: Send notifications to other systems as soon as an event occurs in your workflow.
The groundbreaking advantages of HTTP Request Node.
- Absolute flexibility: No need to wait for n8n to update with new integrations; you can create connections with any platform that has API documentation.
- High security capabilities: Supports multiple authentication methods such as Basic Auth, API Key, and OAuth2, ensuring data remains secure during transmission.
- Handling complex data: Allows customization of Headers and Body (JSON, Form-Data) to meet all stringent server-side requirements.
Instructions on how to use the HTTP Request Node in n8n
Follow the standard procedure below to establish your first HTTP request:
Step 1: Add a new Node to the Workflow
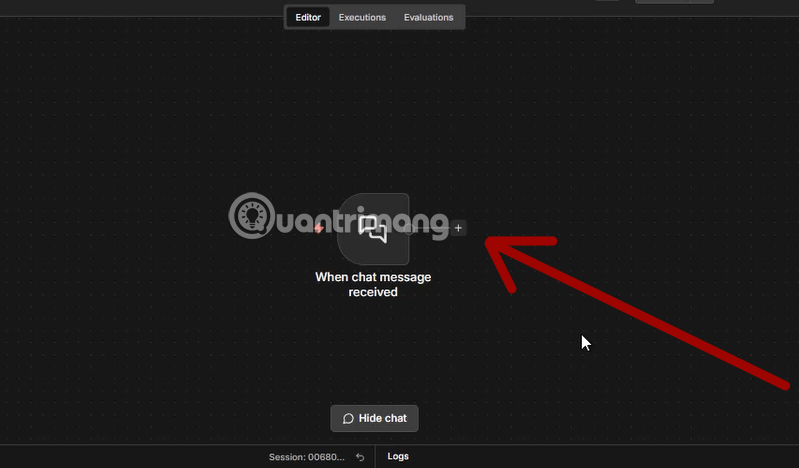
- In the n8n design interface, click the 'Add' button (plus sign) to create a new step.
Step 2: Access the system Node group
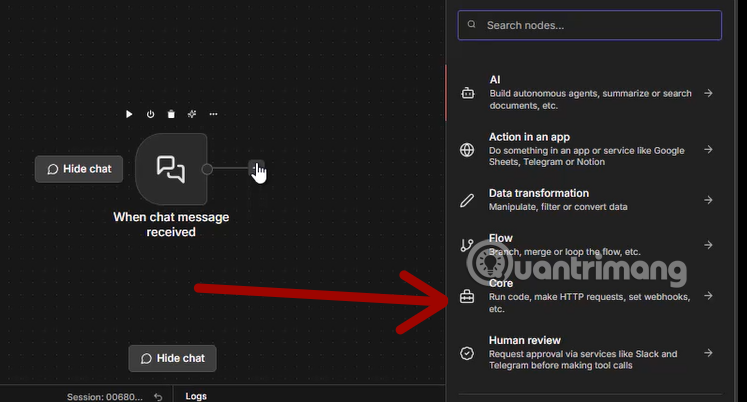
- In the menu that appears, click on 'Core' to find the core tools of n8n.
Step 3: Select HTTP Request
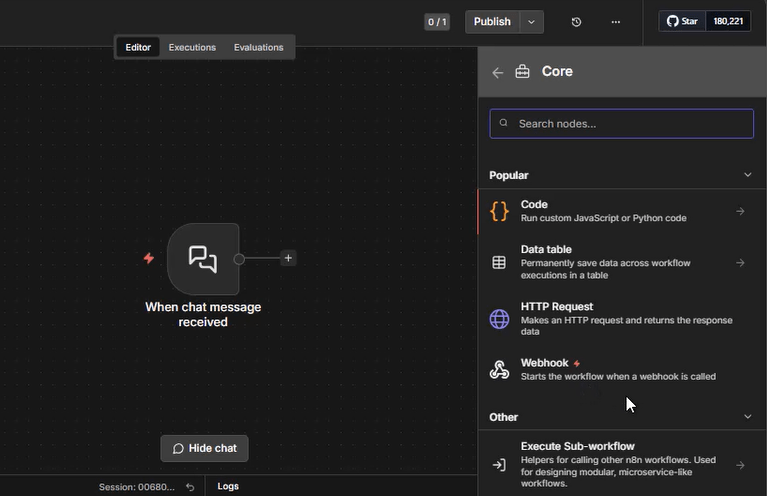
- Find and select 'HTTP Request' from the list . A detailed configuration panel will appear on the right-hand side.
Step 4: Select the Method/Mode
- Click on the 'Method' (or Mode) menu. Depending on your purpose, select GET to retrieve information or POST to send information.
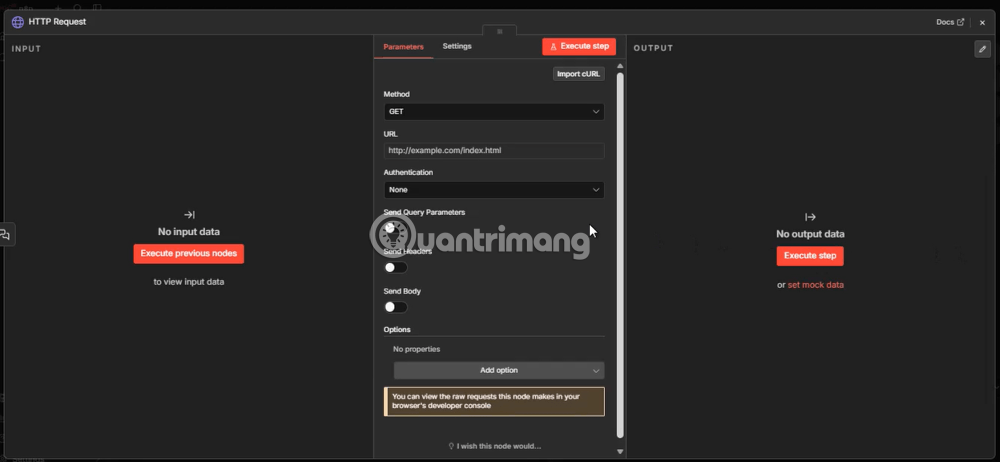
In the URL field , enter the API address or website you want to interact with.
-
Tip: You can use Expressions to make this URL dynamic (e.g., get the ID from Google Sheets).
If the website requires login, set it up in the 'Authentication' menu . You can choose Header Auth , Basic Auth , or select from the saved credentials .
If the API requires special parameters, toggle the corresponding switches in the additional settings to adjust Headers, Query Parameters, or Body.
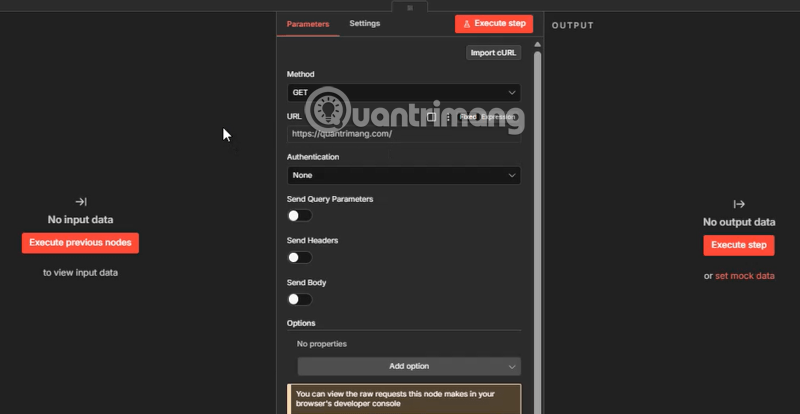
After completing the configuration, press the 'Execute Step' button to have n8n send the request and check the returned results immediately.
If the result is green (Success), your Node is ready to officially run in the workflow.
Instructions on the content to be used in the HTTP Request Node.
The HTTP Request Node is a universal "bridge" in n8n. It allows you to interact with any application or service that has a REST API . You can use it as a normal step in your workflow or integrate it into an AI Agent as a tool for AI to automatically retrieve data.
1. Credentials
To access secure services, you need to provide a "key". n8n is divided into two types:
- Predefined: Used for applications that already support n8n (such as Google, Facebook.). Setup is very quick.
- Generic: Used for non-generic services. You can choose your own authentication method such as: Header Auth (passing a code in the header), Query Auth (passing a code in the URL), or OAuth2 .
2. Basic Parameters (Node Parameters)
| Parameter | Simple explanation |
| Top | Execution commands: GET (Retrieve), POST(Send), PUT/PATCH(Update), DELETE(Delete). |
| URL | The "home" address of the data you want to go to. |
| Query Parameters | Data filters directly on the URL (Example: ?id=123). |
| Headers | Additional information is required with the request (such as data format, security code). |
| Body | "Contents of the package" you send (usually used for POST/PUT). |
- JSON: The most common, structured text format.
- Form-Data: Use this when you need to send a file (binary data) .
- Raw: Send arbitrary raw data.
3. Advanced Options (Node Options)
n8n provides powerful tools for handling complex situations:
-
Batching: If you have 1000 data items to send, this option helps to split them into smaller batches (e.g., 100 at a time) to avoid crashing the recipient's server.
-
Redirects: Automatically follow the new URL if the address changes.
-
Response: * Response Format: Do you want to receive the response in JSON format (for further processing), File (image/PDF), or Text ?
-
Never Error: Even if the server on the other side reports an error, n8n still considers the process complete (useful when you want to handle errors yourself).
-
-
Pagination: Extremely important! When the data is too large, the server only returns "Page 1". n8n will automatically "flip the page" to retrieve all the data for you.
-
Timeout: Limits the waiting time. If there is too little response time, n8n will automatically disconnect to prevent system crashes.
4. AI-specific options (Tool-only)
If you turn this Node into a Tool for an AI Agent , you can:
-
Optimize Response: Reduce the returned data (only including important fields) to save tokens and help the AI understand faster, without being overwhelmed by junk data.
5. The "Import cURL" Tip
If you read a service's API documentation and see they provide sample code in the form of a `cURL` curl ., you don't need to fill in each field manually. Just click the `Import cURL` button , paste that code, and n8n will automatically fill in all the parameters (Method, URL, Headers, Body) for you.
Here's some advice for you:
When starting out, always check the API documentation of the service you intend to connect to. Use the Execute Step node frequently to see the actual data returned before chaining to other nodes.
Would you like me to demonstrate a specific cURL command so you can try the "Import cURL" feature right away?