Some common problems with Exchange 2003 systems - Activesync and workarounds
TipsMake.com - The following article is synthesized based on many issues related to Exchange 2003 system and some supporting devices such as Apple's iPhones phone, Microsoft Windows Mobile, and most recently the device Tablet iPad when operating with Activesync.
Specifically, the system used in this test is based on Exchange Server 2003 Service Pack 2. In fact, Activesync works well with Exchange 2003 Service Pack 1, but with Service Pack 2 , everything is simple. and a lot easier. And to test, please open Exchange System Manager (Start> Programs> Microsoft Exchange> System Manager) , select Servers , right-click on your server system and select Properties :

In case you have not installed SP2, please download and install here. Next, make sure that TCP port 443 has been opened (and forwarded) in the firewall to Exchange's server, and we don't need to open any other ports to Activesync , because only TCP port 443 is needed. enough. You can check this condition on Exchange Server system through CanYouSeeMe service, if it is correct, you will see Success message when the port is opened and forwarded as required. If not, check your router device and reconfigure it accordingly.
Next, check the LAN Adapter Binding to make sure that the Exchange NIC device is at the top of the list: Start> Run> type ncpa.cpl> press Enter> Advanced> Advanced Settings> Connections:

Open IIS Manager (Start> Programs> Administrative Tools> Internet Information Services (IIS) Manager) , open the Web Sites> Default Web Site section, select the appropriate Virtual Directory > Properties and click the Directory Security tab :

For Exchange 2003 systems (not belonging to Small Business Server):
Exchange Virtual Directory:
Authentication = Integrated & Basic
Default Domain = NetBIOS domain name (eg company name, business name . no more than 15 characters)
Realm = yourcompany.com
IP Address Restrictions = Granted Access
Secure Communications = does not select the Require SSL section (very important)
Microsoft - Server - Activesync Virtual Directory:
Authentication = Basic
Default Domain = NETBIOS domain name (eg company name, business name . no more than 15 characters)
Realm = NETBIOS name
IP Address Restrictions = Granted Access
Secure Communications = select Require SSL and Require 128-Bit Encryption IS
With Exchange 2003 system (belongs to Small Business Server):
Exchange Virtual Directory:
Authentication = Integrated & Basic
Default Domain = NetBIOS domain name (eg company name, business .)
Realm = yourcompany.com
IP Address Restrictions = Granted Access
Secure Communications = select Require SSL IS (very important)
Microsoft - Server - Activesync Virtual Directory:
Authentication = Basic
Default Domain = NETBIOS domain name (eg company name, business .)
Realm = NETBIOS name
IP Address Restrictions = Granted Access
Secure Communications = does not select Require SSL and Require 128-Bit Encryption
Exchange - oma Virtual Directory:
Authentication = Integrated & Basic
Default Domain = NETBIOS domain name (eg company name, business .)
Realm = NETBIOS name name
IP Address Restrictions = Restricted to IP Address of Server
Secure Communications = does not select Require SSL and Require 128-Bit Encryption
OMA Virtual Directory:
Authentication = Basic
Default Domain = NETBIOS domain name (eg company name, business .)
Realm = NETBIOS name
IP Address Restrictions = Granted Access
Secure Communications = does not select Require SSL and Require 128-Bit Encryption
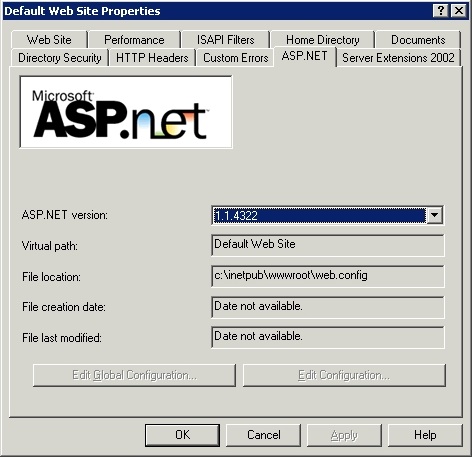
Note that the company name, business information above can be determined using the Command Prompt (Start> Run> cmd) , type the SET command and press Enter . The returned value USERDOMAIN is the information we need to find. Besides, ASP.NET should be set to version v 1.1 for all virtual directories in the list. If you do not see the ASP.NET tag and only version v 1.1 has been installed, there is no need to worry, in case you choose any other version v 1.1 , please change it to v 1.1.4322 :
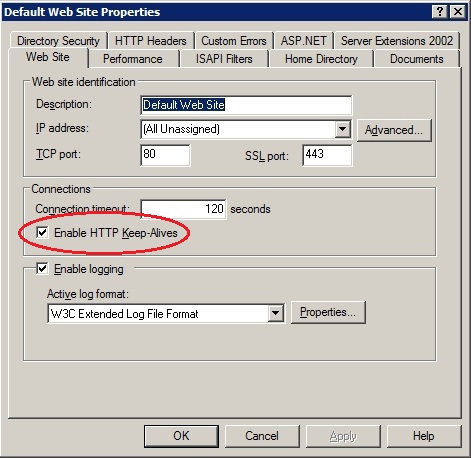
Besides, make sure that we have enabled and used the HTTP Keep - Alives feature , right-click the Default Web Site and select Properties , on the Web Site tab, in the Connections section, check the Enable HTTP Keep box. - Alives and OK :
Next, select Ignore Client Certificates below the IISADMPWD virtual directory ( Directory Security Tab> Edit Secure Communications ). Note that this virtual directory may not exist if you do not choose the ability to reset passwords through Outlook Web Access (OWA).
Some requirements on IPV6:
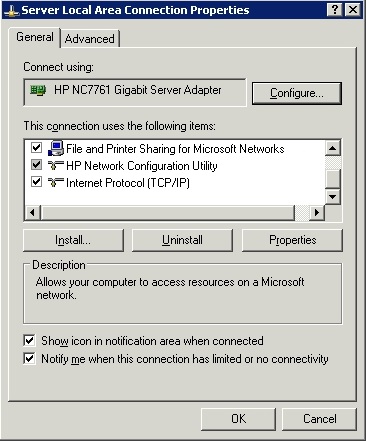
Make sure we do not choose to install IPV6 on the system, because otherwise it will become a factor that breaks the stability during Activesync operation ( Start> Run> type ncpa.cpl> press Enter ), Right-click Local Area Network Connection and select Properties , notice under the This Connection Uses section The Following Items for Internet Protocol (TCP / IP) v6, if the component appears here, select Uninstall and restart system:
Next, make sure the IP address for the Default Website is set to All Unassigned and use port 80 ( open IIS Manager> right-click Default Website> Properties> Advance ):
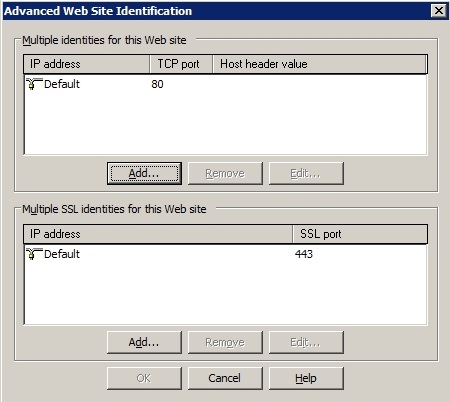
In case your default website uses all ports except 80, the system will not work. So if you change this value to use any program, switch back to value 80 or stop using Activesync ! Another point to note is that you should not use any Host Headers on the Default Website because it also affects Activesync . If the user makes any changes to IIS , it is necessary to reset all properties at this step ( Start> run> type IISRESET and press Enter ).
SSL Certificate:
In addition, make sure that the name name on the SSL certificate just installed must match the Fully Qualified Domain Name (FQDN) that we are using to connect to ActiveSync (for example, mail.microsoft.com ). To check, right-click the Default Web Site in IIS> Properties> Directory Security tab> click the View Certificate button:
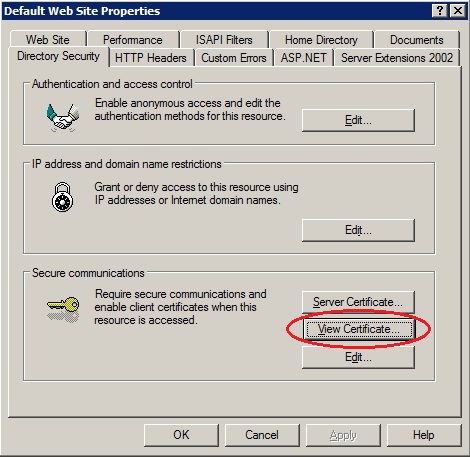
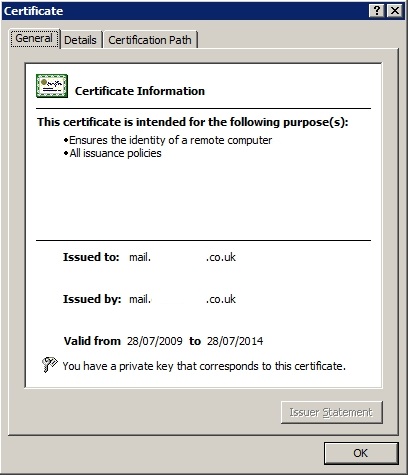
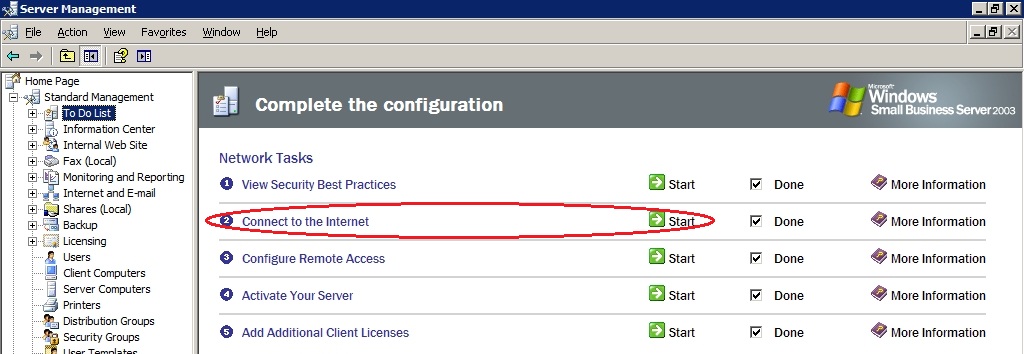
If you are using Small Business Server system and do not want to purchase SSL certificate from any 3rd party unit, please use Connect To The Internet Wizard again (Start> Server Management> To-Do List> Connect to the Internet):
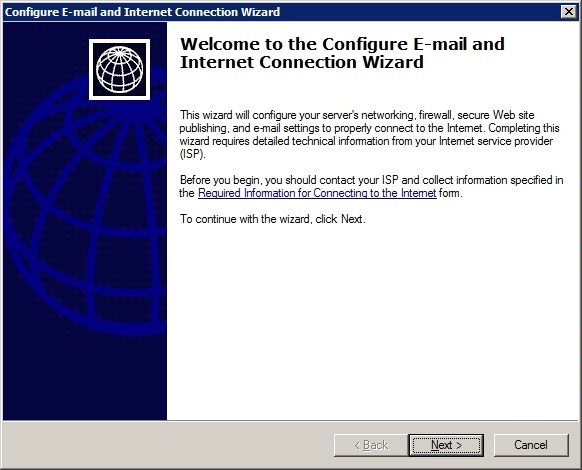
Click Next , if this process automatically detects the router device on the system, select No at this step:

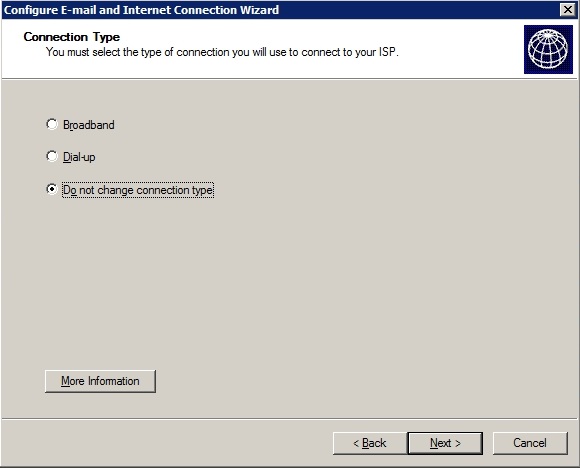
Select the section Do not change connection type and click Next :
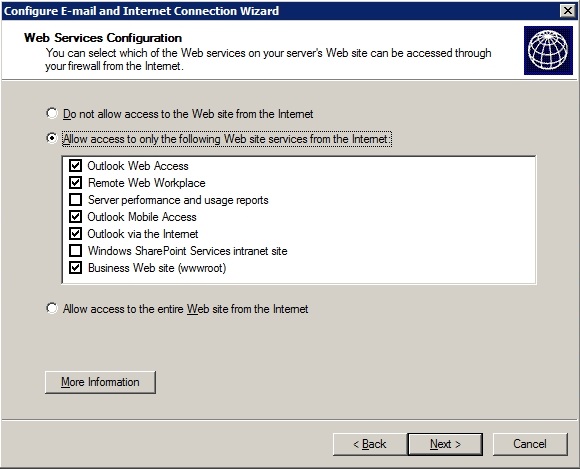
Leave the settings in the Web Services Configuration Settings section and continue to select Next :
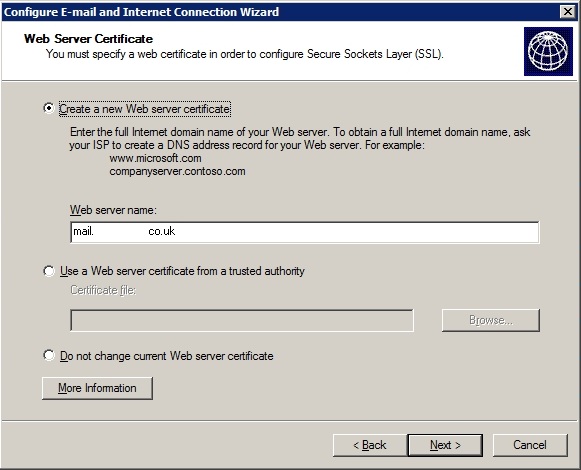
Select Create a new Web server certificate and enter the value in the Web server name section , for example mail.yourdomain.com and click Next :
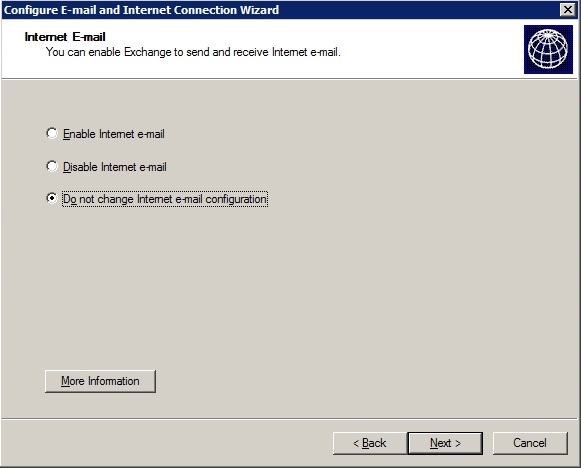
Continue as Do not change Internet e-mail configuration and Next :
And finally, Finish to finish this process:
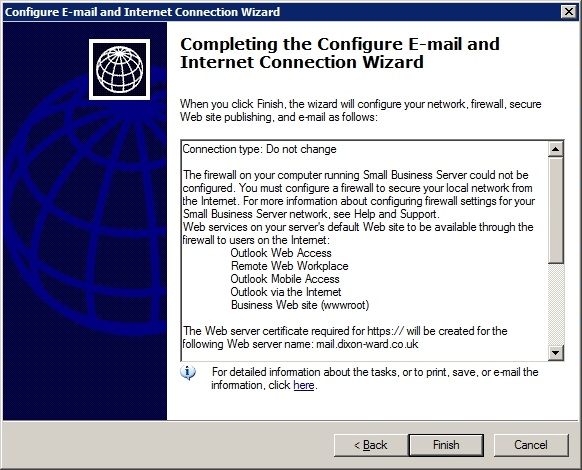
If you want to do the same thing on a Windows Mobile phone , it will be much simpler, Activesync will also be more adaptable and configurable, as well as buying SSL certificates . In case users create an SSL certificate themselves and use a Windows Mobile phone, they will have to install the SSL certificate on each device that they want to use with the Exchange 2003 server .
Some settings on Windows Mobile Phone or iPhone:
Email Address: email address
Server: any information on your certificate, such as mail.yourdomain.com
Domain: Your internal domain name, such as yourdomain.com (maximum of 15 characters)
Username: account information, such as User123
Password: login password
Description: any information used to describe the account
Check:
Once the user has installed SP2, check back by visiting here to make sure everything will work properly. This is an official Microsoft service, dedicated to supporting users to check the installation and configuration of Exchange:
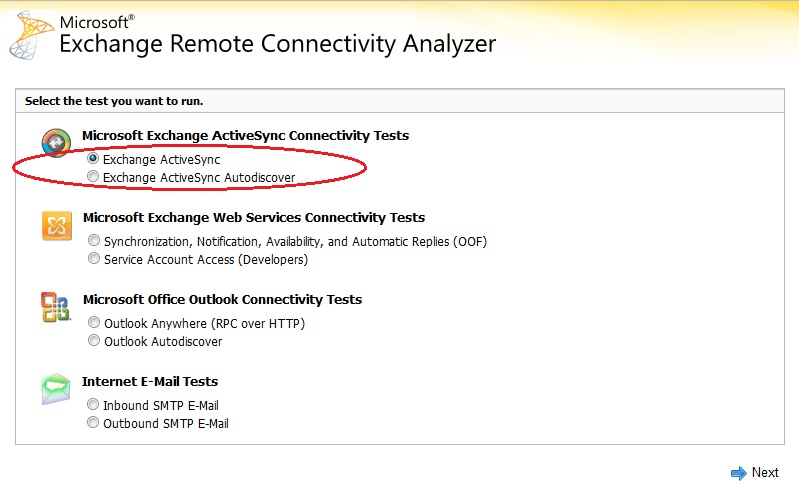
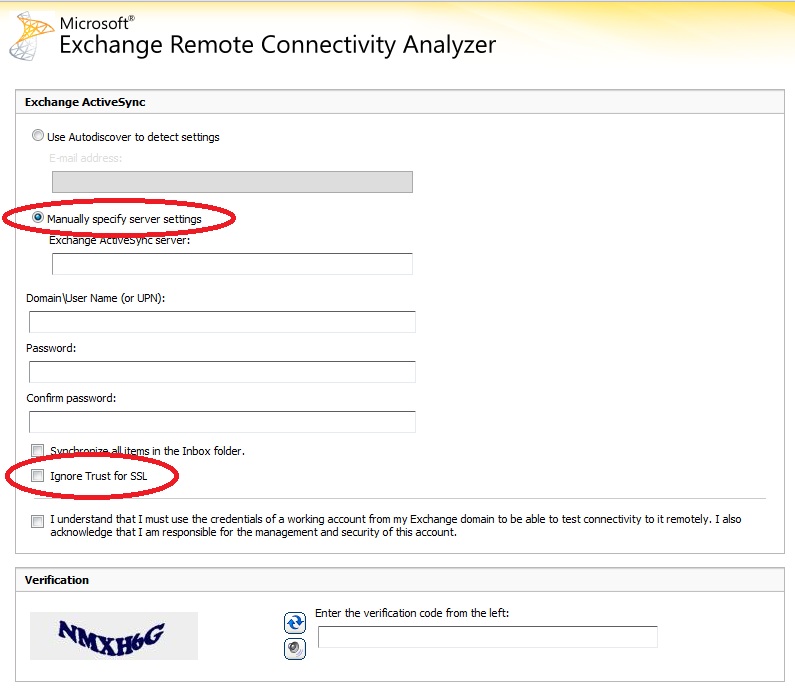
Please select the Specify Manual Server Settings section (note that Exchange 2003 does not have Autodiscover , so if an Autodiscover setting is used, an error will occur).
For Certificate SSL from 3rd party, we should not choose Ignore Trust for SSL. For Certificate SSL itself, check the Ignore Trust for SSL box:
In case you want to set up on your iPhone , download and use the free Activesync Tester support tool - which is used to determine if an error occurred during the installation process. Besides, you can use the PC version here.
Some common problems with Activesync and how to fix it:
The first rule to keep in mind is that if you make any changes to the settings of IIS , run the IISRESET command and then revisit https://testexchangeconnectivity.com/ to check.
- Activesync Error 0x86000108 : The process of setting up Activesync failed and the user sees error 0x86000108 on Windows Mobile phone. When you encounter this situation, please consult the following article carefully at Microsoft for confirmed accounts that have been granted access to % TEMP% folder.
- Application Event Log 3005 Errors : a lot of errors similar to 3005 can be solved by changing the Default Website Timeout value from 120 (default) to a larger value (eg 480 ) using IIS Manager . For Small Business Server 2003 users , please refer to the tutorial article below.
- Inconsistent Sync: in case you get a message about a data synchronization error - Synchronization from the device to an Exchange 2003 server , add the following Registry key:
HKEY_LOCAL_MACHINESYSTEMCurrentControlSetServicesMSExchangeISVirusScan ProactiveScanning REG_DWORD 1
- HTTP 401 Error: when the user encounters this error during the checkout process with https://testexchangeconnectivity.com/, it may be because the Username or Password information is incorrectly registered, besides the possibility of a conflicting IP address Suddenly setting up virtual directories (see Prerequisites section in IIS Settings ).
- HTTP 403 Error: make sure that Forms Based Authentication feature is not enabled in Exchange Virtual Server section of Exchange Protocols (Exchange System Manager> Servers> Protocols> HTTP> Exchange Virtual Server properties> Settings) . In this case, please refer to the following tutorial to create exchange - oma virtual directory.
- There are quite a few special cases, that is Activesync system still works even if an error occurs: ' An HTTP 403 forbidden response was received. Gặp câu trả lời để có sẵn không rõ. Body is:
HTTP / 1.1 403 Forbidden
. To solve this problem thoroughly, please open Exchange System Manager> Global Settings> Mobile Services Properties> Device Security> Exceptions, then assign your account to this list of Exceptions .
- On the other hand, we can also solve this 403 error by using the command:
eseutil / p
eseutil / d and
isinteg -s servername -fix -test alltests
- Check if Activesync is enabled on your server system: http://technet.microsoft.com/en-us/library/bb125073(EXCHG.65).aspx
- Check Activesync has been enabled for each user account: http://technet.microsoft.com/en-us/library/aa997489(EXCHG.65).aspx
- HTTP 500 Error : in case you still cannot make Activesync work or the system continuously reports an HTTP 500 Error , apply Method 2 in Microsoft Knowledgebase Article KB883380 tutorial . The key to this process is that users must delete the Exchange Virtual Directories section in the IIS Metabase , then re-initialize them. While deleting the Exchange virtual Directories , remember to delete the Exchange - OMA virtual directory if available.
- If after you follow the KB 883380 tutorial and the problem is still not resolved, Activesync is still not "active" and the HTTP 500 Error notification error will still show up frequently, please continue with the following method. here:
- Disable the function of Forms Based Authentication - Exchange HTTP Protocol (if currently enabled)
- Remove SSL settings from the Exchange IIS virtual directory
- Use iisreset command
- Check Activesync without SSL mechanism. If successful, right-click on Exchange Virtual Directory and select Tasks> Save Configuration to a file , name the file Exchange and save to Desktop .
- Using regedit , right-click My Computer and select Export , name the file EntireRegistry and save the backup file on the Desktop .
- In Registry Editor, look for the HKLM System CurrentControlSet Services MasSync Parameters link and delete the ExchangeVDir key in the right pane. Then, close this Registry Editor window.
- Right-click on the default website and select New> Virtual Directory , point to Desktop and select the Exchange.xml file saved in the previous step, click the Read File button, and select Exchange from Select a configuration to import , then click Next OK . Next, select Create a new virtual Directory, name the item exchange - oma and click OK .
- After that, right-click on the Exchange-OMA virtual directory that you just created and click Browse , we will see OWA displayed.
- Open the Registry Editor again and assign the file ExchangeVDir back to String Value , then change the value to read / exchange-oma , and close this Registry Editor window.
- Enable SSL mechanism and Encryption request 128 - Bit in Exchange Virtual Directory to use security features.
- Activate and use Forms Based Authentication (if desired) in Exchange> Protocols> HTTP section
- Make sure we have Integrated Authentication selected in the Exchange Virtual Directory section
- Check that Exchweb virtual directory does not use SSL
- Use iisreset command
- Check all Activesync again.
- If all of the above steps do not help us fix the situation, check the log file - Event ID 9667 - Source MSExchangeIS . Please consult the MS KB820379 article carefully.
- For some cases where the error is quite special and extremely difficult to understand with HTTP 500 error, let's check again the whole setting of EXCHWEB Virtual Directory in IIS Manager :
Exchweb Virtual Directory:
Authentication = Anonymous
Secure Communications = does not choose Require SSL and Require 128-Bit Encryption
Exchweb> Bin folder:
Authentication = Basic
Secure Communications = does not choose Require SSL and Require 128-Bit Encryption
Exchweb Directory> Bin> Auth:
Authentication = Anonymous
Secure Communications = does not choose Require SSL and Require 128-Bit Encryption
Exchweb Bin Auth USA Directory:
Authentication = Basic
Secure Communications = does not choose Require SSL and Require 128-Bit Encryption
Once again, please note that when you apply any changes to IIS settings, use the IISRESET command, then check again with https://testexchangeconnectivity.com/. Good luck!
You should read it
- ★ Transfer system from Windows Small Business Server 2003 to SBS 2011
- ★ Mobile messaging in Exchange 2003 - Part 3: Installation, administration, and use of Microsoft Exchange Server ActiveSync Web Administration tool
- ★ Transfer from Linux Mail Server to Exchange Server 2007 (Part 1)
- ★ Discover advanced features of Exchange ActiveSync in Exchange Server 2007 SP1
- ★ Microsoft stopped supporting Windows Server 2003 in the middle of next year