Install and configure Mailman (with Postfix) on Debian Squeeze
Mailman is a free open source software used to manage mailing lists, it can be used in managing email discussions and newsletters..
TipsMake.com - Mailman is a free open source software used to manage mailing lists, it can be used in managing email discussions and newsletters. Characteristics are integrated with web pages, helping users to easily manage their accounts, automatically handling return locations, filtering content, spam . Therefore Mailman is currently a management program. The most popular and most widely used mailing list on the Internet.
The following article will show you how to install and configure Mailman on a Debian Squeeze server with a Postfix mail server.
1. Some notes
In the illustration below we will configure a virtual server with hostname lists.example.com - the place to install Mailman. lists.example.com is also the right part of the mailing list of mail addresses configured in Mailman. As such, mail sent to an email list will address @ lists.example.com .
Also, because your hostname will be different, you need to adjust it accordingly. Also make sure your hostname always exists in DNS.
Mailman can be used with multiple mail servers (such as Postfix, Exim, Sendmail, Qmail). In this case we choose Postfix. If you follow this tutorial, be sure to have an active Postfix installation.
2. Install Mailman and Apache
First we need a web server so Mailman can approve it. Here we choose Apache. Mailman and Apache can be installed using the command line:
apt-get installmailman apache2
You will receive the following questions / announcements:
Languages to support:
Missing the list site
Mailman needs a so-called "site list", which is the list from which password reminders and như được gửi qua từ.Tên danh này cần thiết tạo trước mailman sẽ bắt đầu.Để tạo danh sách, chạy "newlist mailman" and follow the instructions on-screen.Ghi nhớ, bạn cần phải bắt đầu thưman sau đó, dùng /etc/init.d/mailman start.
Mailman comes with the Apache /etc/mailman/apache.conf configuration file, we will copy to /etc/apache2/sites-available/mailman.conf :
cp /etc/mailman/apache.conf /etc/apache2/sites-available/mailman.conf
Then open /etc/apache2/sites-available/mailman.conf .
en/etc/apache2/sites-available/mailman.conf
. and add the vhost configuration below for the file:
[.] ServerName lists.example.com DocumentRoot / var / www / lists ErrorLog /var/log/apache2/lists-error.log CustomLog /var/log/apache2/lists-access.log combined Options FollowSymLinks AllowOverride None Alias / pipermail / / var / lib / mailman / archives / public / Alias / images / mailman / / usr / share / images / mailman / ScriptAlias / admin / usr / lib / cgi-bin / mailman / admin ScriptAlias / admindb / usr / lib / cgi-bin / mailman / admindb ScriptAlias / confirm / usr / lib / cgi-bin / mailman / confirm ScriptAlias / create / usr / lib / cgi-bin / mailman / create ScriptAlias / edithtml / usr / lib / cgi-bin / mailman / edithtml ScriptAlias / listinfo / usr / lib / cgi-bin / mailman / listinfo ScriptAlias / options / usr / lib / cgi-bin / mailman / options ScriptAlias / private / usr / lib / cgi-bin / mailman / private ScriptAlias / rmlist / usr / lib / cgi-bin / mailman / rmlist ScriptAlias / roster / usr / lib / cgi-bin / mailman / roster ScriptAlias / subscribe / usr / lib / cgi-bin / mailman / subscribe ScriptAlias / mailman / / usr / lib / cgi-bin / mailman / ScriptAlias / / usr / lib / cgi-bin / mailman / listinfo
The second line from the bottom to " ScriptAlias / / usr / lib / cgi-bin / mailman / listinfo " is optional; This line works when you visit http://lists.example.com/ and will be redirected to http://lists.example.com/listinfo . This is especially meaningful in case you don't have any files served in the document root / var / www / lists .
Next create the document root / var / www / lists , enable the vhost lists.example.com configuration and restart Apache.
mkdir / var / www / lists
a2ensite mailman.conf
/etc/init.d/apache2 restart
Because here we are using a vhost ( lists.example.com ), so we need to adjust the variables in /etc/mailman/mm_cfg.py :
en /etc/mailman/mm_cfg.py
[.] DEFAULT_URL_PATTERN = 'http:///% s /' [.] DEFAULT_EMAIL_HOST = 'lists.example.com' [.] DEFAULT_URL_HOST = 'lists.example.com' [.]
3. Configure Postfix
Now we will configure Postfix, first run the command:
postconf -e 'relay_domains = lists.example.com'
postconf -e 'mailman_destination_recipient_limit = 1'
Then open /etc/postfix/master.cf .
en/etc/postfix/master.cf
. and make sure you have the following lines:
[.] mailman unix - nn - - pipe flags = FR user = list argv = / usr / lib / mailman / bin / postfix-to-mailman.py $ {nexthop} $ {user} [.]
Next we combine the lists.example.com domain name to mailman: transport. To do this depends on your Postfix configuration. For example, if you have set up your server according to this guide the transport will be stored in the MySQL database. In most settings, the file / etc / postfix / transport is used for creating transports. Here are two common cases:
a. Transport in a MySQL database
The transport case is stored in the transport table of the mail- named MySQL database. To create the required transport, log into MySQL:
mysql -u root -p
And run the following MySQL command:
USE mail;
INSERT INTO `transport` (` domain`, `transport`) VALUES ('lists.example.com', 'mailman:');
quit;
Then restart Postfix:
/etc/init.d/postfixrestart
b. Transports in / etc / postfix / transport
If you do not have transport in the MySQL database, you can use / etc / postfix / transport . In this case, you need to set up the transport as follows:
postconf -e 'transport_maps = hash: / etc / postfix / transport'
Open / etc / postfix / transport .
vi/ etc / postfix / transport
. and add the following command:
lists.example.com mailman:
Next run:
postmap -v / etc / postfix / transport
Finally restart Postfix:
/etc/init.d/postfix restart
4. Create Mailman mailing list
Before we can use Mailman, we need to create a mailing list named mailman; - this is mandatory, otherwise Mailman will not be able to boot.
newlist --urlhost = lists.example.com --emailhost = lists.example.com mailman
In most cases, --urlhost and --emailhost are not necessary because our vhost is already named lists.example.com , and we also have it in /etc/mailman/mm_cfg.py ( DEFAULT_EMAIL_HOST and DEFAULT_URL_HOST ). But if you want to make sure Mailman uses the correct hostname, you can use:
  root @ server1: ~ # newlist --urlhost = lists.example.com --emailhost = lists.example.com mailman Enter the email of the person running the list: Initial mailman password: To kết thúc tạo danh sách danh sách bạn, bạn cần phải tạo danh sách thư mục của bạn, bạn cần sửa tạo danh sách thư mục, bạn phải sửa your / etc / aliases (or
  equivalent) file by adding the following lines, and có thể chạy the
  `newaliases' program:

  ## mailman mailing list
  mailman: "| / var / lib / mailman / mail / mailman post mailman"
  mailman-admin: "| / var / lib / mailman / mail / mailman admin mailman"
  mailman-bounces: "| / var / lib / mailman / mail / mailman bounces mailman"
  mailman-confirm: "| / var / lib / mailman / mail / mailman confirm mailman"
  mailman-join: "| / var / lib / mailman / mail / mailman join mailman"
  mailman-leave: "| var / lib / mailman / mail / mailman leave mailman"
  mailman-owner: "| / var / lib / mailman / mail / mailman owner mailman"
  mailman-request: "| / var / lib / mailman / mail / mailman request mailman"
  mailman-subscribe: "| / var / lib / mailman / mail / mailman subscribe mailman"
  mailman-unsubscribe: "| / var / lib / mailman / mail / mailman unsubscribe mailman"

  Enter hit to notify mailman owner . root @ server1: ~ #
Now open / etc / aliases and add the alias that you see in the output of the newlist command (manually done for each list you can create new):
[.] ## mailman mailing list mailman: "/ var / lib / mailman / mail / mailman post mailman" mailman-admin: "/ var / lib / mailman / mail / mailman admin mailman" mailman-bounces: "/ var / lib / mailman / mail / mailman bounces mailman" mailman-confirm: "| / var / lib / mailman / mail / mailman confirm mailman" mailman-join: "| / var / lib / mailman / mail / mailman join mailman "mailman-leave:" | / var / lib / mailman / mail / mailman leave mailman "mailman-owner:" | / var / lib / mailman / mail / mailman owner mailman "mailman-request:" | / var / lib / mailman / mail / mailman request mailman "mailman-subscribe:" / var / lib / mailman / mail / mailman subscribe mailman "mailman-unsubscribe:" / var / lib / mailman / mail / mailman unsubscribe mailman "
Whenever you modify / etc / aliases, you need to run the following command:
newaliases
/etc/init.d/postfix restart
You can then start Mailman:
/etc/init.d/mailmanstart
root @ server1: ~ # /etc/init.d/mailman start
Starting Mailman master qrunner: mailmanctl.
root @ server1: ~ #
5. Use Mailman
From here we can use Mailman's web interface to manage it (with one exception - whenever you create a new mailing list, you need to add new alias to / etc / aliases from the line. command).
The admin interface can be accessed on http://lists.example.com/admin - on this page you will find a link to the Mailman mailing list you created in section 4 :

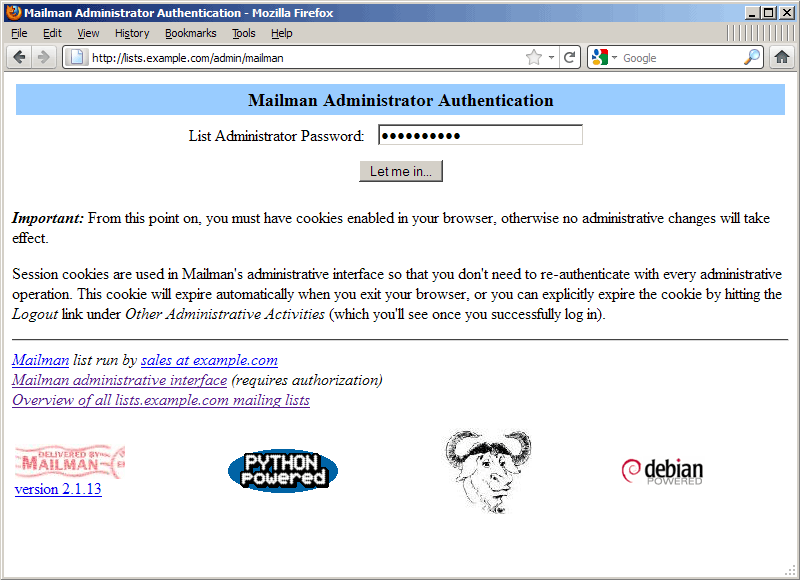
If you click on the link ( http://lists.example.com/admin/mailman ) you will be redirected to the Mailman list management page. But first need to log in with your password (specified in the newlist command).
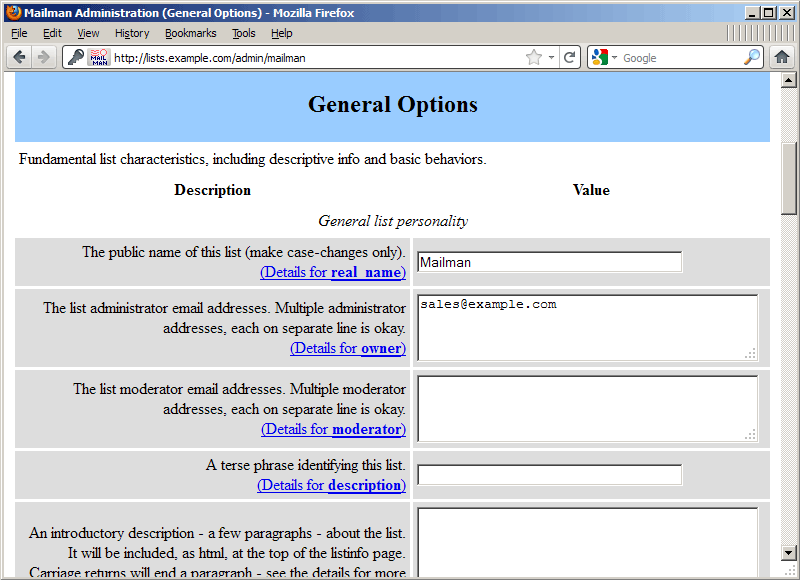
On the management page, the functions will be fully listed:

Replace the basic set of lists .
. or neutralize new notifications ( http://lists.example.com/mailman/admindb/mailman ):

Users can go to http://lists.example.com/listinfo to get the entire mailing list .:

. or go to http://lists.example.com/listinfo/mailman to enter a specific list (eg Mailman ) where they can register:

Admin can also create new lists directly on the web interface (on http://lists.example.com/create ), but first need to run:
mmsitepassmailman_password
If you do not run the above command you will receive an error message ' Error: You are not authorized to create new mailing lists ' when initializing the mailing list (it is recommended that you use the same password - mailman_password - like the newsite command in section 4 ) .
To create a new list via the web interface, specify the name for it and the owner's email address. Enter the password for this list or select Yes in the Auto-generate initial list password section for the web interface to create for you.

At the bottom of the page, specify the password you use with the mmsitepass command; then click Create List :

Once successful, you will see the following page:

A notification will be sent to the email you declare above and instructions to correct / etc / aliases to create a complete list:
Danh sách danh sách `testlist1 'đã được tạo qua một qua-web-interface. In order to complete the activation of this mailing list, the true / etc / aliases file (or equivalent) must be updated. The program `newaliases' may also have to be trembling. Here are the entries for / etc / aliases file: testlist1: "/ var / lib / mailman / mail / mailman post testlist1" testlist1-admin: "| / var / lib / mailman / mail / mailman admin testlist1" testlist1- bounces: "/ var / lib / mailman / mail / mailman bounces testlist1" testlist1-confirm: "| / var / lib / mailman / mail / mailman confirm testlist1" testlist1-join: "/ var / lib / mailman / mail / mailman join testlist1 "testlist1-leave:" / var / lib / mailman / mail / mailman leave testlist1 "testlist1-owner:" | / var / lib / mailman / mail / mailman owner testlist1 "testlist1-request:" | / var / lib / mailman / mail / mailman request testlist1 "testlist1-subscribe:" / var / lib / mailman / mail / mailman subscribe testlist1 "testlist1-unsubscribe:" | / var / lib / mailman / mail / mailman unsubscribe testlist1 "
Accordingly, you open / etc / aliases .
vi/ etc / aliases
. and add new aliases:
[.] ## testlist1 mailing list testlist1: "/ var / lib / mailman / mail / mailman post testlist1" testlist1-admin: "| / var / lib / mailman / mail / mailman admin testlist1" testlist1-bounces: "/ var / lib / mailman / mail / mailman bounces testlist1" testlist1-confirm: "| / var / lib / mailman / mail / mailman confirm testlist1" testlist1-join: "/ var / lib / mailman / mail / mailman join testlist1 "testlist1-leave:" / var / lib / mailman / mail / mailman leave testlist1 "testlist1-owner:" | / var / lib / mailman / mail / mailman owner testlist1 "testlist1-request:" | / var / lib / mailman / mail / mailman request testlist1 "testlist1-subscribe:" / var / lib / mailman / mail / mailman subscribe testlist1 "testlist1-unsubscribe:" | / var / lib / mailman / mail / mailman unsubscribe testlist1 "
then run the command:
newaliases
/etc/init.d/postfix restart
Instead of using Mailman's web interface, you can use the newlist command to create new lists as shown in Section 4 .
newlist--urlhost = lists.example.com --emailhost = lists.example.com testlist2
  root @ server1: ~ # newlist --urlhost = lists.example.com --emailhost = lists.example.com testlist2 Enter the email of the person running the list: Initial testlist2 password: To finish tạo danh sách danh sách bạn your / etc / aliases (or
  equivalent) file by adding the following lines, and có thể chạy the
  `newaliases' program:

  ## testlist2 mailing list
  testlist2: "| / var / lib / mailman / mail / mailman post testlist2"
  testlist2-admin: "| / var / lib / mailman / mail / mailman admin testlist2"
  testlist2-bounces: "| / var / lib / mailman / mail / mailman bounces testlist2"
  testlist2-confirm: "| / var / lib / mailman / mail / mailman confirm testlist2"
  testlist2-join: "| / var / lib / mailman / mail / mailman join testlist2"
  testlist2-leave: "| / var / lib / mailman / mail / mailman leave testlist2"
  testlist2-owner: "| / var / lib / mailman / mail / mailman owner testlist2"
  testlist2-request: "| / var / lib / mailman / mail / mailman request testlist2"
  testlist2-subscribe: "| / var / lib / mailman / mail / mailman subscribe testlist2"
  testlist2-unsubscribe: "| / var / lib / mailman / mail / mailman unsubscribe testlist2"

  Enter enter to notify testlist2 owner . root @ server1: ~ #
vi / etc / aliases
[.] ## testlist2 mailing list testlist2: "/ var / lib / mailman / mail / mailman post testlist2" testlist2-admin: "| / var / lib / mailman / mail / mailman admin testlist2" testlist2-bounces: "/ var / lib / mailman / mail / mailman bounces testlist2" testlist2-confirm: "| / var / lib / mailman / mail / mailman confirm testlist2" testlist2-join: "/ var / lib / mailman / mail / mailman join testlist2 "testlist2-leave:" / var / lib / mailman / mail / mailman leave testlist2 "testlist2-owner:" | / var / lib / mailman / mail / mailman owner testlist2 "testlist2-request:" | / var / lib / mailman / mail / mailman request testlist2 "testlist2-subscribe:" / var / lib / mailman / mail / mailman subscribe testlist2 "testlist2-unsubscribe:" | / var / lib / mailman / mail / mailman unsubscribe testlist2 "
newaliases
/etc/init.d/postfix restart
Finally, the email address of a new list is always in the @ lists.example.com form, such as testlist1@lists.example.com or testlist2@lists.example.com .
6. Reference links:
Mailman: http://www.gnu.org/s/mailman/index.html
Debian: http://www.debian.org/