This is because each theme has its own slide layout and built-in background graphics. You can edit these layouts with the Slide Master feature. Once you learn how to use the Slide Master view, users will be able to customize the entire slide show with just a few clicks.
What Is Slide Master View?
Slide Master is a special feature in PowerPoint that allows quickly modifying slides and their layout in a presentation. From there, the slide master can be edited (this will affect every slide in the presentation). Users can also modify individual slide layouts, which will change any slide using those new layouts.
For example, let's say you find a theme you like but are unhappy with some of the slide layouts. You can use Slide Master to customize the layout the way you want.

In Slide Master view, the Slide Master tab appears first on the Ribbon, but users can still access commands on different tabs as usual.
Instructions for Using Slide Master
Whether you're making big changes or just a few small adjustments to your slides, Slide Master can help you create a consistent, professional presentation with minimal effort. You can use Slide Master to change anything in your presentation, but here are some of the most common uses.
- Modify background : Slide Master makes it easy to customize the background for all slides at once. For example, you can add a watermark or logo to each slide in your presentation or modify an existing background graphic.
- Rearrange placeholders : If you often rearrange placeholders on each slide, users can save time by rearranging them in the Slide Master. When adjusting one of the layouts in Slide Master, all slides with that layout will change.
- Customize text formatting : Instead of changing the text color on each individual slide, users can use Slide Master to change the text color on all slides at once.
- Create unique slide layouts : If you want to create a presentation that looks different from regular PowerPoint themes, users can use Slide Master to create their own layouts. Custom layouts can include background graphics and your own placeholders.
Some changes to the overall presentation, like customizing fonts and theme colors, can be done quickly from the Design tab.
How to Change All Slides
If you want to change something on all slides, you can edit the Slide Master. In the example This guide we will add a logo to each slide.

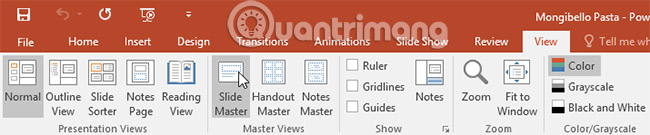
1. Select the View tab, then click the Slide Master command.
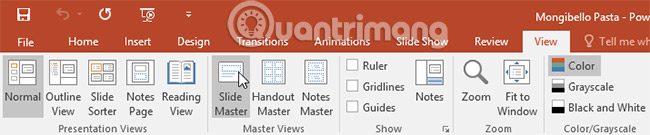
2. The presentation will switch to Slide Master view and the Slide Master tab will be selected on the Ribbon.
3. In the left navigation pane, scroll up and select the first slide. This is Slide Master .

4. Make the desired changes to the Slide Master. In the example This guide we will insert Mongibello's logo into the slide.
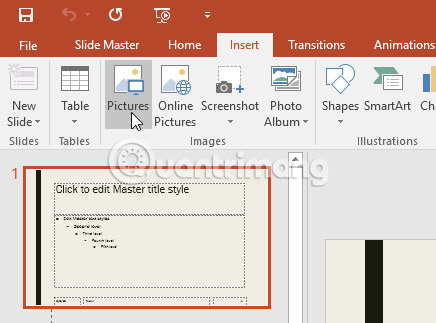
5. Move, resize or delete objects in the slide as necessary. In the example, the logo size will be changed and moved to the bottom right corner.
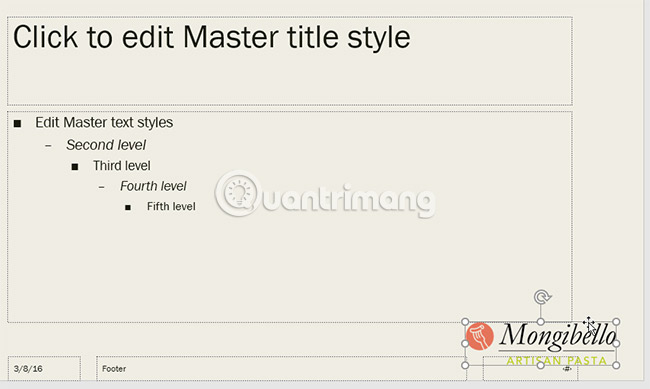
6. When finished, click the Close Master View command on the Slide Master tab.

7. The change will appear on all slides of the presentation.
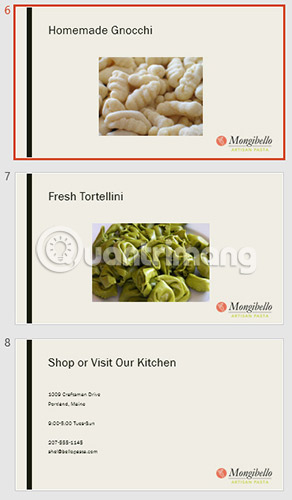
When making changes to the Slide Master, users should review their presentation to see how it affects each slide. Maybe some slides will have problems. In the next section, the article will show you how to fix this by individually customizing the slide layout.
Customize Slide Layout
Users can use Slide Master to modify any slide layout in their presentation. It's easy to make small adjustments like adjusting background graphics or more significant changes like rearranging or removing placeholders. Unlike slide masters, changes to slide layouts will only be applied to slides that use that layout in the presentation.
How to Customize an Existing Slide Layout
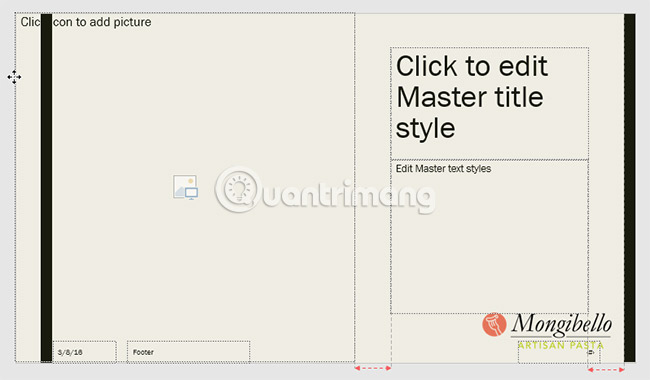
In this example, the newly added logo is hidden behind the image in Picture with Caption Layout . We will customize this layout to make room for the logo.
1. Open Slide Master.
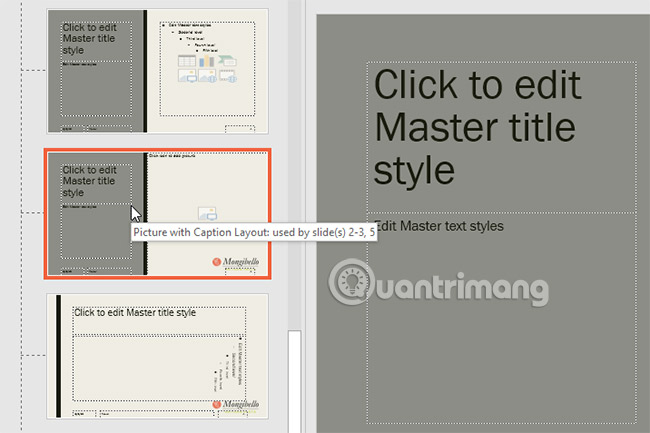
2. Locate and select the desired layout in the left navigation pane. You can hover over each layout to see which slides are currently using that layout in your presentation.
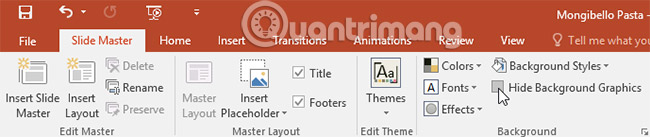
3. In some layouts, background graphics may be hidden. To display graphics, uncheck Hide Background Graphics .
4. Add, move or delete any object as desired. In this example, we will remove the gray PowerPoint background.
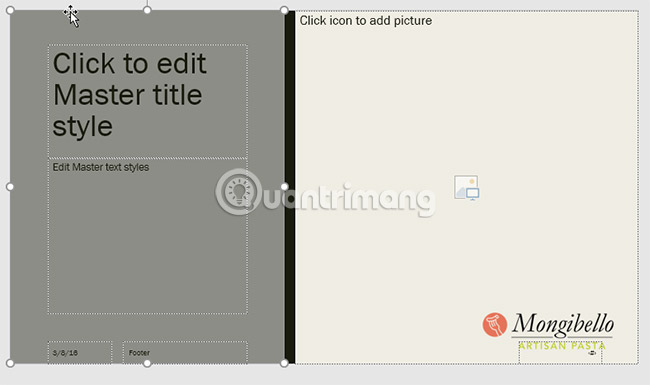
5. If you want to change the arrangement of the placeholders, users can move, resize or delete any of them. In the example, we will move the placeholder for the text and black bar to the right and the placeholder for the image to the left.
6. When finished, click the Close Master View command on the Slide Master tab.

7. All slides using the layout will be updated.

You can also move placeholders on the master slide. Note this will also move placeholders across multiple slide layouts at once. However, some slide layouts may still need to be adjusted manually.
Customize Text Formatting
Users can also customize text formatting from Slide Master view, including font, text size, color, and alignments. For example, if you want to change the font for every title placeholder in your presentation, you can modify the main title style on the slide master.

Each title placeholder is connected to the main title style on the slide master. For example, take a look at the slides before changing the title font.
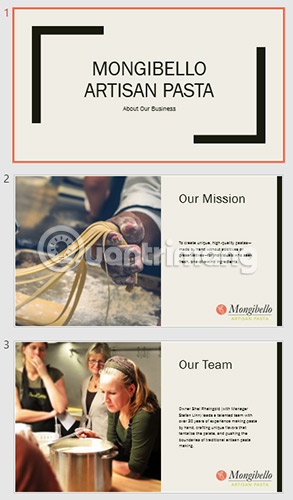
Now let's look at the same slides after changing the title font.

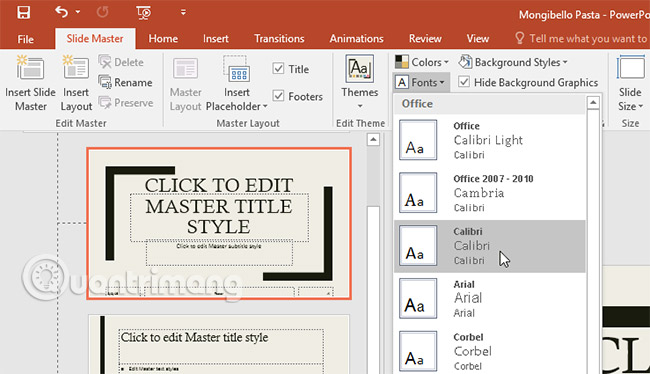
Instead of customizing individual placeholders, users can change the theme's font. From the Slide Master tab, click the Fonts command in the Background group, then select the desired fonts.
Create a New Slide Layout
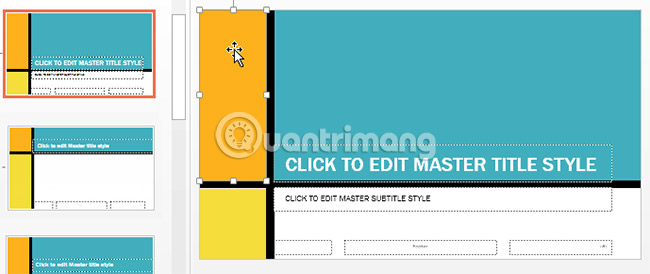
One of Slide Master's most powerful features is creating new slide layouts. This is an easy way to add fun and unique slide layouts to an existing theme. You can even use this feature to design a completely new theme, like in the example below.
How to Insert a New Slide Layout
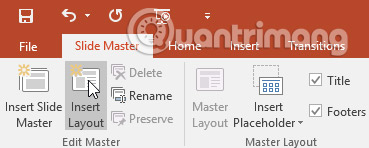
1. Navigate to Slide Master view . From the Slide Master tab, click the Insert Layout command.
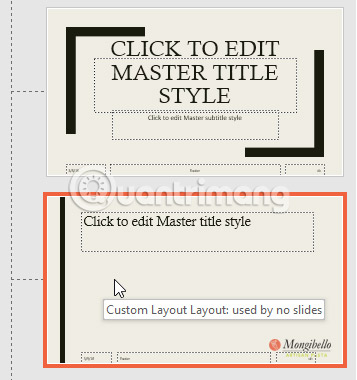
2. The new slide layout will appear.
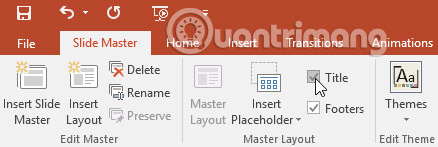
3. The layout will include header and footer placeholders by default. Click the Title and Footers boxes in the Master Layout group to enable and disable these placeholders.
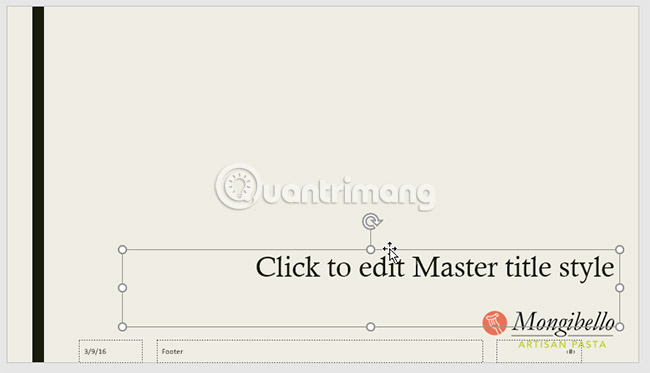
4. You can now add background graphics, shapes, and images to the slide layout. You can also move, adjust, and delete existing placeholders. In our example, we will move the title placeholder to the lower right corner. The text is also changed to align to the right margin instead of the left margin.
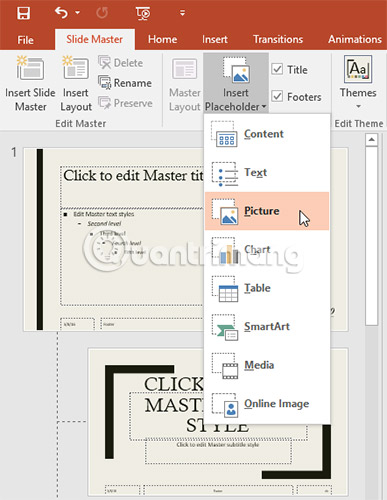
5. To add a new placeholder, click the bottom of the Insert Placeholder command, then select the desired type. In this example, we will use Picture.
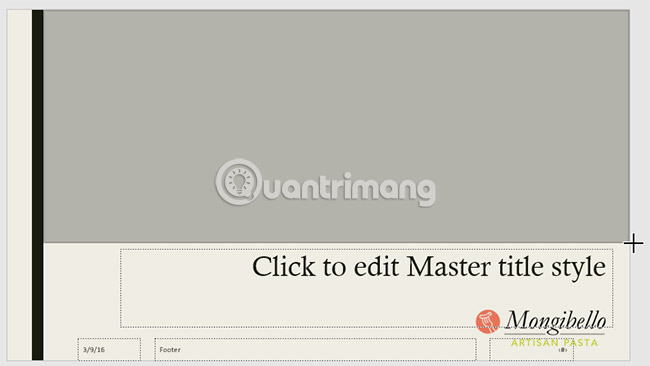
6. Click and drag to draw the placeholder on the slide.
How to Rename a Custom Layout
When finished designing a custom layout, users should give it an easy-to-find name.
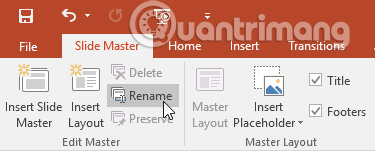
1. From Slide Master view, select the desired layout, then click the Rename command.
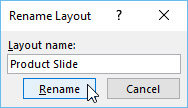
2. A dialog box will appear. Enter the desired name, then click Rename.
How to Use Custom Layouts
Once you've created a custom slide layout, it's easy to add a new slide with that layout or apply it to an existing slide.
1. If you are currently in Slide Master view, click the Close Master View command on the Slide Master tab.
2. From the Home tab, users can insert a new slide with a custom layout or apply it to an existing slide. In this example, we will select Layout and apply the new style to slide 6.

3. The custom slide layout will be applied.

PowerPoint also allows adding new placeholders to existing slide layouts.
Use Custom Layouts in Other Presentations
When you modify a slide layout or slide master in Slide Master view, you're actually creating a customized version of the current theme. If you want to apply this theme to other presentations, you will need to save it.
How to Save a Theme
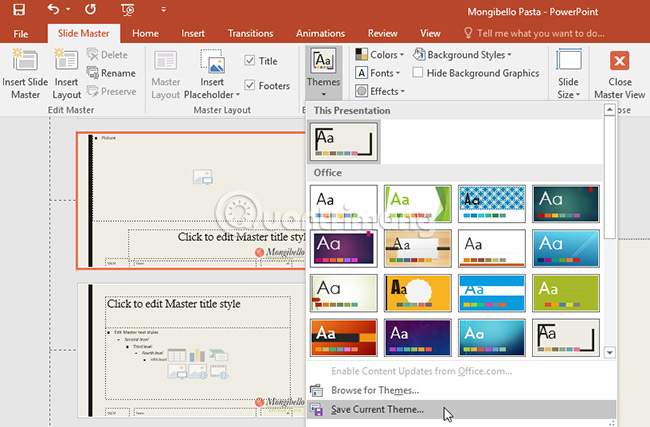
From the Slide Master tab, click the Themes command, then choose Save Current Theme from the drop-down menu.
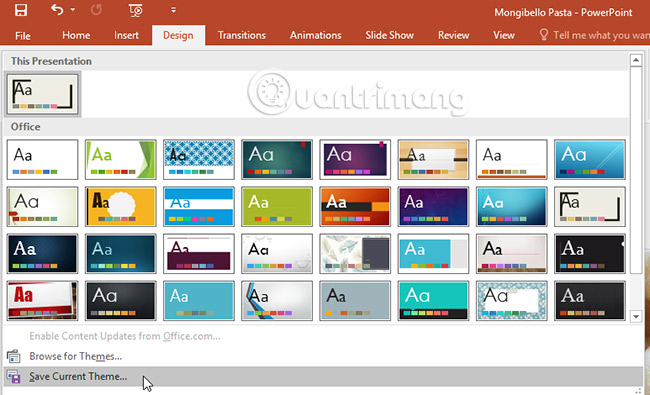
If you're not in Slide Master view, you can save the theme from the Design tab. Just click the drop-down arrow in the Themes group, then select Save Current Theme .


Reader Comments 0
Sign in with email or Google to join the discussion.