MS Access - Lesson 29: Summary of chapter 7
Access is based on the Windows environment when it comes to printing. This chapter introduced you to the basics of printing in Access.
Access is based on the Windows environment when it comes to printing. This chapter introduced you to the basics of printing in Access. The knowledge you gain in this chapter will help you a lot when working with the following chapters on printing reports.
Before moving on to chapter 8, make sure you understand the following:
• Access allows you to use any type of printer that can be used with Windows. Many existing printing options will depend on the type of printer.
• To change the printer you are using, select Page Setup from the File menu or click your Page setup tool or Setup button. The options in the Page Setup dialog box allow you to specify how you want the information printed.
• You can use the Page Setup dialog box to specify the type of paper, where it is located, how to orient paper and page margins.
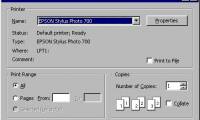
• Access allows you to print a lot of table content easily. To make, select or display the table. Then, choose Print from the File menu or click your mouse on the Print tool.
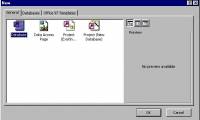
• You can print an easy report that describes as a database object, such as a table. To do so, select Analyze from the Tools and Documenter menu from the submenu results.
• Print Preview is a feature that allows you to view printed data on the screen before you send data to the printer.
In Chapter 8, you will learn how to create a simple reporting structure with Access.
Was this article helpful?
Your feedback helps us improve.
Related Articles
 MS Access 2003 - Lesson 37: Summary of chapter 92 minutes read
 MS Access 2003 - Lesson 1: Chapter 1: Terminology Access8 minutes read
 MS Access 2003 - Lesson 5: Chapter 2: Access Learning in 1 hour6 minutes read
 MS Access 2003 - Lesson 11: Chapter 3: Customizing components26 minutes read
 MS Access 2003 - Lesson 25: Chapter 7: Printing tables7 minutes read
 Ms Access 2003 - Lesson 14: Chapter 4: Creating another database2 minutes read
Reader Comments 0
Sign in with email or Google to join the discussion.