Making Spring cards with Photoshop (Part 3)
A Spring petal with wishes and a couple of boys and girls' wishes is very meaningful in Tet days. Only in simple steps with Photoshop can you design yourself a satisfactory card.
Review section 1 and part 2
A Spring petal with wishes and a couple of boys and girls' wishes is very meaningful in Tet days.
Only in simple steps with Photoshop can you design yourself a satisfactory card.
Open Photoshop and do the following:
1. First we will draw a common frame for the head and body for the girl and the boy.
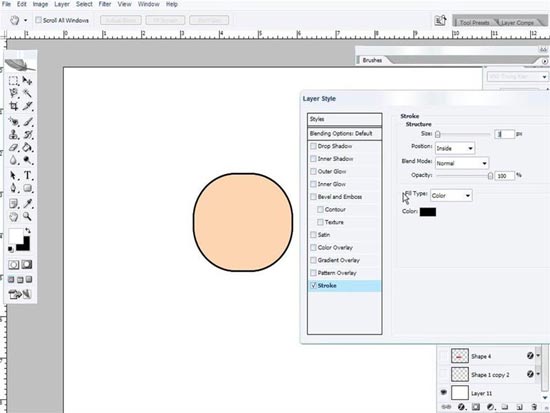
+ Using Rounded rectangle tool , radius = 80, draw a rounded rectangle with skin color (color code fcd5b2), right click / blending options , click on the tab named Stroke , with the parameters: Size: 3 and black , we get the following picture
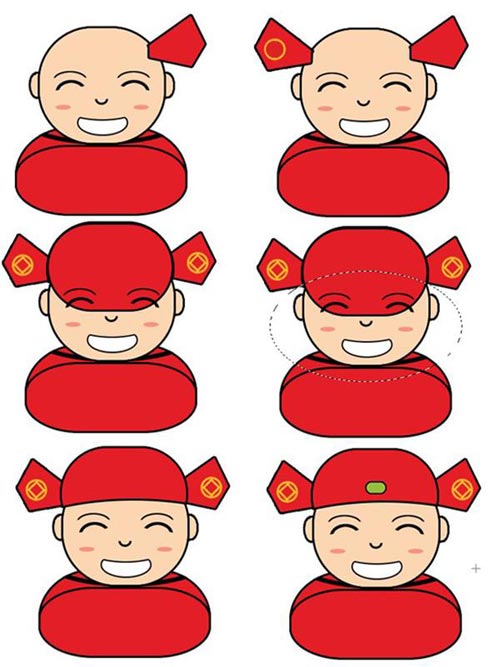
+ Similarly, we can draw 2 ears. To draw the nose eye simply, use the elliptical marquee tool to create a circular selection, then go to the edit / stroke with black, 2 pixels thick, then create a new selection and erase the excess. to create eyebrows. Our eyes and nose also draw in the same way with a wall thickness of about 3-4 pixels.

+ With the tools, select the ellipse, the paint bucket tool and the Stroke part in the blending options , we can continue to draw the mouth, cheeks, hands and body according to the steps in turn. as shown (the color of the blush has the color code f69382, the red shirt has the color code e31e26)

2. To draw the boy, we alternately add wings, hats, pearls on the hat in the order of the wings - hats - pearls like the following (the pattern of coins drawn by drawing a yellow circle with the code color fcbb28 2pixel thickness, then draw a square that is inside also with that yellow, then right / free transform and rotate the square to a 45 degree angle, while the emerald color is blue, color code 99bd3c)
We can draw more sleeves and arms with a pentool and a rectangular marquee tool with a color code (color code fcd5b2), and a sleeve with ff5d64 color code as follows

3. To draw the girl, use the boy's head, hands and body, draw more hair, sideburns and headbands for the same girl, follow these steps:

4. Then we can use the gradient tool and the peach blossom or apricot to decorate the picture.
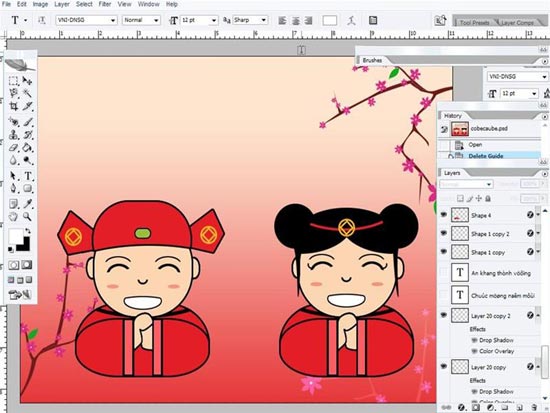
You can use calligraphic fonts to add arbitrary greetings by selecting the background and pressing T (shortcut) and typing the greeting above. So, complete a simple but meaningful card at the beginning of Spring.
Was this article helpful?
Your feedback helps us improve.
Related Articles
 Making Spring cards with Photoshop (Part 2)2 minutes read
 Make Spring cards with Photoshop4 minutes read
 Instructions for using Photoshop CS6 (Part 5): Create christmas cards with snowflakes on a red background6 minutes read
 Instructions for using Photoshop CS6 (Part 7): Creating Christmas cards with Christmas balls on a Stylish background15 minutes read
 Close-up of the screen coordinates to the charm of the spring-producing robots1 minutes read
 How to make Valentine's cards like candy2 minutes read
Reader Comments 0
Sign in with email or Google to join the discussion.