Table of Contents
This guide provides a practical overview of Make Videos, Photo Albums with Windows Movie Maker, including its main features, benefits, limitations, and important considerations.
Detailed instructions on how to create video from images using Windows Movie Maker software.
Step 1: You need to download and install the Windows Movie Maker software.
Step 2: After the installation is complete, to run the program, select Start, enter the keyword Windows Movie Maker into the Search programs and files section, and select the program.
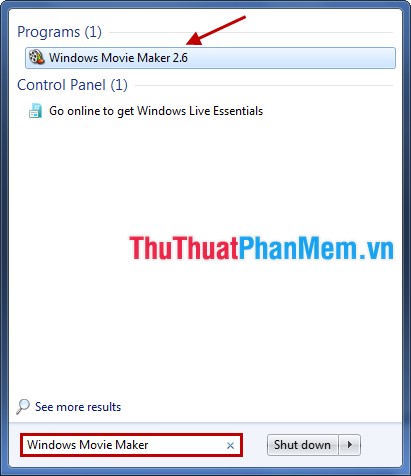
The program interface is as follows:

Step 3: Add photos to the video.
1. Select Import pictures .
2. The Import File dialog box appears, select the images you want to create the video (press Ctrl + A if you want to select all the images in the folder) and then click Import .
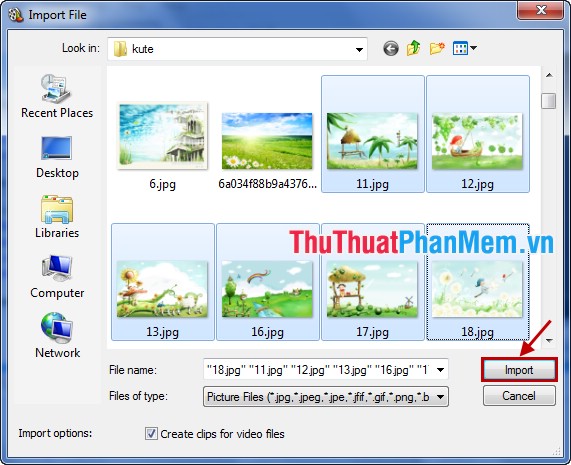
3. After Importing the image will be displayed in the program, to add to the video you click on the image, hold and drag the image to the bottom as shown below:

4. Similarly, you add as many images as you like and arrange the images that appear in the video from left to right.

Step 4: Add music to the video.
1. Select Import audio or music .

2. Select the music file, the music file will be displayed on the program interface. You choose Show Timeline to display the detailed framework.
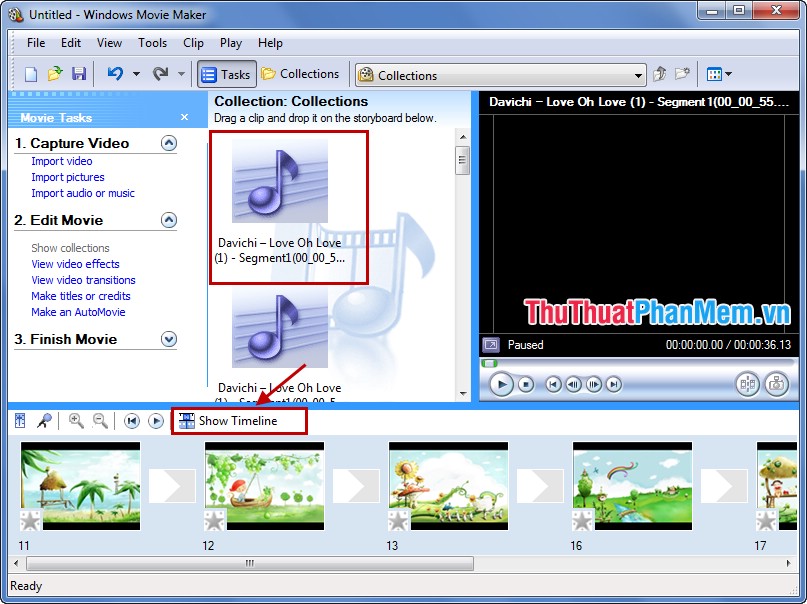
3. Hold down and drag the music file down to the Audio / Music section .
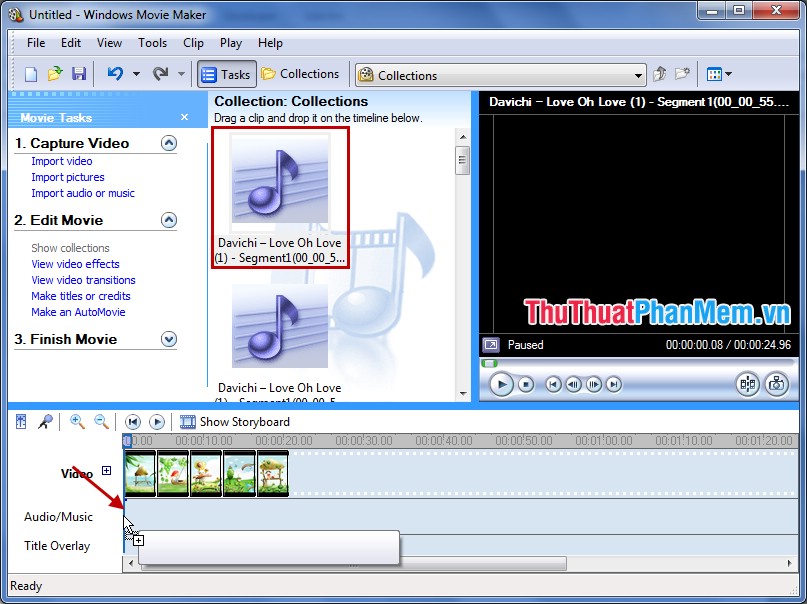
4. Click Show Storyboard to return to the main interface.
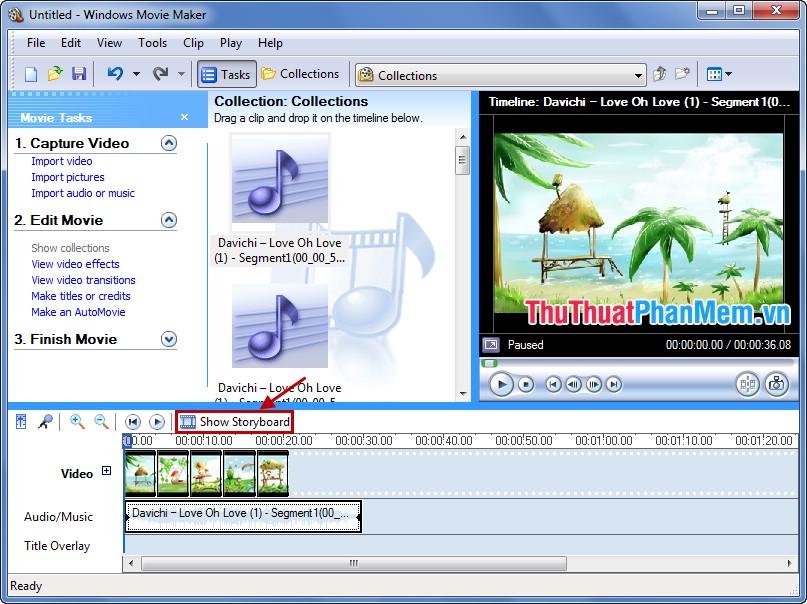
Step 5: Create effects for images.
In the Edit Movie section, select View video effects .
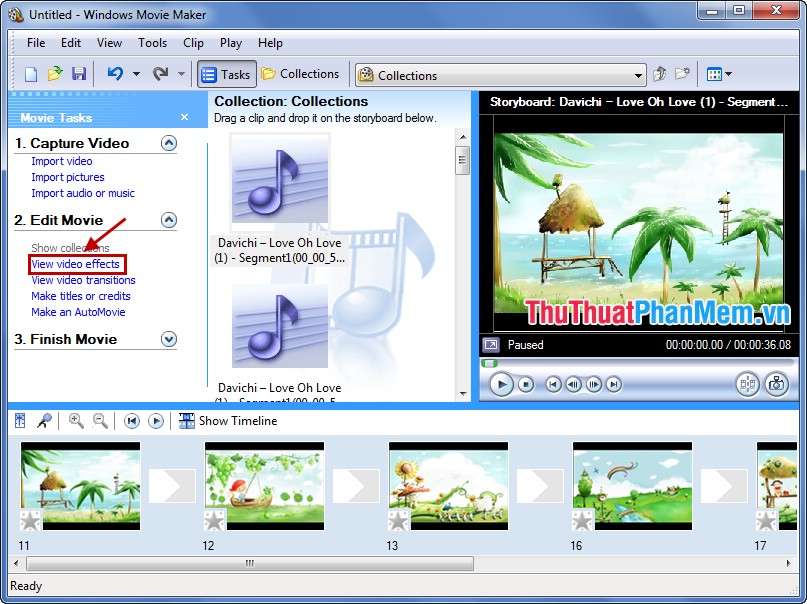
The effect appears, you select the effect for the image by clicking the image, holding and dragging down the star-shaped position in the image and release the mouse as shown below:
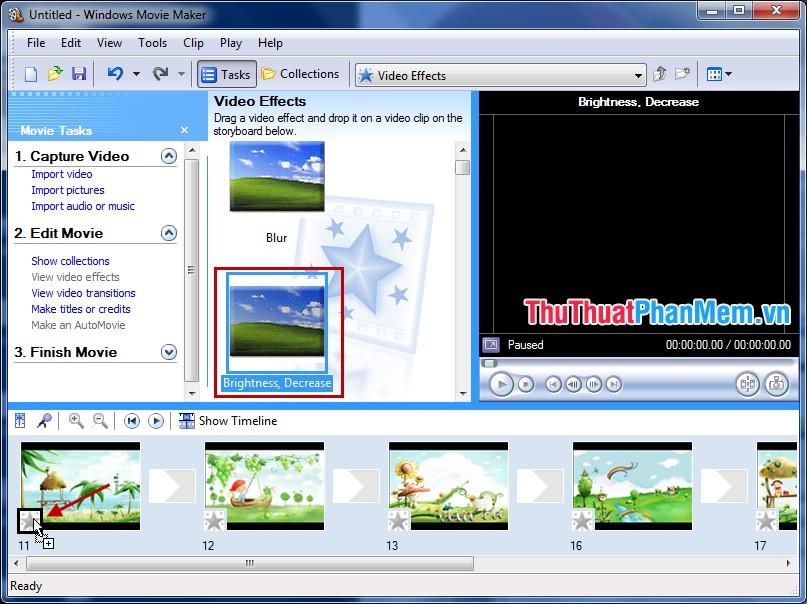
Do the same with other photos and other effects.
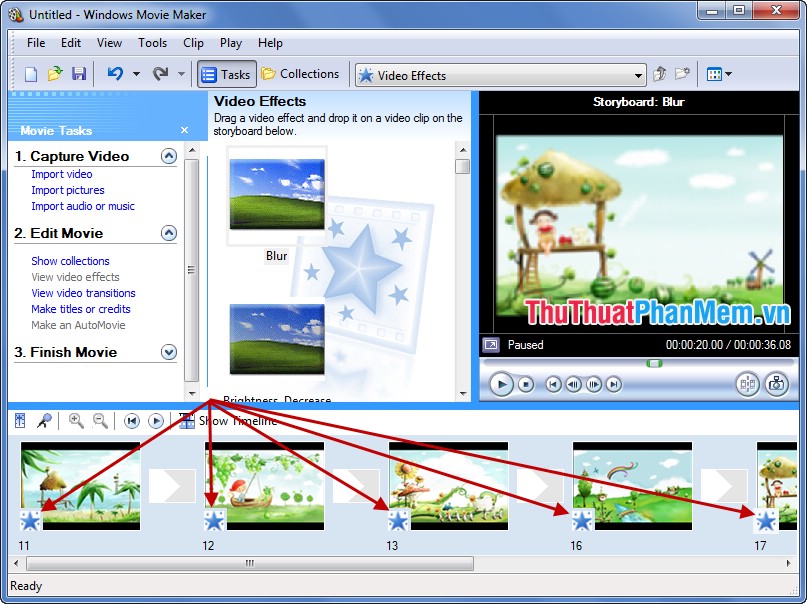
Step 6: Add transitions between images.
Select View video transitions in Edit Movie .
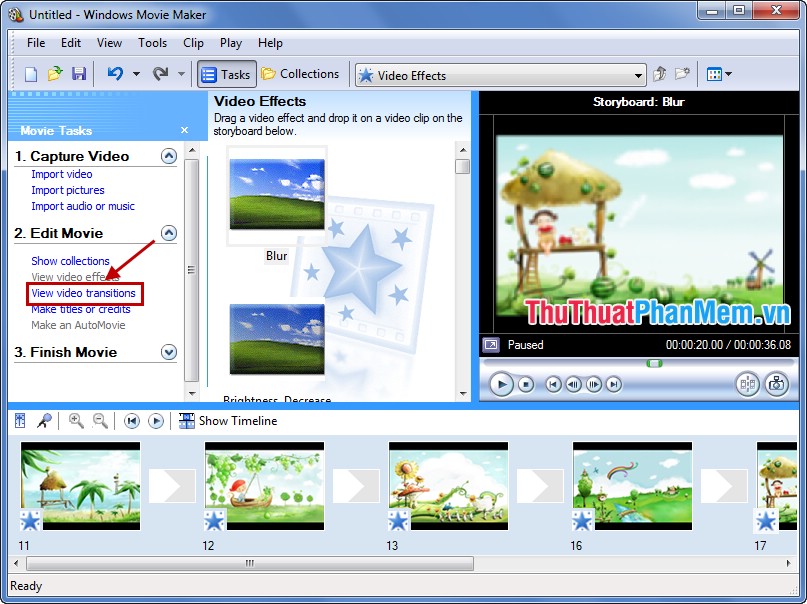
Transition effect appears, you also press and hold the effect down position rectangle between two images as shown below:
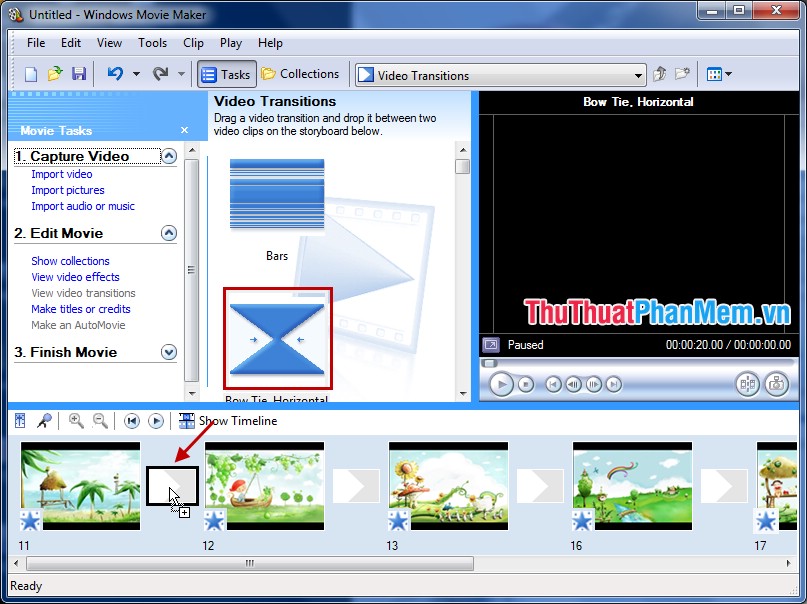
Do the same to the end of the image, you may not set the transition effect between the images.
Step 7: Add a title for the video.
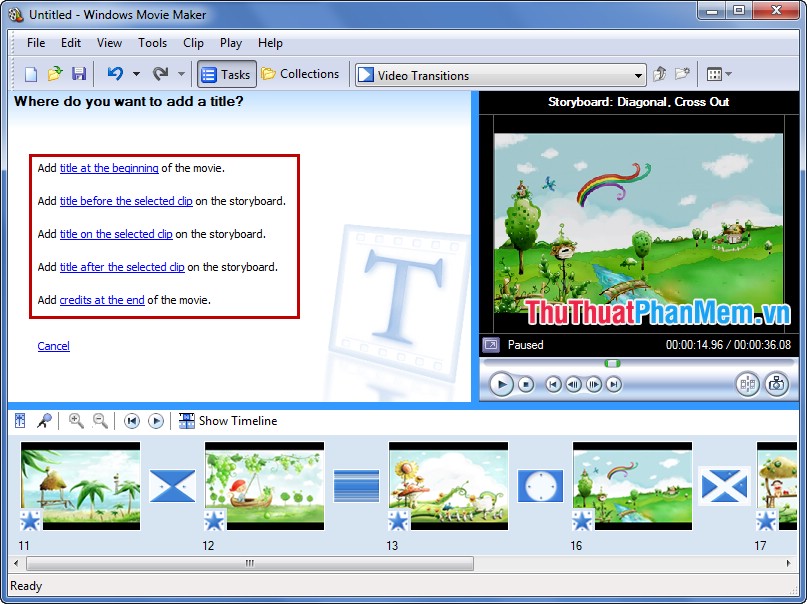
You choose Make titles or credits in Edit Movie .

You choose where to insert the word:
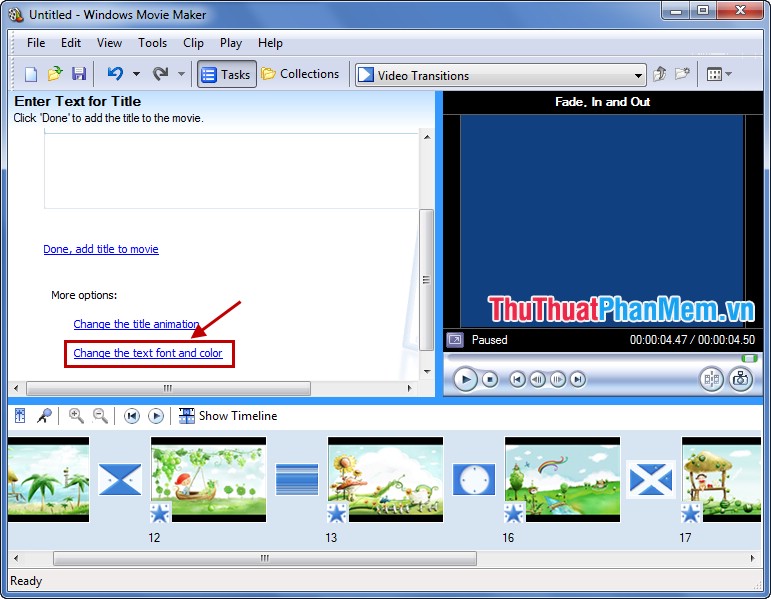
Enter text in the box:

Change the font, font size or background you choose Change the text font and color .
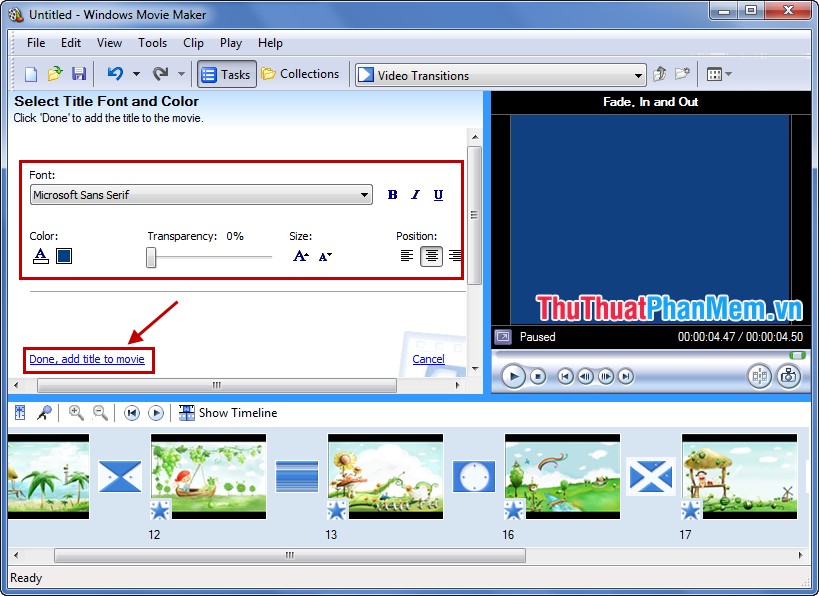
In the Select Title Font and Color section :
- Font: choose the font.
- BIU icon: choose a font style.
- Color: choose a background color.
- Transparency: transparency of words.
- Size: font size.
- Position: position letters appear (left, middle, right).
Once completed, select Done, add title to movie .
Step 8: Export the newly created video.
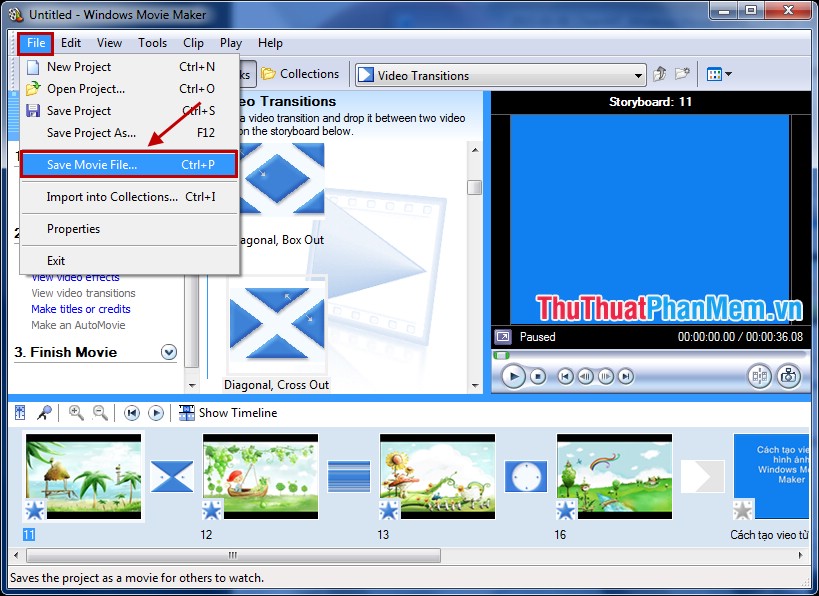
You choose File -> Save Movie File (or Ctrl + P key combination ).
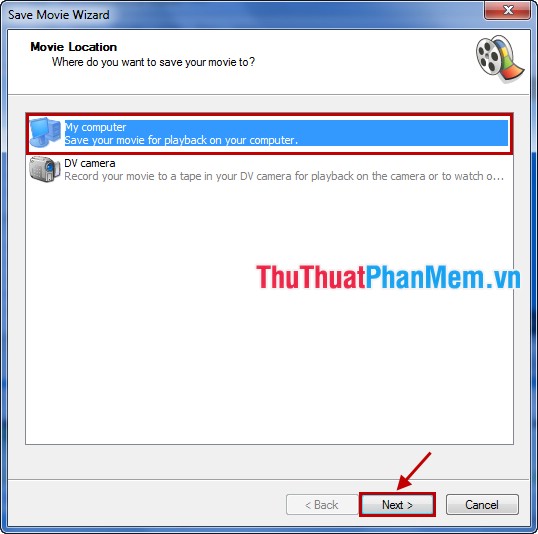
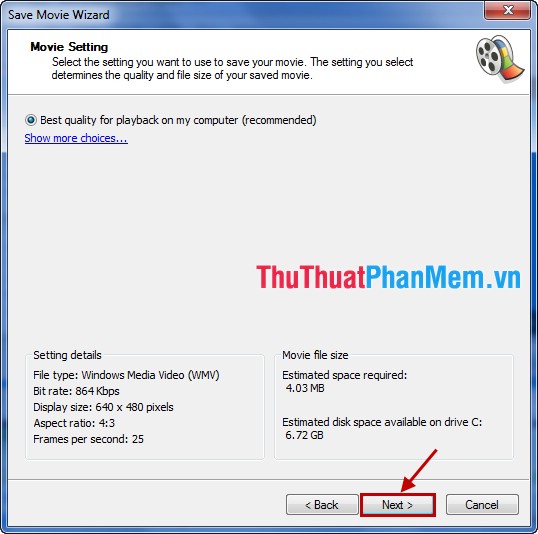
Next choose a location to save the video and click Next .
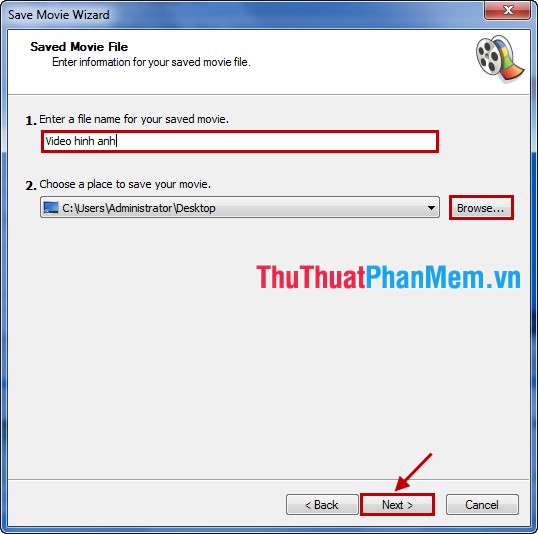
Name the video in the Enter a file name for your saved movie section , click Browse in the Choose a place to save your movie section, and select the directory to save the video to. Click Next to continue.
Continue to click Next .
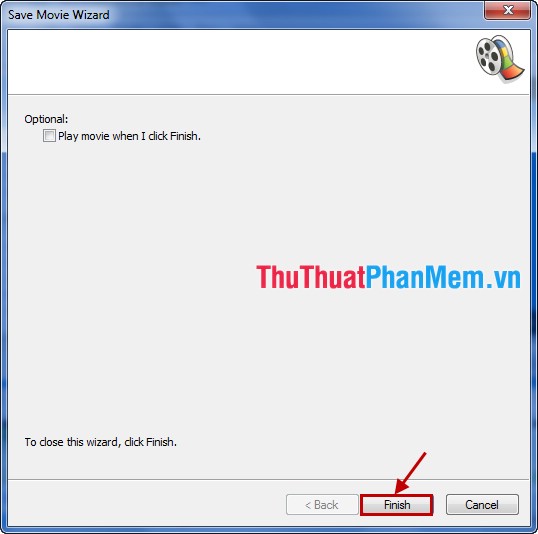
After the process is complete, click Finish to finish.
So you've finished making videos from pictures with Windows Movie Maker. With Windows Movie Maker, you can save images as videos with your favorite music easily. Good luck!
FAQ
What should I know about Make Videos, Photo Albums with Windows Movie Maker?
Focus on the key features, requirements, limitations, and practical use cases explained in this guide.
How do I get the best results with Make Videos, Photo Albums with Windows Movie Maker?
Follow the recommended steps, use current software or information, confirm compatibility, and review settings before major changes.
Are there any risks or limitations?
Potential limitations depend on compatibility, data quality, cost, privacy, support, and how the product or method is used.
Related Articles
 How to Rotate the Video in Reverse, Tilt with Windows Movie Maker6 minutes read
 Click: How to Make a Slideshow with Windows Movie Maker6 minutes read
 Music: How to Create a Video in Windows Live Movie Maker5 minutes read
 Choose: How to Use Story Remix4 minutes read
 Click: How to Use Windows Movie Maker14 minutes read
 How to Make a Scary Movie on Windows Movie Maker3 minutes read
Reader Comments 0
Sign in with email or Google to join the discussion.