Create advanced Panorama images with Microsoft Image Composite Editor
TipsMake.com will continue to introduce how to create advanced Panorama photos with the free utility Microsoft Image Composite Editor
QTM - In the previous post, TipsMake.com introduced you how to create Panorama photo with Live Photo Gallery program . Now, we continue to show you how to create advanced Panorama photos with the free Microsoft Image Composite Editor utility.
Microsoft Image Composite Editor download path
Begin
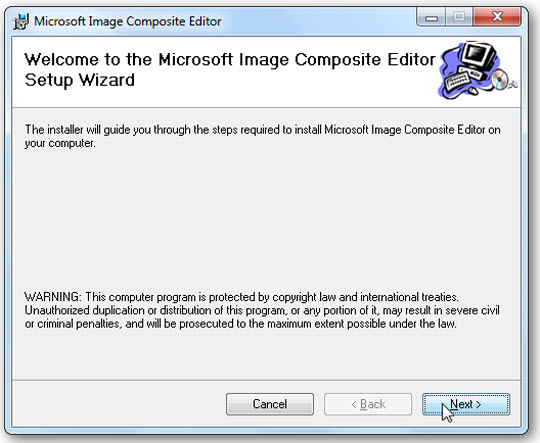
First, you need to download the Microsoft Image Composite Editor version suitable for your operating system (Windows XP, Vista and 7, 32 or 64 bit). Then proceed to the normal installation:
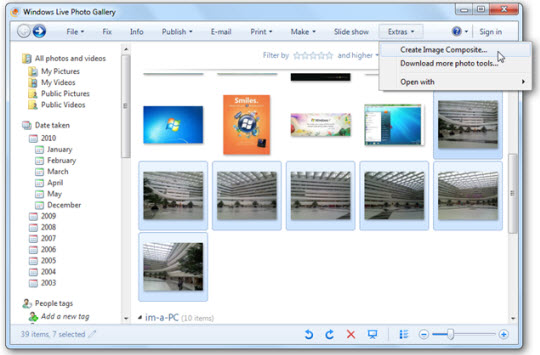
After successfully installing Microsoft Image Composite Editor, you will see the program automatically integrates with Live Photo Gallery. Open Live Photo Gallery, select some sample elements, click on the Extras > Create Image Composite tool:
Or you can do this directly in the Windows Explorer window by right-clicking on the pictures and selecting Stitch Images . :

Or more simply, start Image Composite Editor and drag and drop images into the main work window, the program will automatically analyze and combine those photos together. Through this feature, we have realized the difference in how to work, faster speed, more functions than other panorama applications such as Live Photo Gallery:

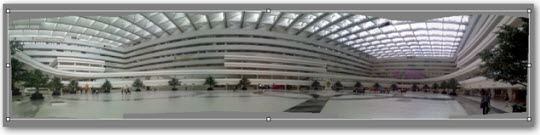
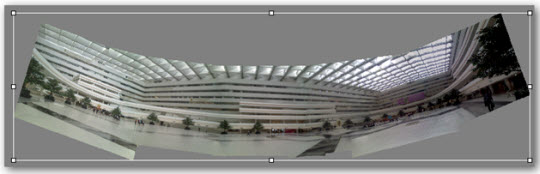
In a few seconds, you will get a panorama in the preview window preview:
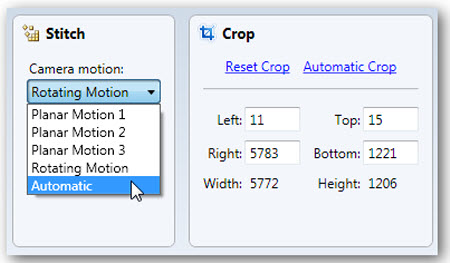
Looking down at the window is to select the views, change how the pictures are stitched together. Or you can choose to automatically change the frame size with the Automatic Crop tool:
This is the sample after changing the Camera Motion view to Camera Motion 2 :
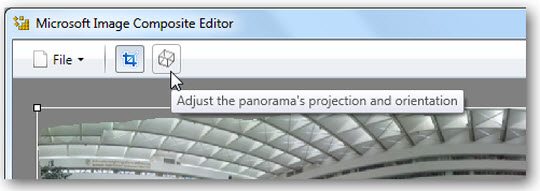
But, to bring the most realistic and vivid look possible to the photo, you should use the Adjust the panorama's projection and orientation function :
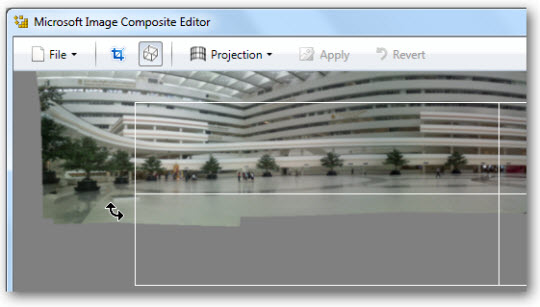
On the panorama will appear grids - grids, where you can rotate, move the corners in different directions:
Or from the Projection button above, you can choose different project modes:
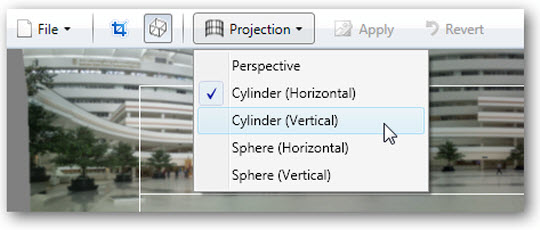
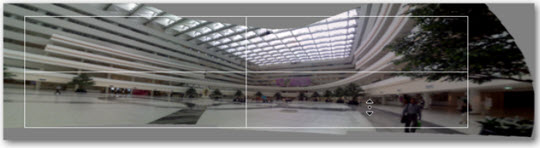
Here we select Cylinder mode (Vertical), which will completely remove the borders around the image. You can select each surrounding area, or individual parts from the center of the image. After feeling satisfied with your choice, click Apply to save or select Revert to return to the previous process:
After completing your own "masterpiece", you can export the panorama file into different formats from the Export menu below, select the scale scale or to set the original maximum size of the photo. Click Export to disk to save the image on your computer, or Publish to Photosynth to upload your panorama online. On the other hand, you can save the entire process of creating, editing panorama images in .spj format, this file contains all the settings in Image Composite Editor , so you can edit later if you want:

Conclude
With a lot of different tests, whether the inside angle of the building or the tall trees, with the Microsoft Image Composite Editor's multi-function tool set will easily bring about the effect you want for your panorama picture. . The program is simple, easy to use, many utilities, good compatibility with Windows XP, Vista and 7 operating systems, both 32 and 64 bit platforms.
Good luck!
Was this article helpful?
Your feedback helps us improve.
Related Articles
 How to take Panorama photos on iPhone9 minutes read
 Compress photos, reduce image size with Bzzt! Image Editor3 minutes read
 How to capture and post Panorama 360-degree photos on Facebook8 minutes read
 How to easily resize photos without installing the editor8 minutes read
 How to use Image+ to create images with AI technology2 minutes read
 How to use AI Image Editor to edit photos with AI3 minutes read
Reader Comments 0
Sign in with email or Google to join the discussion.