How to configure Windows Sandbox on Windows 10
The new Sandbox feature of Windows 10 lets you safely test programs and files downloaded from the Internet by running them in a safe environment. This feature is very easy to use but its settings are hidden in the text configuration file. This article will show you how to configure Windows Sandbox on Windows 10.
- Run untrusted .exe files: Use Windows Sandbox
- 7 best Sandbox apps for Windows 10
- What is a sandbox and how does it sandbox a program?
This feature is part of the May 2019 Update of Windows 10 update. Once the update is installed, you can use it on Professional, Enterprise or Education versions of Windows 10. But if it is available on the system You can easily activate the Sandbox feature and then launch it from the Start menu.
The sandbox will launch, copy the current Windows operating system, access the private folder, bring you a clean Windows desktop with Internet access. Before Microsoft adds this configuration file, you cannot customize the Sandbox. If you do not want to access the Internet, you must disable it immediately after launching. If you need to access the file on the host system, you must copy and paste them into the Sandbox. And if you want to install a specific third-party program, you must install them after launching the Sandbox.
Because Windows Sandbox deletes its entire instance when closed to make the system more secure, you must perform a custom process each time it is launched. If a problem occurs, close the Sandbox and everything will be deleted.
How to configure Windows Sandbox

This tutorial assumes you have set up Sandbox for normal use. If not, you need to enable it first with the Windows Features dialog box.
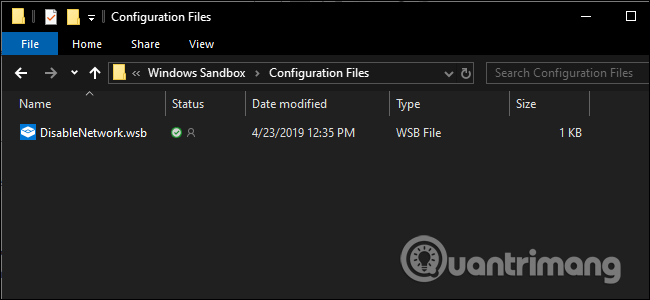
To get started, you need to use the Notepad application or other text editing application. You need to create an XML file to configure. Once you've created the file you need to save it with the .wsb extension, then double-click the file that will launch the Sandbox with a specific configuration.
As explained by Microsoft, you should choose some options when configuring Sandbox such as enabling or disabling vGPU (virtual GPU) turning on or off the network, defining shared host directory, setting read / write permissions on the message item or run the script at launch.
Using this configuration file will allow you to disable the virtual GPU (it turns on by default), turn off the network (turned on by default), specify the shared host directory (the sandbox application does not have access to This directory is by default), set read / write permissions on that directory and run the script at launch.
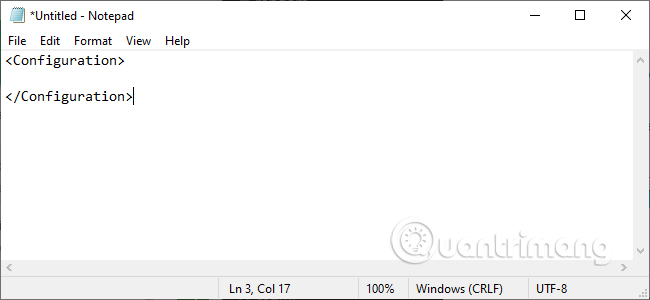
First, open Notepad or your favorite text editing application and add the following line to the new text file:
All the options you add must be between these two parameters. You can add one or more options or if nothing else, it will use the default configuration.

How to disable virtual GPU or network
According to Microsoft, turning on a network or virtual GPU will increase the likelihood of malware coming out of the sandbox environment, so if you need to test something suspicious of malware, you should disable it.
To disable the virtual GPU (enabled by default) add the following line of text to the configuration file.
Disable

To disable network network access (turned on by default) add the following line of text:
Disable

How to map directories
To map the directory you need to specify the folder to share and then specify which directory to read only.
Perform directory mapping using text lines similar to the following:
 C: UsersPublicDownloads
 true
HostFolder is where you list the specific folder you want to share. In the above example, the Public Download folder in the Windows system is shared. ReadOnly sets the ability of the Sandbox to write a directory with true value only to read or false to write.
However, you need to be aware that your system may be at risk when linking folders between Windows Sandbox with storage and the granting of write permissions increases this danger. If testing something that is suspected to be malicious, you should not use this option.
How to run the script at launch
Finally, you can run the custom script or the basic command to force the Sandbox to open the mapped folder at launch. Replace the directory path and grant the correct permissions for your directory.
C: UsersPublicDownloads
trueexplorer.exe C: usersWDAGUtilityAccountDesktopDownloads
WDAGUtilityAccount is the default user of Windows Sandbox, so you need to view it as part of the command when opening a folder or file.
However, in the recently released build of Windows 10's May 2019 update, the LogonCommand option does not work, it does not take any action. Hopefully Microsoft will soon fix this error

How to launch Sandbox in Settings
After editing the configuration file, save it in .wsb format. For example, if your text editing application saves the file as Sandbox.txt, fix it to Sandbox.wsb. To launch Windows Sandbox in the installation, double-click the .wsb file. You can leave this file on the desktop or create a shortcut in the Start menu.
- Create and customize application shortcuts on win 10

I wish you all success!