Table of Contents
This guide provides a practical overview of Instructions on How to Install Internet Explorer, including its main features, benefits, limitations, and important considerations.
Step 1: Go to the Microsoft home page and select the version of Internet Explorer that is suitable for your Supported operating systems.
Once you have selected the appropriate version, select Download Internet Explorer below. You need to choose the right version for your Windows, for example 32-bit / 64-bit Windows.

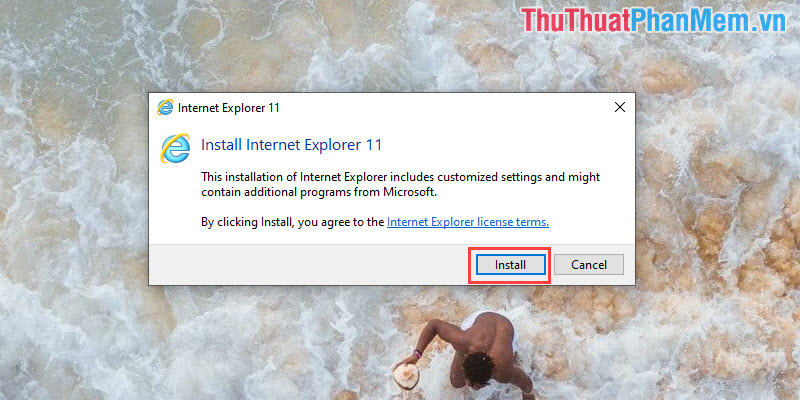
Step 2: After downloading the software to your computer, you proceed to boot to install. You choose Install to automatically install the system.
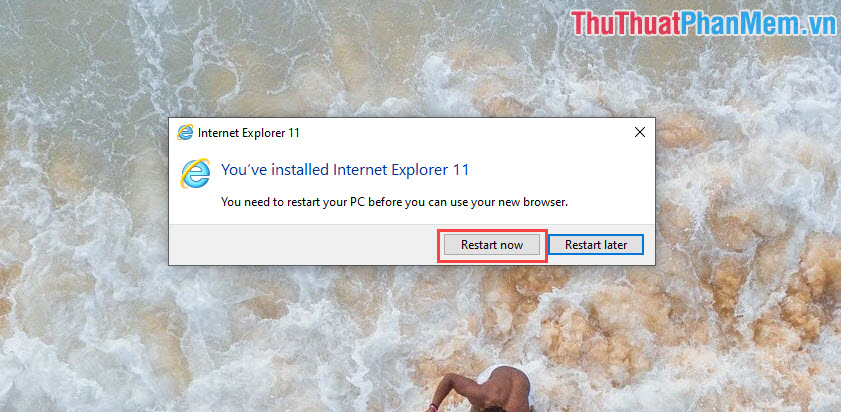
Step 3: Once the software has been installed, the system will ask you to reboot to keep the update working smoothly. To restart, select Restart Now .
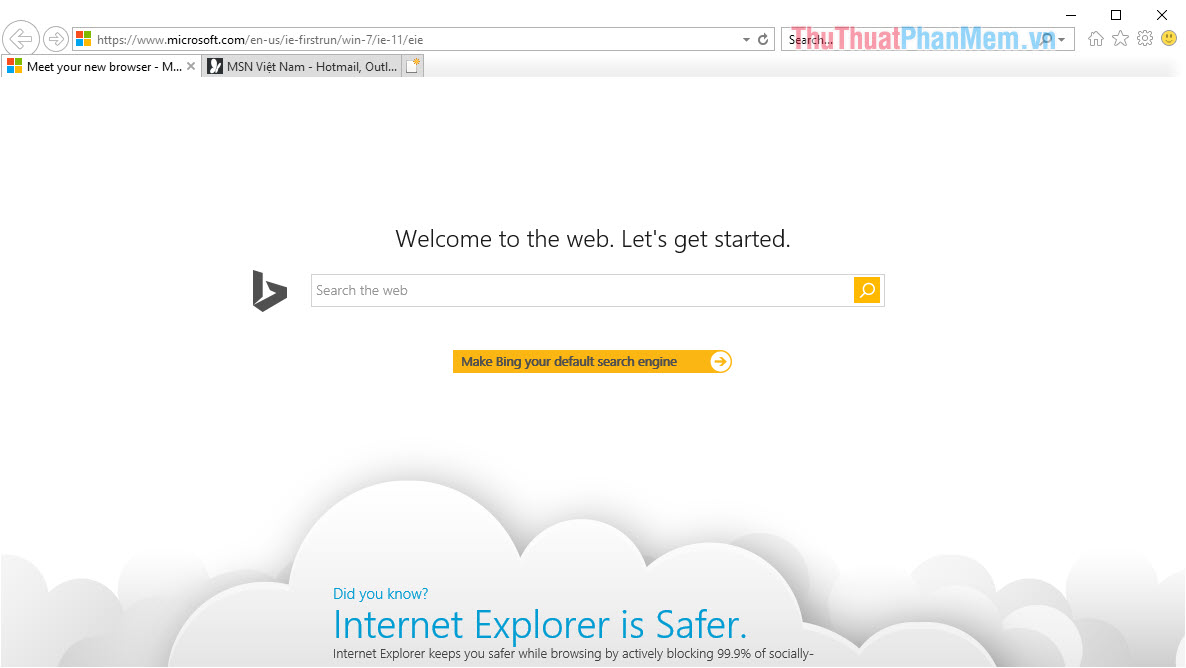
Step 4: Once the system has rebooted, you will see the Internet Explorer interface start up. So you have finished installing Internet Explorer on the computer.
In this article, the Software Tips guide you how to install Internet Explorer software quickly on all versions of Windows. Good luck!
FAQ
What should I know about Instructions on How to Install Internet Explorer?
Focus on the key features, requirements, limitations, and practical use cases explained in this guide.
How do I get the best results with Instructions on How to Install Internet Explorer?
Follow the recommended steps, use current software or information, confirm compatibility, and review settings before major changes.
Are there any risks or limitations?
Potential limitations depend on compatibility, data quality, cost, privacy, support, and how the product or method is used.
Related Articles
 Ways to Uninstall Internet Explorer 8 on Windows XP // Vista // 76 minutes read
 Instructions to Remove Internet Explorer 10 in Windows 82 minutes read
 How to Enable Internet Explorer Mode on Microsoft Edge3 minutes read
 The 7 Most Common Problems in Internet Explorer10 minutes read
 Instructions on How to Remove Internet Explorer on Windows 103 minutes read
 Instructions to Reset Internet Explorer, Set Default Settings for3 minutes read
Reader Comments 0
Sign in with email or Google to join the discussion.