Table of Contents
Grok lets you delete individual conversations or clear your conversation history. The steps differ between the standalone Grok app, grok.com, and Grok inside X. Use the controls for the service and account where the conversation was created.
Save any information you need before confirming deletion. Do not assume that a deleted conversation can be restored, or that clearing chats also deletes generated media or closes your account.
Delete chats in the Grok mobile app
For one conversation, open your profile or conversation history, press and hold the conversation’s name, and choose Delete Conversation. These are the steps described in the official consumer FAQ.
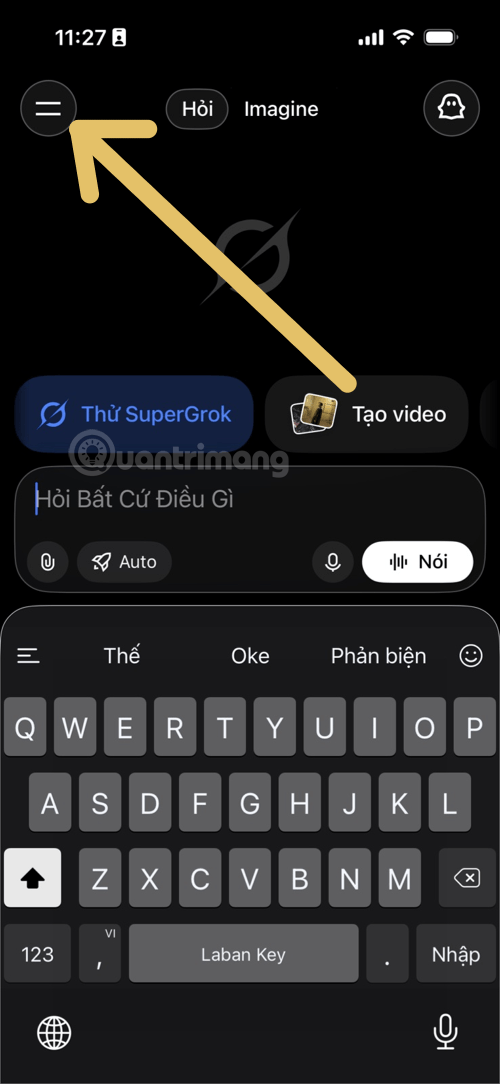
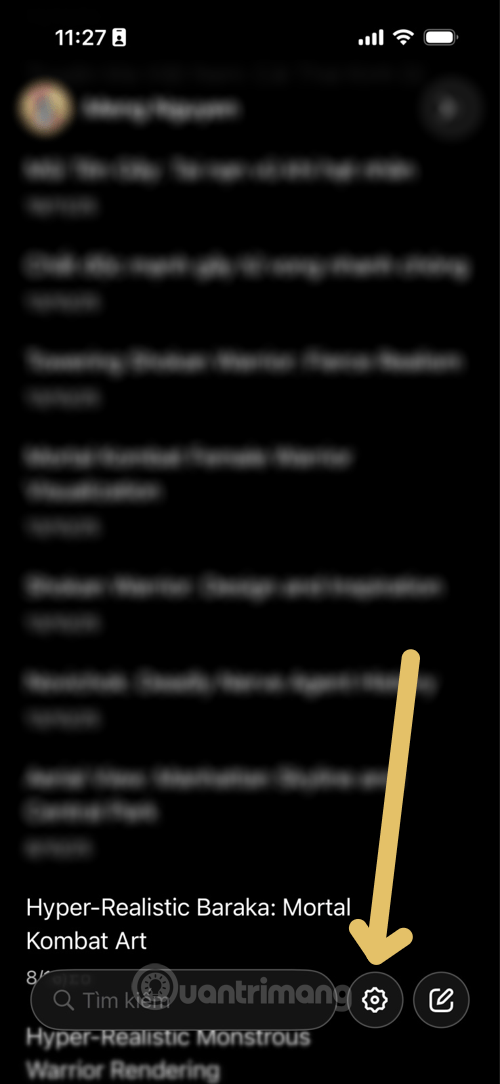
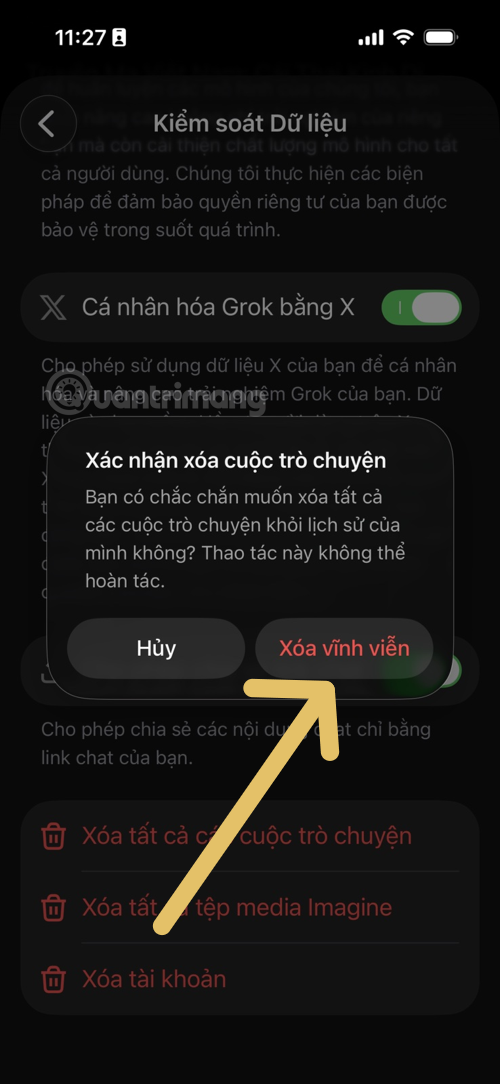
To clear the entire history, open Settings.
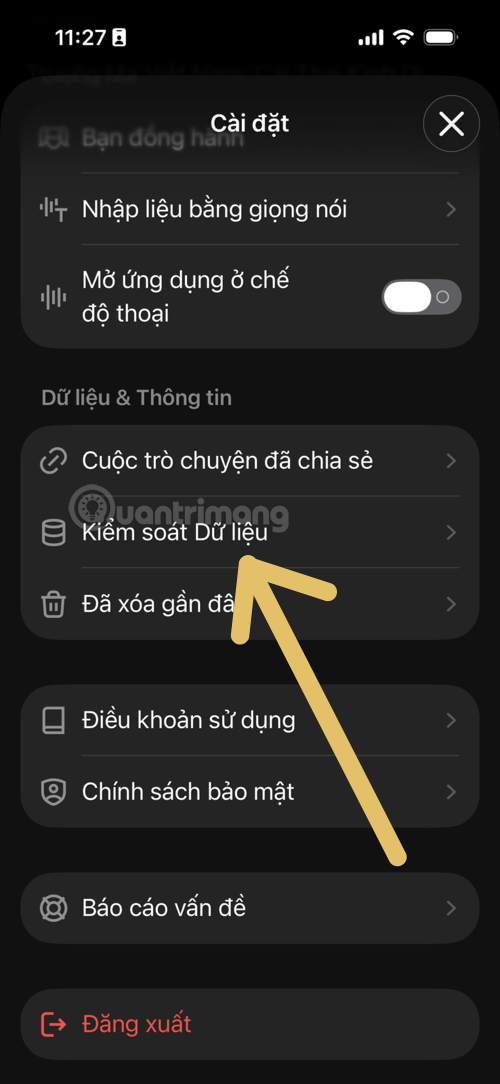
Select Data Controls and find Delete All Conversations.
Read the confirmation carefully so you know which data the selected option covers.
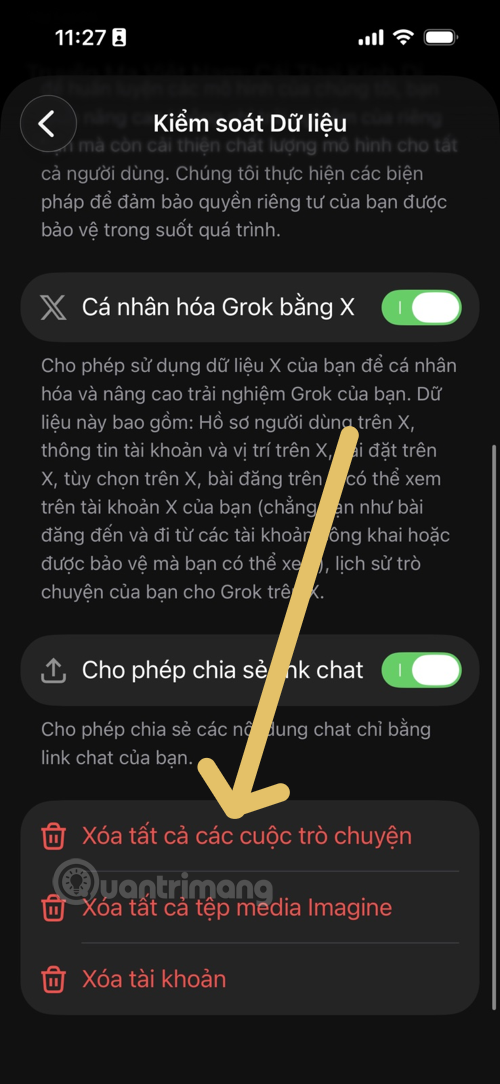
Confirm only after checking that you have saved anything you want to keep. Menu placement and wording may vary by app version.
Delete chats on grok.com
To delete one conversation, open the conversation history page and use its trash control. For bulk deletion, open your profile menu and Settings.
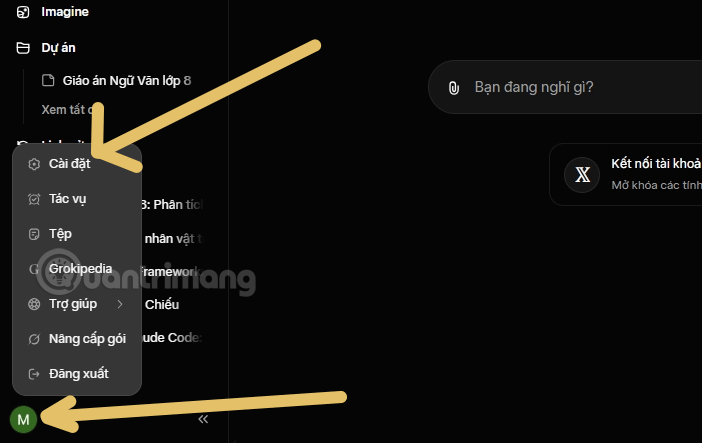
Find the Data or Data Controls section and choose Delete all conversations.
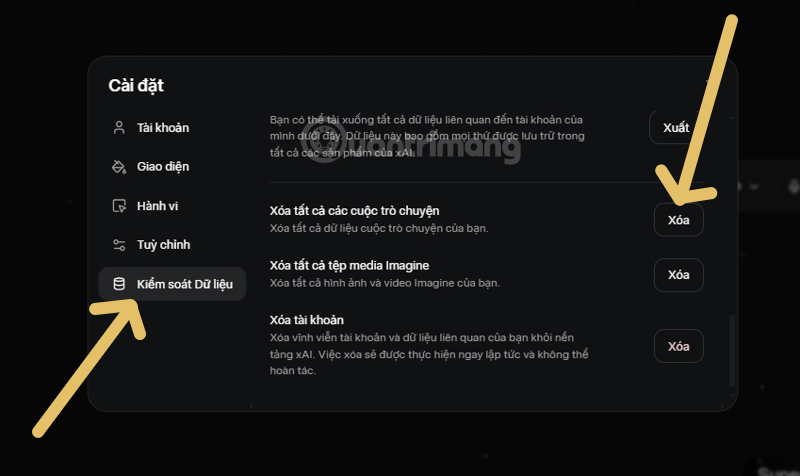
Check the scope of the confirmation, then choose the deletion option if you are ready.
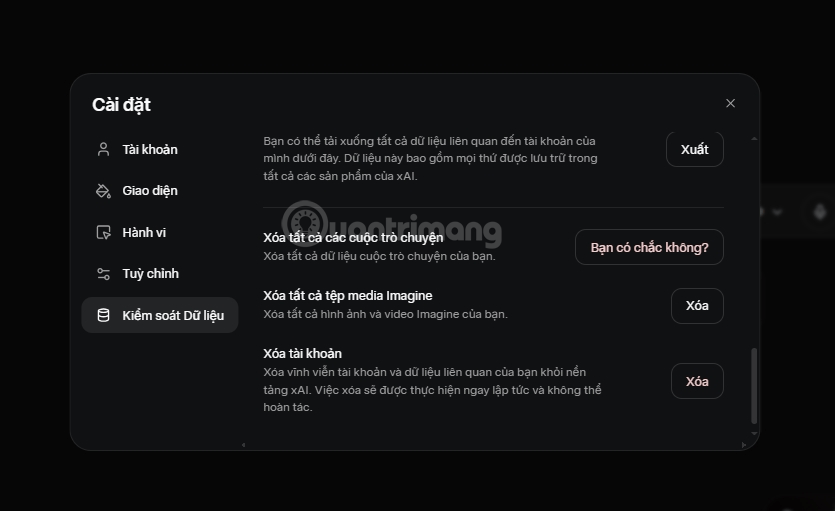
If you see a separate option for Imagine media, treat it as a separate action. Read what it will remove before selecting it. Delete Account is also different from deleting chats.
Delete Grok history inside X
X’s Grok help page gives this route: Settings → Privacy and safety → Data sharing and personalization → Grok → Delete Conversation History. Confirm the removal of your interactions, inputs, and results.
X states that deleted conversations are removed from its systems within 30 days, subject to security or legal retention requirements. That is different from immediate removal of every stored copy.
Deletion and training preferences are separate
Clearing visible history is not the same as changing whether future conversations are used for model improvement. In the standalone Grok app or website, review Improve the model in the data settings. Grok on X has separate training and personalization settings.
See how to change chatbot training controls for related instructions. Before starting another chat, also consider which sensitive information to avoid sharing with chatbots.
Deleting history can reduce what is visible when someone opens your account, but it does not protect an unlocked device by itself or guarantee better app performance. Sign out on shared devices and keep access to your account secure.
Related Articles
 Instructions for Exporting Grok AI Chat History4 minutes read
 How to Enable the Memory Feature on Grok to Personalize Your Own AI Assistant6 minutes read
 What Is the Project Feature in Grok AI? How to Effectively Manage Your Projects with Grok10 minutes read
 More Professional, Easier Programming with Grok's Files Feature6 minutes read
 How to Write Basic Code with Grok: Step-by-Step Guide11 minutes read
 Negative Prompt AI Techniques5 minutes read
Reader Comments 0
Sign in with email or Google to join the discussion.