Table of Contents
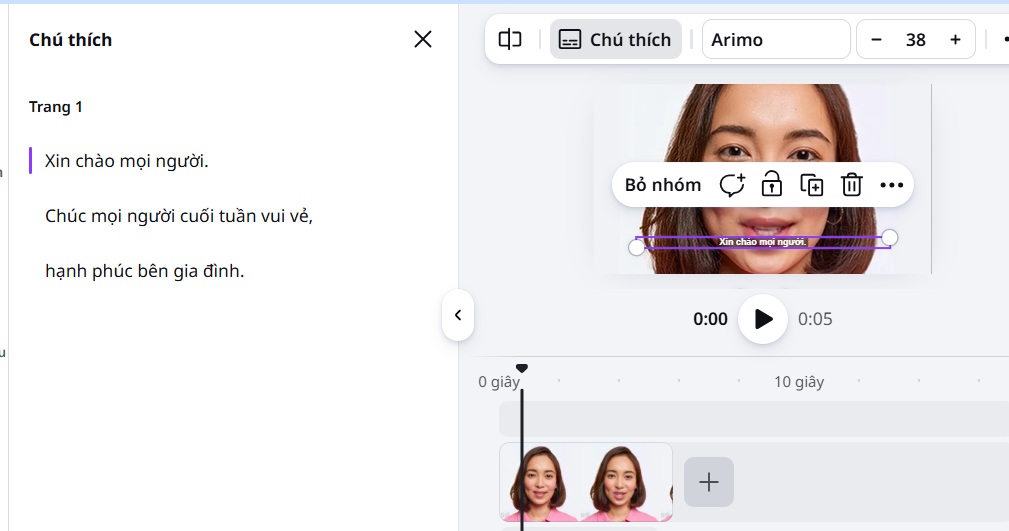
Canva can transcribe speech in an uploaded video and place editable captions on the timeline. The automatic result is a starting point: review names, numbers, punctuation, and timing before exporting, especially for lessons or other material where accuracy matters.
The exact menu names can vary as Canva updates its editor, but the workflow remains: upload the video, open the caption or subtitle tool, generate text, correct it, style it, and export a test copy.
1. Create a video design and upload the file
Choose a canvas that matches the destination. A 16:9 layout suits many presentations and standard video players, while a vertical layout is common for short-form mobile video. Upload the source clip and place it on the page or timeline.
Use the clearest audio available. Heavy background music, overlapping speakers, room echo, and low microphone volume make automatic transcription less accurate.
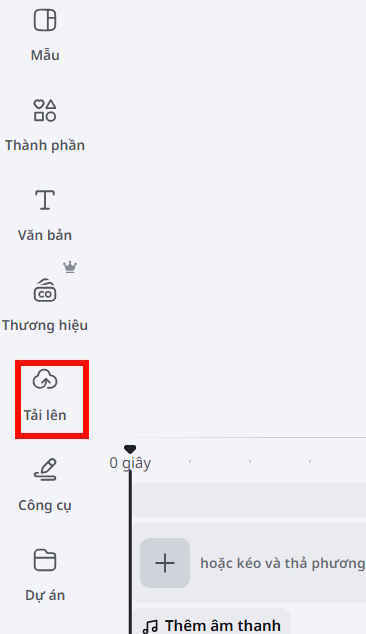
2. Open Canva's caption tool
Select the video, then look for Captions, Subtitles, or an automatic text option in the video, text, or apps panel. Canva's interface may label or place the tool differently depending on the editor version and account.
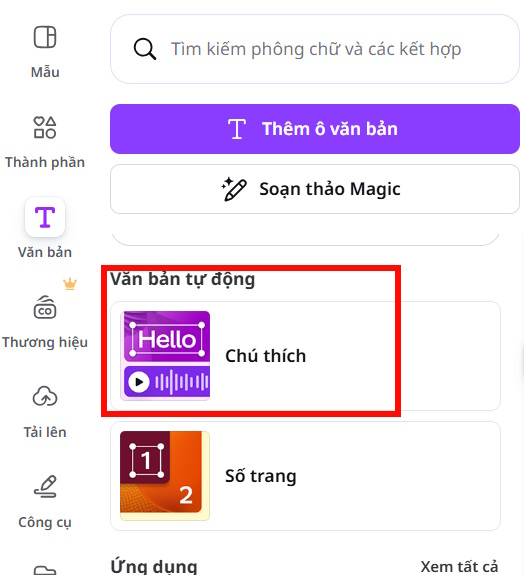
If the control is not visible, search Canva's apps or tools panel for “captions.” The official Canva subtitle tool page provides the current entry point.
3. Generate captions from the audio
Choose the spoken language when prompted and start caption generation. Processing time depends on the video's length and the clarity of its audio.
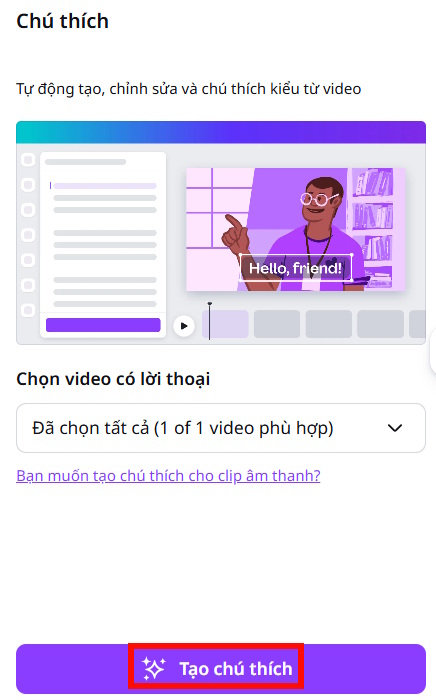
When the transcript appears, play the video from the beginning and follow every caption. Click a caption segment to edit its text or adjust it on the timeline.
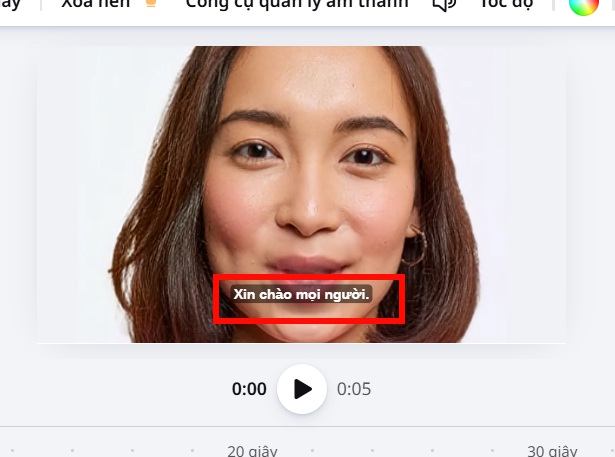
4. Correct the transcript and timing
Automatic speech recognition commonly mishears:
- people's names, place names, brands, and technical terms;
- numbers, dates, abbreviations, and homophones;
- speech in noisy sections or from speakers with different accents;
- words spoken over music or another voice.
Correct the words first, then check when each caption appears and disappears. Break long sentences at natural pauses and avoid leaving a single short word on a line by itself. Captions should remain on screen long enough to read without covering the next speaker.
5. Style captions for readability
Use a clear font, strong contrast, and a size appropriate for the smallest device on which the video will be watched. A solid or semi-opaque background behind the text is often more reliable than an outline alone when the scene changes from dark to light.
Keep captions inside the safe area. Social-app buttons, lower-thirds, player controls, and phone notches can cover text near the edges. Use the same style throughout unless color or labels are deliberately used to distinguish speakers.
6. Export and check the final video
Download a short test or the complete video in the required format, then watch it outside the Canva editor. Confirm that:
- every spoken section that needs a caption is included;
- the text is readable against each scene;
- captions are synchronized and not cut off;
- names, formulas, and numbers are correct;
- the video orientation, resolution, audio, and duration are correct.
In many workflows, Canva's visible captions are rendered into the exported video. If a platform requires a separate caption file or switchable subtitle track, verify that requirement before editing; you may need a tool that exports SRT or VTT files.
Why captions are worth reviewing
Captions make video usable when sound is muted and improve access for viewers who are deaf or hard of hearing. They can also help learners follow unfamiliar vocabulary or speech in a second language. Those benefits depend on an accurate transcript—uncorrected automatic captions can confuse viewers or change the meaning of a lesson.
For educational content, keep the original script or terminology list beside the editor. It makes names and specialized words easier to verify and reduces repeated corrections across a series of videos.
Related Articles
 How to Turn Off Automatic Subtitles in X Videos3 minutes read
 Guide to Creating Parallel Subtitles in CapCut4 minutes read
 Guide to Creating 3D Designs Using AI in Canva4 minutes read
 How to Design Greeting Cards on Canva AI4 minutes read
 Instructions for Creating Subtitles for Videos with Videopad6 minutes read
 How to Create AI Videos on Canva Using Veo 32 minutes read
Reader Comments 0
Sign in with email or Google to join the discussion.