Instructions for using Flyby11 to upgrade to Windows 11 24H2
With the arrival of Windows 11 24H2, Microsoft has set stricter requirements for operating system upgrades. This makes it impossible for many older devices to perform direct upgrades. Therefore, users have used Flyby11 to overcome these barriers.
How to use Flyby11 to upgrade to Windows 11 bypassing TPM 2.0, Secure Boot
Step 1: First you need to download the latest version of Flyby11 here
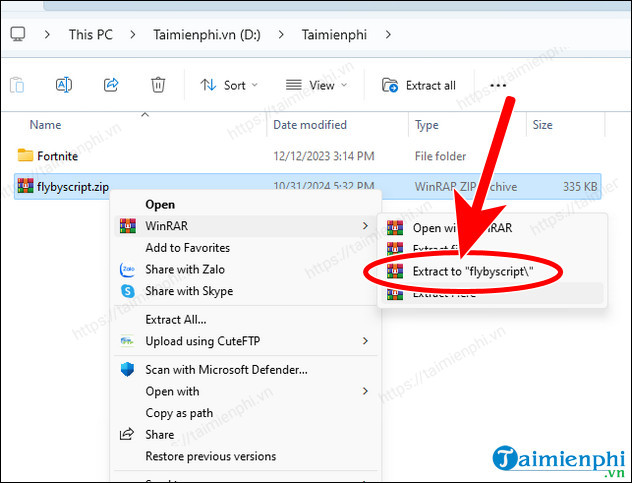
Step 2: Go to the folder containing the downloaded file and extract it with Winrar , right click on the file => Winrar => Extract to .
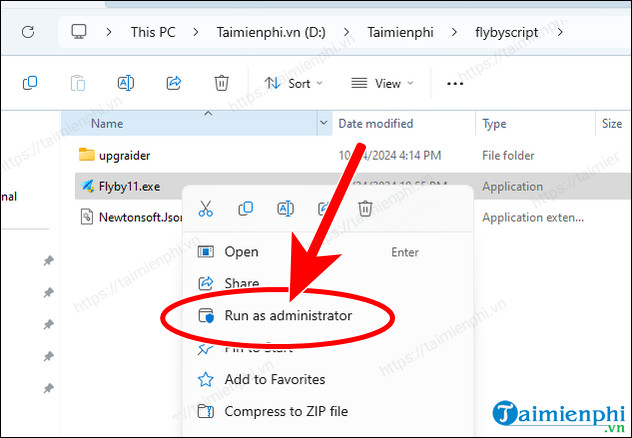
Step 3: Go to the successfully extracted folder, right-click on Flyby11.exe and select Runs Administrator
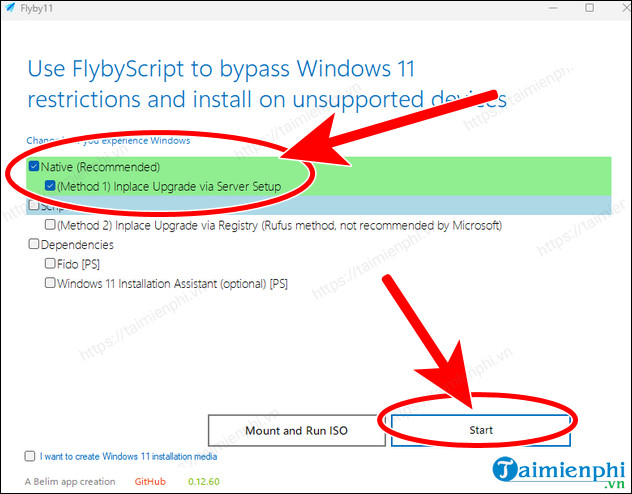
Step 4: At the initial interface, select Native (Recommended) and (Method 1) Inplace Upgrade via Server Setup => click Start
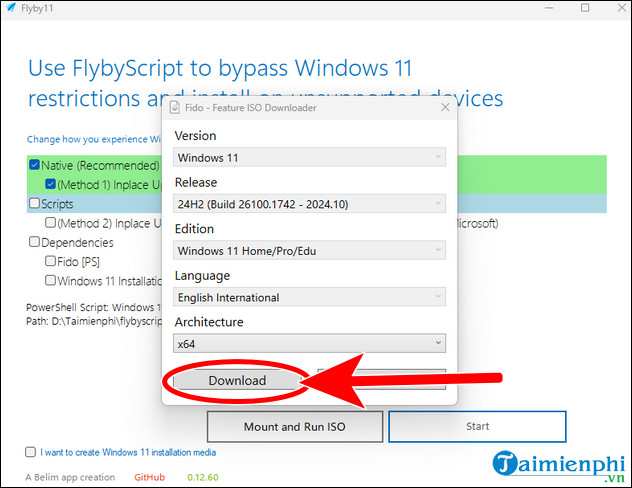
Step 5: On the Fido tab, select Windows 11 version => Continue
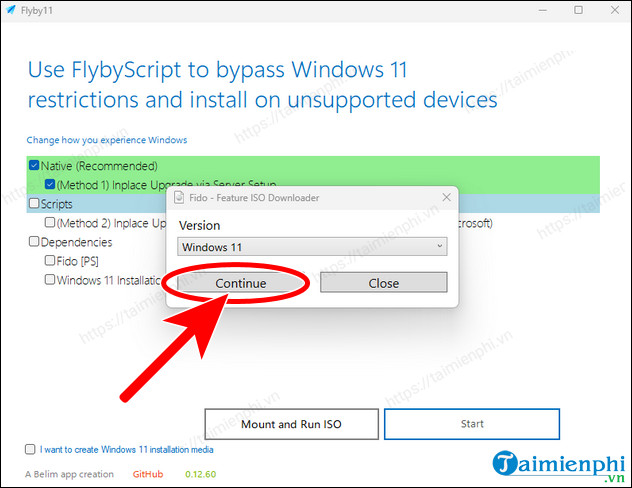
- Continue to select the Windows 11 version to upgrade to => Continue
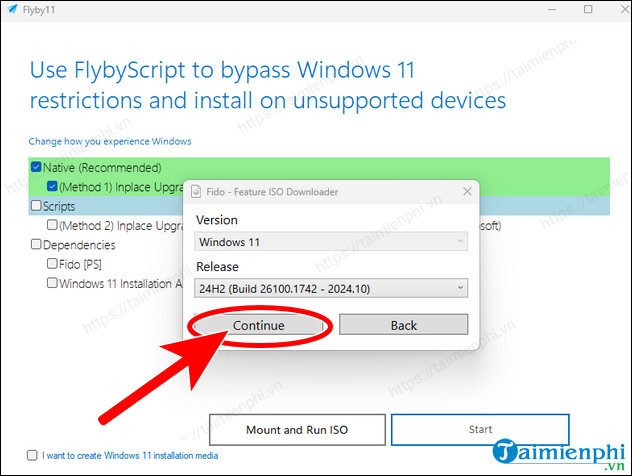
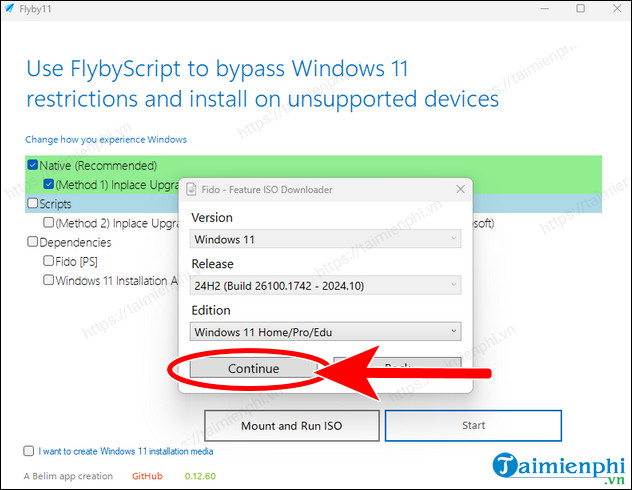
- Continue to select Continue .
- Select the operating system language in the Language section => click Continue
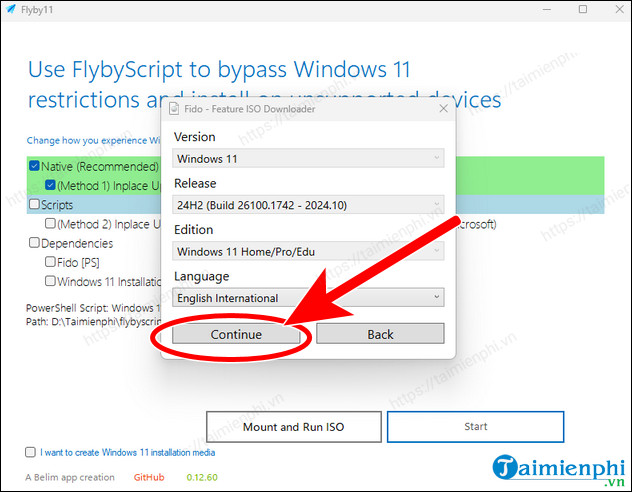
- Finally, select Download and the system will automatically download the Windows 11 file.
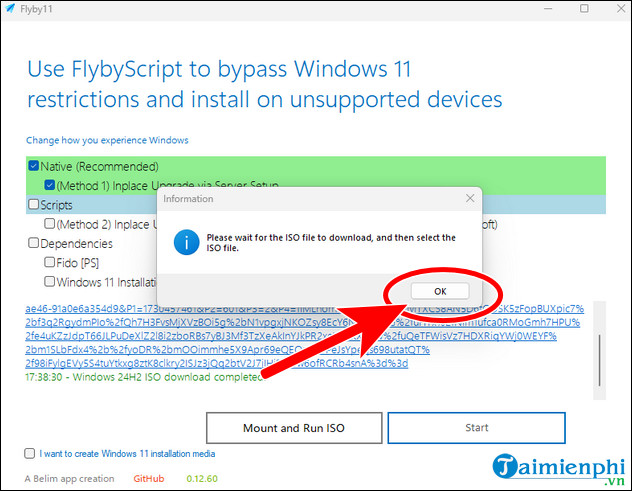
Step 6: After downloading, select OK .
- If you have selected OK and exited that tab, click Mount and Run ISO on Flyby11 and perform the next step below.
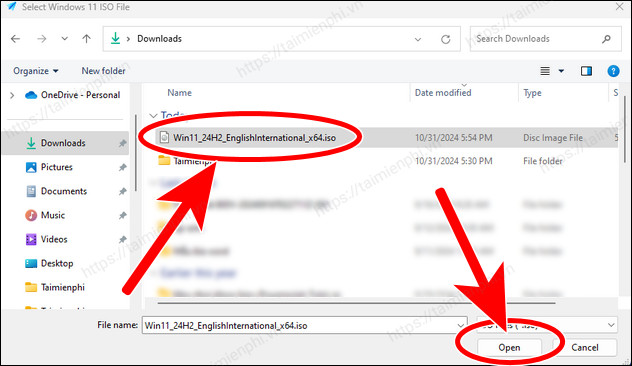
- Select the Windows 11 file downloaded above, click Open .
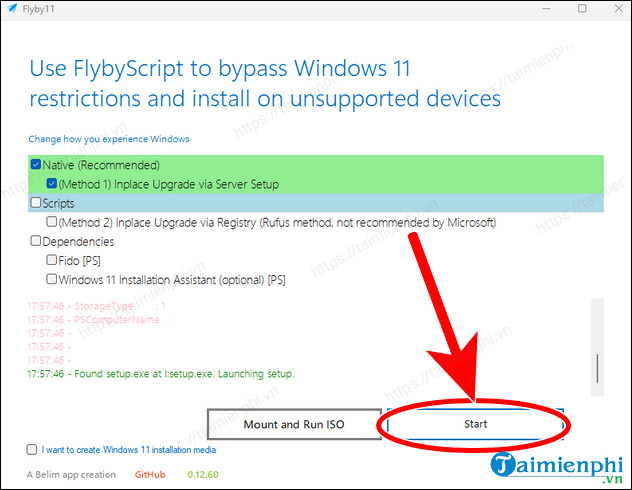
Step 7: Now click on the Start button and the system will automatically upgrade to Windows 11.
Users often use Rufus to install Windows 11 to bypass TPM 2.0 and Secure Boot requirements. However, with version 24H2, this process becomes more complicated because Microsoft has added new requirements. For those with low-end computers and are not tech-savvy, using Flyby11 to upgrade to Windows 11 24H2 will become easier and more convenient.
If your computer meets all the requirements and you want to reinstall your operating system, you can download Rufus 4.6 or a newer version, then create the installation package and install Windows 11 24h2 using your USB BOOT.
==> Refer to how to create a USB BOOT to install Windows 11
==> Refer to how to install Windows 11 using USB
 How to adjust Windows 11 screen off time
 How to turn off weather on Windows 11
 What to do when open command window here does not appear?
 How to restore the old context menu in Windows 11
 Instructions to remove DirectX 11, restore default DirectX
 How to Turn Off Widgets on Windows 11