Instructions for setting the default printer in Windows 10
Instructions for setting the default printer in Windows 10. When we use Windows 10 operating system, the system will default to select the printer you use most recently to be the default printer..
This is a nice feature, but it can be a bit confusing for people who connect multiple printers on one computer because they often get the wrong printer. In this article, Software Tips will guide you to set up the default printer in Windows 10.
Method 1: Set the default printer in Settings
Step 1: First, open MenuStart and enter Settings to open the settings.
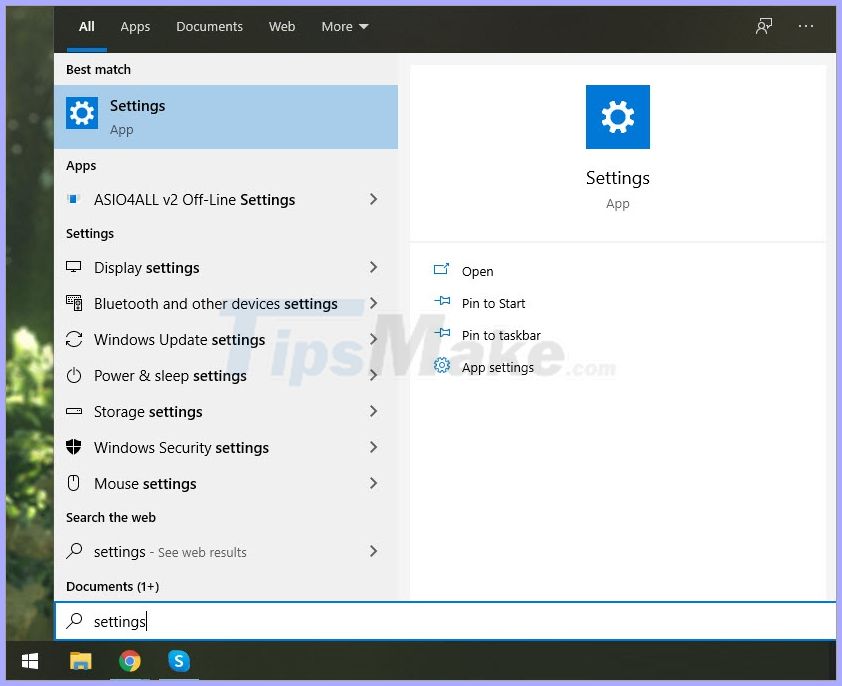
Step 2: Next, you select the Devices tab to set up peripheral devices connected to the Windows 10 computer.

Step 3: Then, you select the Printers & Scanners tab to set up the printer and scanner. Scroll down to the bottom and uncheck Let Windows manager my default printer (Allow Windows to automatically select the default printer).

Step 4: Next, select the printer you want to use by default and select Manage .

Step 5: When the printer settings are opened, select Set as default to set them as the default printer for Windows 10.

Method 2: Set the default printer in Control Panel
Step 1: You proceed to open MenuStart and enter Control Panel to open.
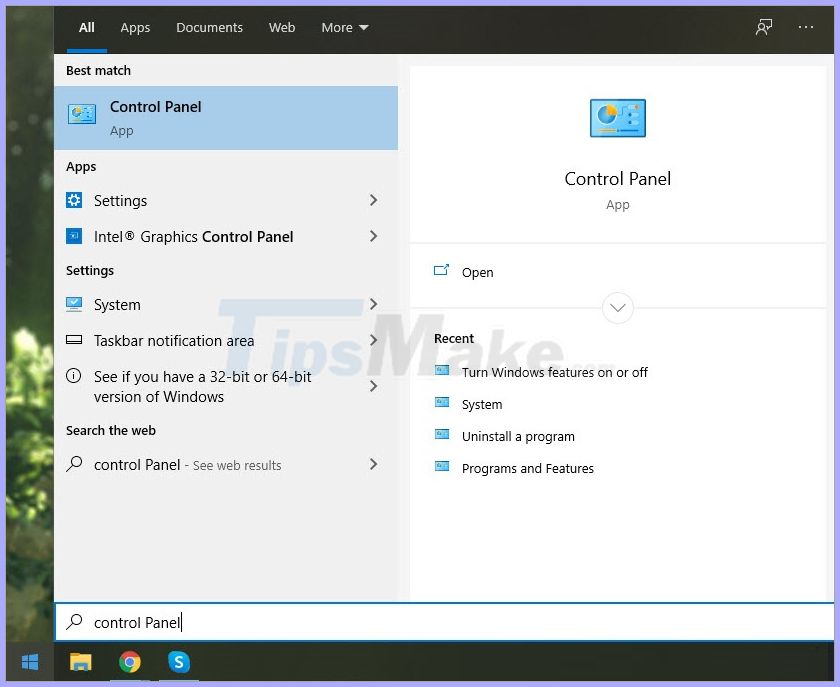
Step 2: In the Control Panel window , change the View by mode to Small Icons to display more information.
Next, you select Devices and Printers .

Step 3: Finally, right-click on the printer you want to set as the default and select Set as default printer .

The default printer on Windows 10 will be highlighted in green as shown below.

In this article, TipsMake showed you how to set up the default printer in Windows 10. I wish you success!