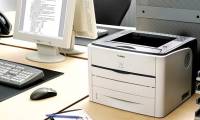
Instructions for installing Canon LBP 1210 printer on the computer
To be able to install Canon LBP 1210 printer on a computer, users need to have the printer driver and then we can proceed to install the printer on the computer as usual.
Table of Contents
Installing a printer driver on your computer is the first step anyone has to take, when you want to connect a computer to print, such as Canon LBP 1210. After we have installed the device driver Print correctly with the computer operating system you are using, you can install the printer on Windows. In the following article, we will show you how to install Canon LBP 1210 printer on a computer.
Step 1:
First of all, you download the driver for the printer suitable for the computer operating system. You access the link below to download the drive.
- Download diver for Canon LBP1210 printer
At this interface, we go to the Your operating system section and select Windows XP (32-bit) or Windows Vista (32-bit) will appear a Download button to download the driver.
Note to users, if you want to install Canon LBP 1210 printer on 32-bit or Windows 8 32-bit Windows 7, you can download the printer link for Windows Vista to use.
Then proceed to extract and copy to C or D drive on the computer.

Step 2:
Next, we plug in the power and start the printer and check to make sure the printer is working properly. Then plug the cord to connect the printer to the computer.
Step 3:
Next, on a Windows XP computer , follow the Start> Setting> Printer and Fax path .
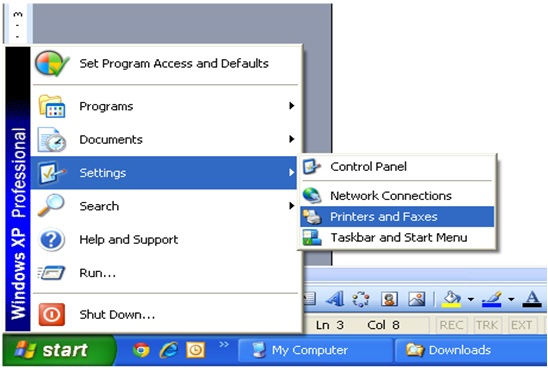
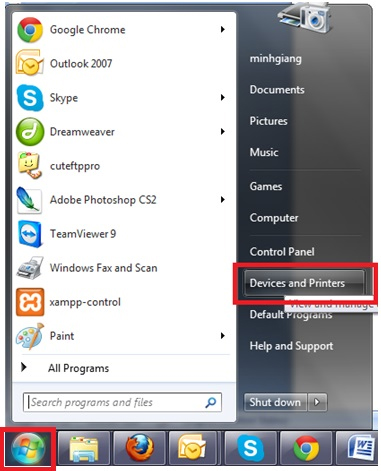
If on Windows 7 , we click Start> Setting> Printer and Fax .
Step 4:
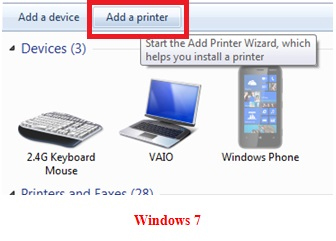
Then, click on the Add printer item in the computer interface. With Windows XP it will be on the left menu and Windows 7 will be above.

Step 5:
The Add Printer Wizard window interface appears. Click Next to continue.
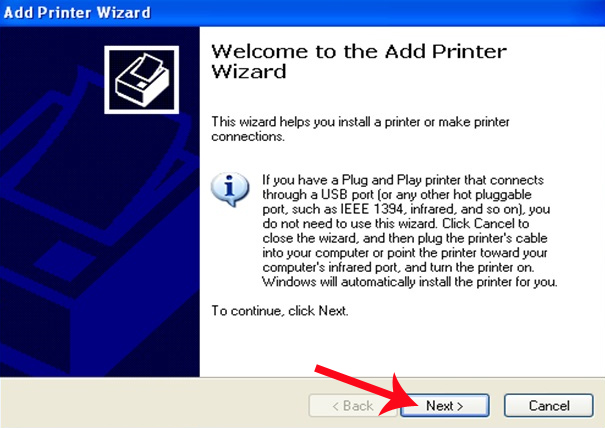
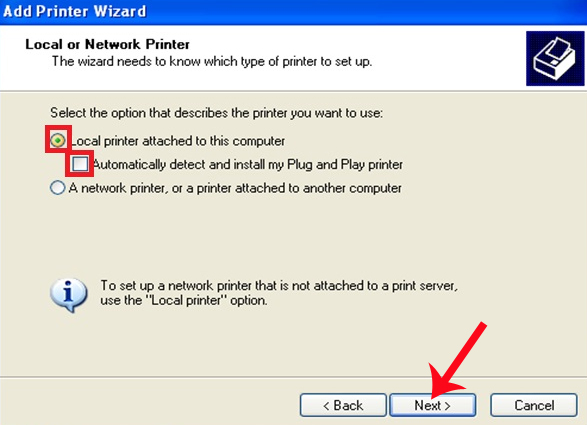
Then click on the Local printer attached to this computer option and uncheck the Automatically dectect and install my Plug and Play printer option and click Next .
Step 6:
At this interface, select the option User an existing port and select USB001 (Virtual printer port for USB) and click Next .

Step 7:
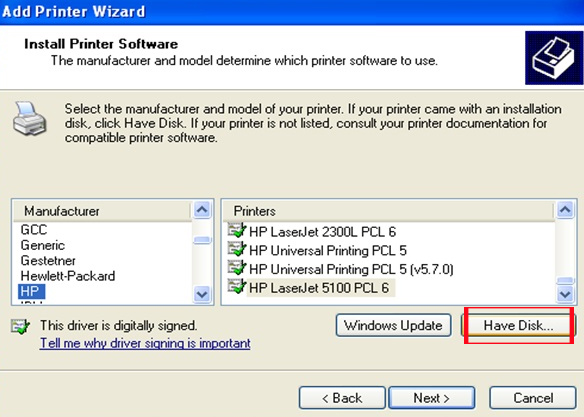
Next we click the Have Disk button below.
Step 8:
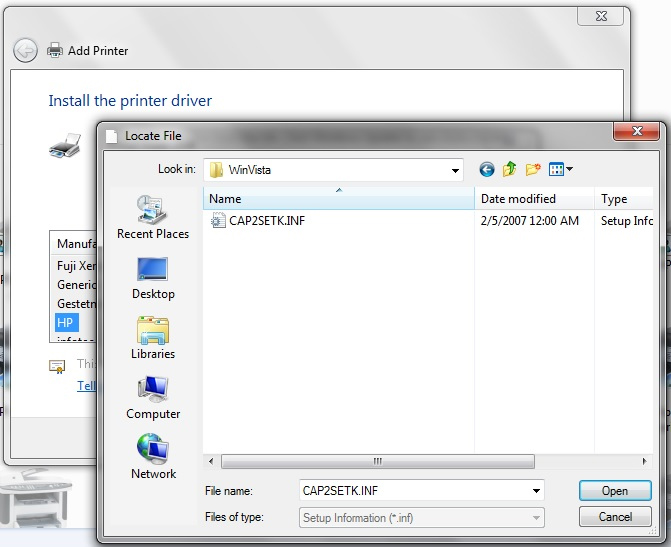
In this step, if with Windows XP computer , we will find the folder to install Canon LBP 1210 on the computer and then select WinXP .

For Windows 7 computers, select Canon 1210 installer folder and select WinVista .
Step 9:
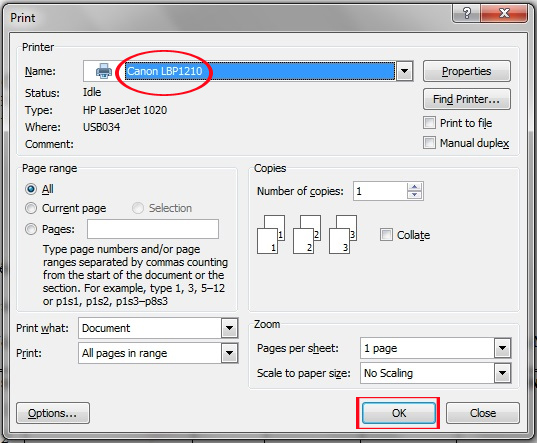
You proceed with the test print operation. Item Name select Canon LPB121 printer and click OK to print.
Above are the steps to install Canon LPB121 printer on Windows computer. Please check and download the correct printer driver for Windows operating system to successfully install the printer.
Refer to the following articles:
- Instructions for installing the printer in Windows 8
- Common printer errors and how to fix them
- Tips for sharing printers in the network
I wish you all success!
Was this article helpful?
Your feedback helps us improve.
Related Articles
 Instructions for installing Canon LBP 2900 printer on Windows3 minutes read
 Instructions for installing Canon MF4720W multi-function laser printer4 minutes read
 How to quickly and easily install a Canon 2900 printer on a Macbook.8 minutes read
 Popular genuine Canon inks2 minutes read
 Instructions on how to use the Canon 2900 printer16 minutes read
 How to install Canon 2900 printer, Canon 2900 Driver on Windows 7/10/114 minutes read
Reader Comments 0
Sign in with email or Google to join the discussion.