Instructions for creating animations with Beneton Movie GIF software
When you need to create animations, you will think of creating animations online so you do not waste time installing support software. But creating online animations will not create better animations using the software. Using the software you will be able to create effects, rotate images . your animations will be more beautiful.
The following article shows you how to create animations with Beneton Movie GIF software.
Step 1: First, you need to download and install Beneton Movie GIF software on the system, after the installation is complete you run the Beneton Movie GIF program.
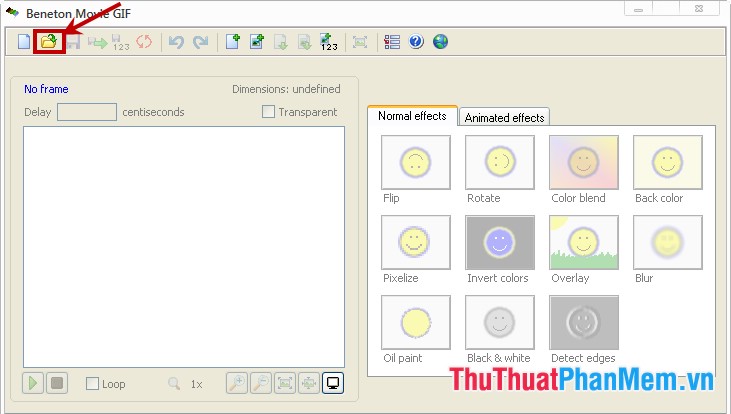
On the program interface, you select the Open icon (like a folder icon) on the toolbar. Or you can press the keyboard shortcut Ctrl + O to open the image file. You note the maximum size of the image is 720x450, if the size of the image is larger then Beneton Movie GIF will change the size of the image.

Step 2: Next, to add other images, select the Add frame (s) from a file icon as shown below to add more images to the animation.

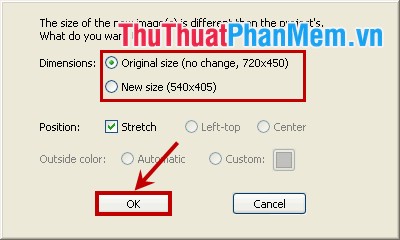
If the photos you add are different from the image you first added, a message will appear informing you of the size of the added images. You will have two options:
- Select Original size if you want to resize the added image to the same size as the first added image.
- Choose New size if you want to keep the size of the image added later.
After choosing the size for the image, click OK to add the image.

Step 3: Once you've added the images to create the animation, you need to set the display time of the photos.
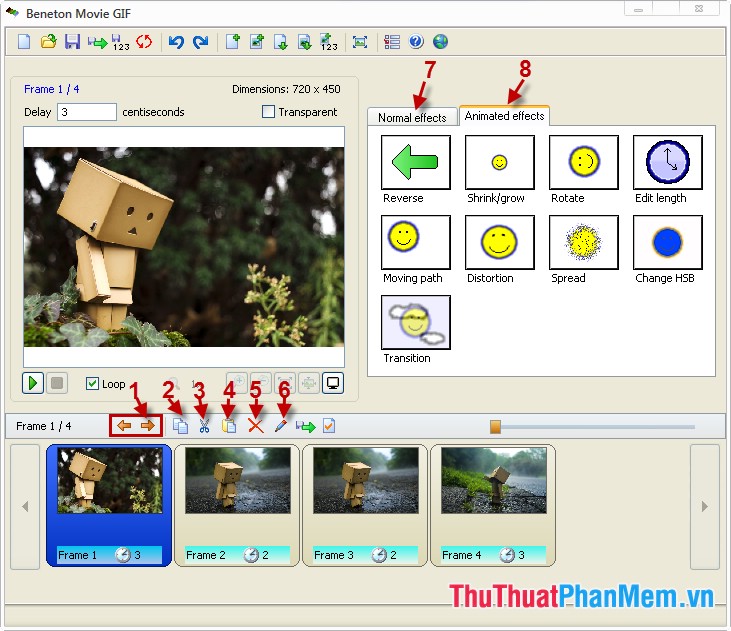
Click on each image below the Frame and enter the time displayed in the Delay box . Display time is in centiseconds (percent seconds).

Step 4: Some other features of Beneton Movie GIF:
- (1): Move left, right Frame is selected.
- (2): Copy the selected frame.
- (3): Cut Frame is selected.
- (4): Paste the Frame.
- (5): Delete the selected Frame.
- (6): Edit the selected frame.
- (7): Display normal effects for images.
- (8): Animation effects.

Step 5: To preview the newly created animation, click the Play icon , if it is correct, click the floppy disk icon on the toolbar or press Ctrl + S to save the animation. If not satisfied you can edit and then save the image later.

Image after creating from Beneton Movie GIF software:

The article has finished how to create animations with Beneton Movie GIF software. Hopefully, the article will help you. Wish you create beautiful animation with Beneton Movie GIF.