Backup SMS, MMS and call logs automatically on Android device
You can back up anything to the cloud storage service. However with text messages, when you perform factory reset or switch handset, the messages will be completely lost.
However, if you want to back up your SMS, you can use the SMS Backup + or Tasker application.
1. Use SMS Backup + to store your messages "safe"
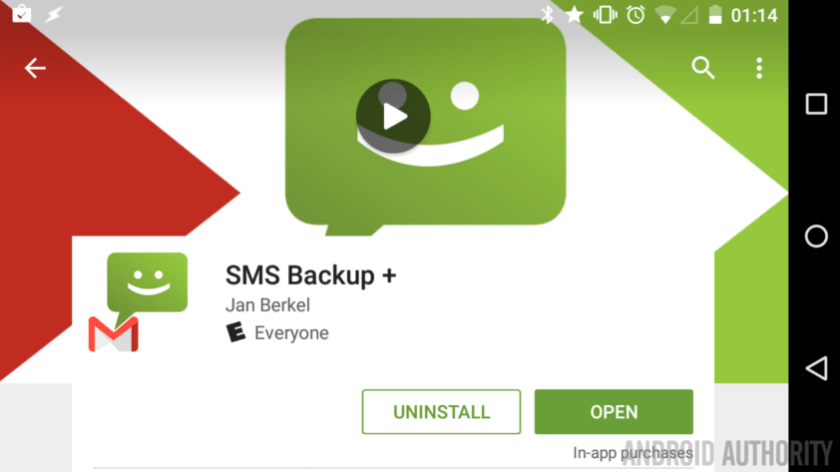
If you don't want to lose important messages on your Android device, it's best to regularly back up your SMS messages.
The easiest way to back up your message is to use SMS Backup +. SMS Backup + not only backs up SMS messages but also backs up MMS messages and call logs.
If you are using Google Hangouts, you can search for Label called "SMS" on Gmail, all your messages are safely stored there.

Download SMS Backup + to your computer and install it here.
The steps to install SMS Backup + are quite simple, to install SMS Backup +, follow the steps below:
1. Connect to your Gmail account. SMS Backup + uses OAuth like other applications, so you can block access anytime you want in the Google account settings section on the website.
2. Click Connect.
3. Select your Google account.
4. Select to back up all your messages or all existing messages on your device or just back up your received messages.
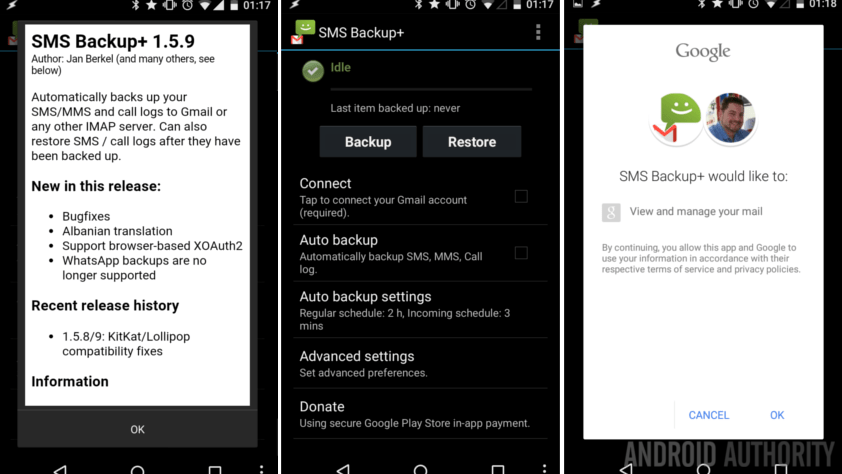
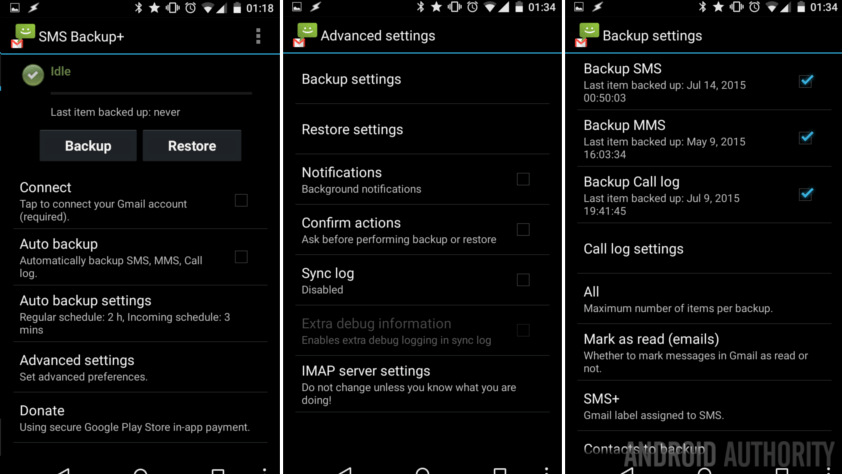
All messages you back up will be stored on the Label called SMS on Gmail. However, if you want to customize it further, follow the steps below:
Select messages to backup:
1. Go to Advanced Settings.
2. Select Backup Settings.
3. Select the message format (SMS or MMS) that you want to back up on Gmail.
4. Alternatively, you can select the SMS item to change the label name you created on your Gmail account.
5. Press the back button to save the changes.
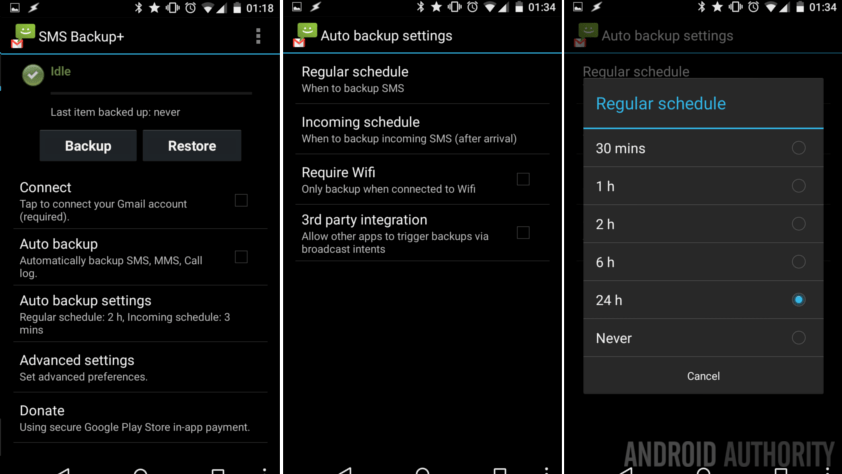
Set up automatic backup:
1. Click to select Auto backup settings .
2 Click the Regular schedule option to set the upload frequency. By default the option is set to 2 hours.
3. Select Incoming schedule to set the SMS Backup + time to be activated after a new message. By default the option is set to 3 minutes.
4. Click the back button to exit the main screen.
5. Click Auto Backup to make sure the feature is enabled.
2. Use Tasker to backup SMS
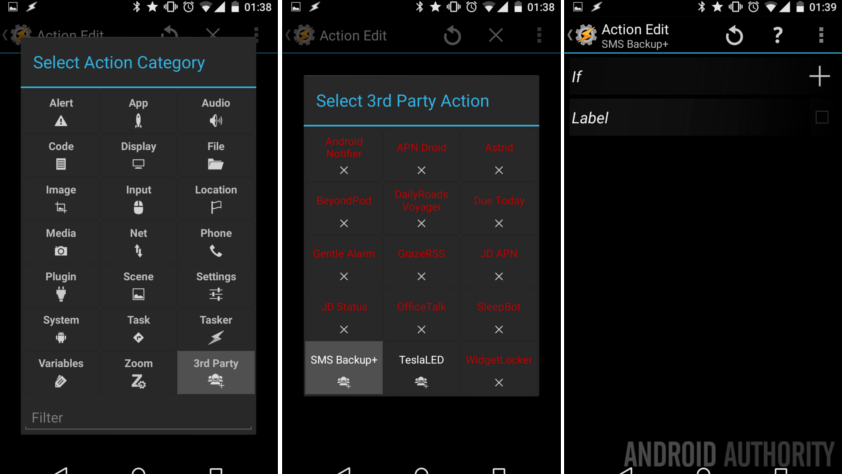
To use Tasker to activate SMS backup, we will use SMS Backup + as the 3rd extension.
Download Tasker to your computer and install it here.
1. Access SMS Backup + to enable integration.
2. Click to select Auto backup settings .
3. Exit SMS Backup +, then access Tasker.
4. Create a new Tasker Task and place any name you want.
5. Click the + button to add action.
6. Choose 3rd party .
7. Select SMS backup +.
8. Click the Back button to save the changes and exit the Task you just created.
9. Your next task is to decide how to run Tasker and when to run Tasker to backup.
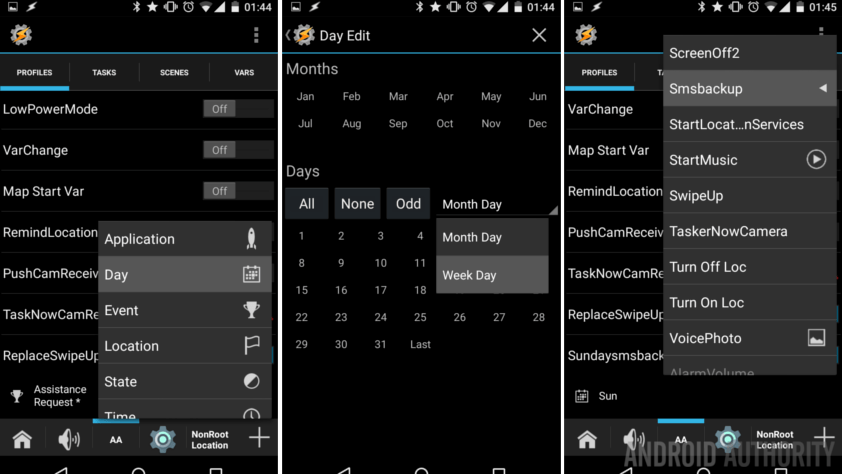
10. Go to Tasker's Profile tab, create a new profile and place any name you want.
11. Select Day.
12. Click Menu form drop Month Day and change to Week Day.
13. Select Sunday.
14. Click the back button to save the changes.
15. Select your Backup Task.
16. Complete.
Refer to some of the following articles:
- Instructions for basic steps to backup Outlook data
- How to backup and restore Windows in just 10 minutes with Acronis True Image
- 9 tips to protect your computer safely from virus attacks
Good luck!
You should read it
- ★ Instructions for backing up all data on Android device without root
- ★ Cause backup battery charger explodes, causes fire and prevention
- ★ 11 best DVD and Blu-ray backup software
- ★ 5 solutions to backup local Mac to replace Time Machine
- ★ How to check whether spare batteries are allowed to be carried on board