Instructions for installing DHCP Role in Windows Server 2012
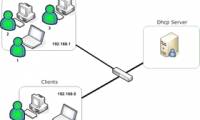
Dynamic Host Configuration Protocol (DHCP) - Dynamic server configuration protocol is the network services that are commonly deployed in the current network environment
Table of Contents
As you know Dynamic Host Configuration Protocol (DHCP) - The dynamic server configuration protocol is the network services that are commonly deployed in today's network environment. DHCP is mainly used to automatically distribute IP configuration settings to clients on the network, eliminating manual server configuration, on TCP / IP-based networks.
DHCP role settings
To install the DHCP role, you will have to follow the steps below.
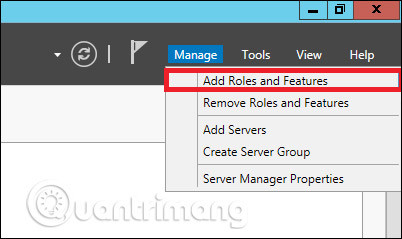
Step 1 - Switch to Server Manager → Manage → Add Roles and Features .
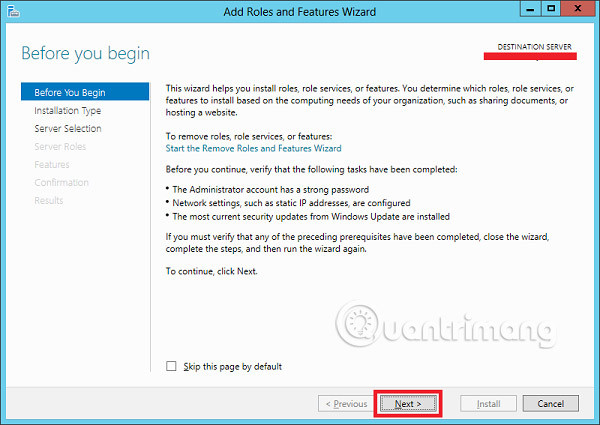
Step 2 - Click Next .
Step 3 - Select Role-based or feature-based installation option → click Next .

Step 4 - Install the Local DHCP Role because it will select a server from the Pool Server → then click Next .

Step 5 - From the Roles lists , select DHCP Server role → click Add Features on the window that appears as shown in the following screenshots.


Step 6 - Click Next .

Step 7 - Click Next .

Step 8 - Click Install .

Step 9 - Click Close .

Configuration after deployment
In this section, we will see how to perform the post-deployment configuration of DHCP. Please follow the steps below.
Step 1 - Click the warning icon and then click " Complete DHCP Configuration ".

Step 2 - Click Next .

Step 3 - Select a domain user account with permission to create objects in Net Services container in the active directory or domain administrator account → click Next .

Step 4 - Click Close .

Scope of DHCP deployment
Now you have to configure the service to make it useful for computers. To do this, you need to follow the steps below.
Step 1 - Find Server Manager screen → Tools → DHCP screen .

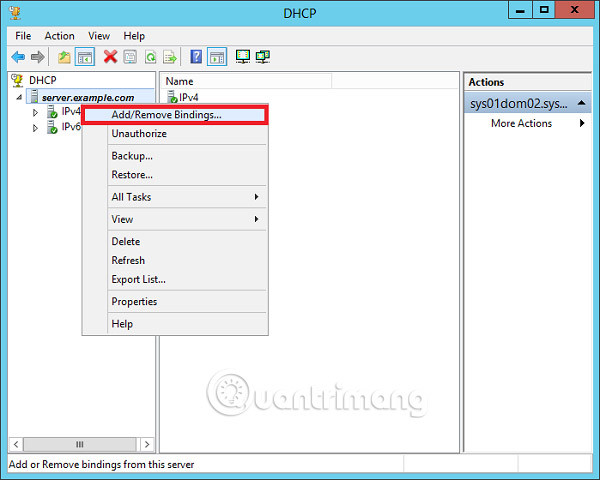
Step 2 - Right-click DHCP Server → then click ' Add / Remove Bindings . '
Step 3 - Make sure the server's static IP address appears as shown in the following screen shot.

Step 4 - Right click on IPv4 → Select ' New Scope '.

Step 5 - Click Next .

Step 6 - Enter Scope Name and description as shown in the following screenshot and then select Next .

Step 7 - Enter the Start and End IP addresses , Subnet masks , and default Length ' 24 ' for C class subnets → click Next .

Step 8 - Enter your IP range in the exclusion list. If you have a device on the network that requires a static IP address, make sure that the excluded range of the Start and End ranges is specified earlier → click Next .

Step 9 - Enter the desired period for the specified IP or leave it default → then click Next .

Step 10 - Select ' Yes, I want to configure these options now to configure the DHCP options for the new scope ' → then click on Next .

Step 11 - Enter the default port as your IP Router → then click Next .

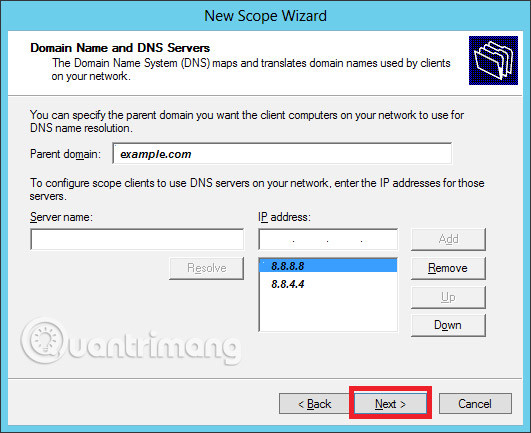
Step 12 - Add DNS IP → click Next (we can set Google DNS or if it is a Domain environment you can put DC IP there) → then click Next .
Step 13 - Specify your WINS Server if available → and then click Next .

Step 14 - Select the ' Yes, I want to activate this scope now "option to Activate range immediately → select Next .
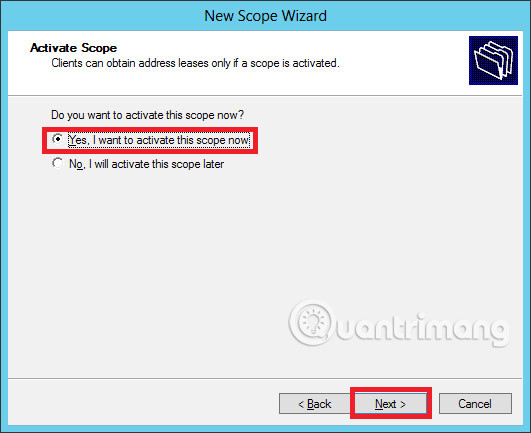
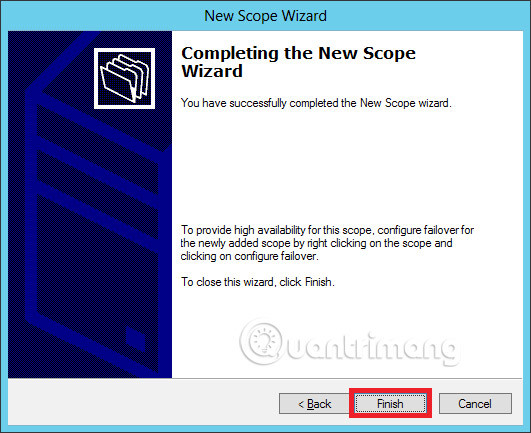
Step 15 - Click Finish .
Good luck!
See more:
- Learn Resource Monitor tool in Windows Server 2012
- How to create DC Accounts in Windows Server 2012
- How to install Active Directory in Windows Server 2012
Was this article helpful?
Your feedback helps us improve.
Related Articles
 Steps to fix 'Unable to Contact your DHCP Server' error on Windows 105 minutes read
 How to Install, Configure, and Test Windows Server 2012 R2 Single Subnet DHCP Server8 minutes read
 Set up DHCP server in Windows 20038 minutes read
 What is DHCP error? How to overcome it?6 minutes read
 Install and configure Windows Server 2008 DHCP Server8 minutes read
 Transfer DHCP from Windows Server 2000 to 200810 minutes read
Reader Comments 0
Sign in with email or Google to join the discussion.