How to Format the C Drive With Windows 7
If you just want to start with a fresh installation of Windows 7, see How to Reinstall Windows 7 to learn an easy way of doing so. If your goal is to completely get rid of your Windows 7 partition to make way for something new, you can use...
Table of Contents
Method 1 of 2:
Using a Windows 7 Installation Disc or Drive
-
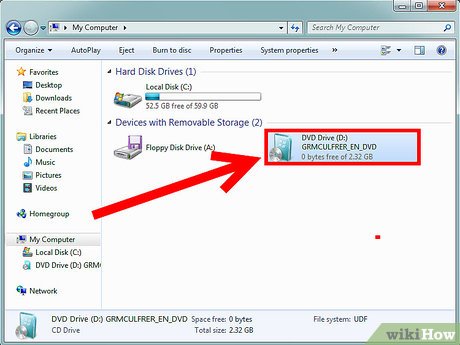 Insert your Windows 7 installation disc or USB flash drive. As long as you have access to a Windows 7 DVD or repair disc/drive, you can use it to format your C drive. You don't have to use the disc that came with your PC—you can borrow one from a friend or create a bootable system repair disc using any Windows 7 PC.
- You'll be formatting your C drive from a tool that doesn't display drive letters, so make sure you know the size of the drive and the amount of available space. If you choose the wrong drive or partition to format, you may lose data. To check the drive size, open Computer from the desktop or Start menu, right-click the C drive, and then select Properties.
- Formatting the C drive will delete the Windows operating system and render your PC unbootable until you install a new operating system.
-
 Restart your PC. You can do this by clicking the Start menu, clicking the arrow next to "Shut Down," and then clicking Restart.
 - Press any key when prompted to do so. When your computer powers back on, it will read the installation disc.
- If your PC won't boot from the disc or drive, see How to Set Your Computer to Boot from USB Flash Drive or How to Boot a Computer from a CD to learn how to change the boot order in the BIOS.
- Select your language on the "Install Windows" page and click Next.
- Click the Install Now button. You'll see a message that says "Setup is starting."
- Accept the license terms and click Next. To proceed to the next screen, you must place a checkmark in the box next to "I accept the license terms."
- Click the Custom (advanced) button. This displays a list of installation options.
- Click the Drive options (advanced) button. It's on the "Where do you want to install Windows?" screen.
- Select your C drive and click Format. Note that you will not see a "C" on the drive. If you only see one partition, choose that one. Otherwise, choose the partition that reflects your C drive's statistics (its capacity, available space, etc.). A confirmation message will appear.
- Click OK to erase and format your drive. When the cursor turns back into an arrow, you'll know that the drive formatting is complete.[1]
- Click Next to reinstall Windows 7 (optional). Now that you've formatted the drive, you'll probably want to install an operating system so you can still boot the PC. If the operating system you want is Windows 7, click Next and follow the on-screen instructions to reinstall.
- If you don't want to reinstall Windows 7, simply eject or remove the installation media and power down your PC.
Method 2 of 2:
Using a System Repair Disc or Drive
- Insert the Windows 7 system repair disc or drive. If you don't have Windows 7 installation media, you can boot from a system repair disc or USB drive. Even if you don't already have one available, you can create a system repair disc using any Windows 7 PC (including the one you're about to format. Here's how:[2]
- Click the Start menu and select Control Panel.
- Click System and Maintenance.
- Click Backup and Restore.
- Click Create a system repair disc.
- Follow the on-screen instructions.
-
 Restart your PC. You can do this by clicking the Start menu, clicking the arrow next to "Shut Down," and then clicking Restart.
- Formatting the C drive will delete the Windows operating system and render your PC unbootable until you install a new operating system. Make sure you're okay with this before you proceed.
- Press any key when prompted to do so. When your computer powers back on, it will read the installation disc.
- If your PC won't boot from the disc or drive, see How to Set Your Computer to Boot from USB Flash Drive or How to Boot a Computer from a CD to learn how to change the boot order in the BIOS.
- Select your language settings and click Next.
- Select Use Recovery Tools That Can Help Fix Problems Starting Windows. It should be one of two options on the screen.[3]
- Click Next. This displays a list of recovery tools you can use to fix Windows.
- Click Command Prompt. It's near the bottom of the "System Recovery Options" window.[4]
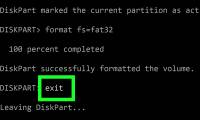
- Enter the command to format your C drive. Type format c: /fs:NTFS and press ↵ Enter to begin the process. A confirmation message will appear.
- If you don't want to use the ntfs file system, you can replace it with a different one, such as FAT32.
- Press the Y key and then press ↵ Enter. This will erase all of the data on the C drive. Once the format is complete, you'll be brought to a new line asking you to enter a volume name.
- Name the drive and press ↵ Enter. Just give the drive a name that will identify the drive in the future. Once named, the format will be complete.
- For example, if you plan on installing Windows 10 on the drive, you might call it Win10.
- If you don't want to give the drive a name, press ↵ Enter without typing any text.
- Install a new operating system (optional). Now that the C drive is empty, remove the system repair disc/drive and insert the installation media for your desired operating system (e.g., a Windows 10 DVD or Linux DVD) and reboot the PC to begin the installation. If you don't want to install an operating system, simply eject or remove the installation media and power down your PC.
Was this article helpful?
Your feedback helps us improve.


Reader Comments 0
Sign in with email or Google to join the discussion.