How to use Net Writer to blog on Windows 10
Net Writer application supports users to blog right on the application without direct access.
Table of Contents
If you are a blog writer, you should not ignore the Net Writer application on Windows 10. Net Writer application links and supports many popular blogs WordPress, Movable Type, Livejournal, Typepad, Google Blogger. You just need to select the type of blog you are using and then log in to your blog account as usual. Thus, the application saves you the operation of logging blog pages on multiple browser tabs, instead of accessing it right in the browser interface. The following article will guide you how to use the Net Writer application on Windows 10.
- How to create a blog site with Google Docs
- Instructions for creating websites with WordPress from A to Z
- 7 great HTML effects anyone can add to their website
- Ways to change website domain names on WordPress
Instructions for using Net Writer blog
Step 1:
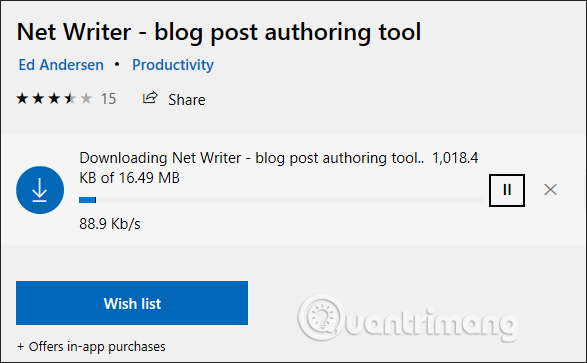
We install the Net Writer application on Windows 10 according to the link below.
- Download Windows 10 Net Writer application
Step 2:
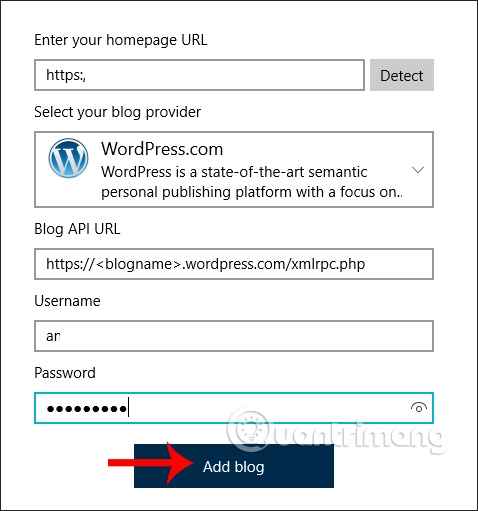
Displaying the interface of the application, we select the type of blog you want to use by clicking on the Select your blog provider line . Then display the list of blogs that the application supports.

Continue to enter the information of the blog site you choose. We enter the blog site address at Enter your homepage URL, click the Detect button to get the API and display at the Blog API URL, enter the account name and the blog password. Finally, click Add blog .
Step 3:
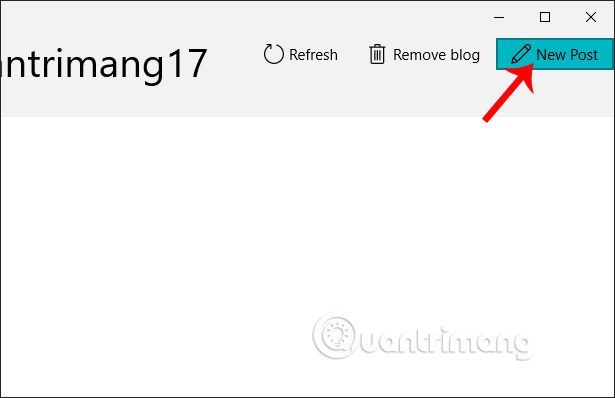
Soon display the interface to write content on the blog. Click the article to edit it if you have it or click New Post to create a new post.
Show the editor interface. Here the user has 3 interfaces to edit the content of the article.At Edit we format text as bold, italic, center.
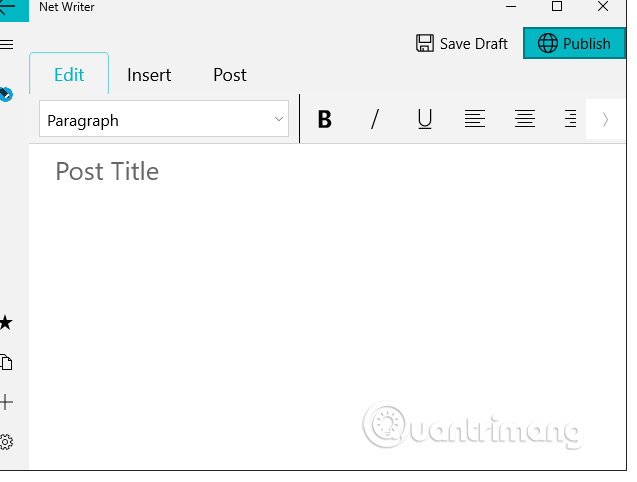
Insert card to insert photos, links, YouTube and Vimeo videos.
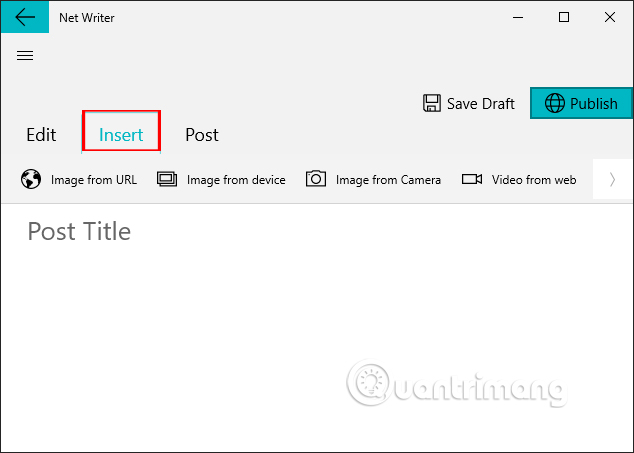
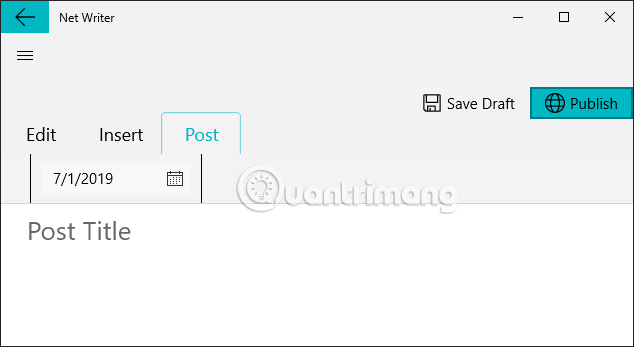
Post tags are used to create labels, schedule posting posts.
Step 4:
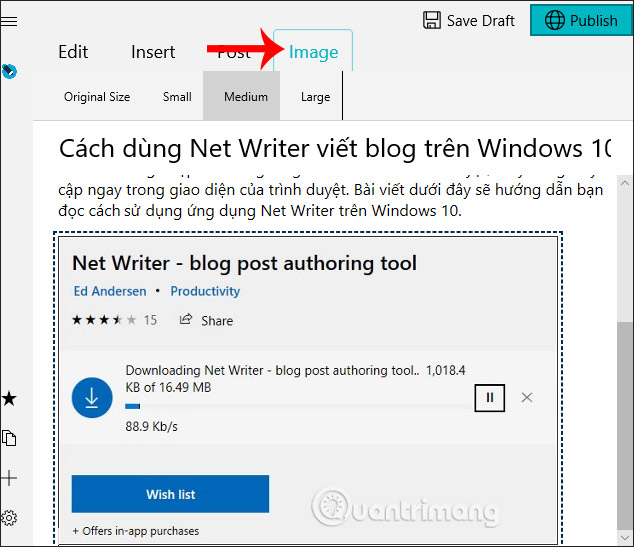
While composing content, there are enough Heading tags to apply to the title of the article. When resizing the image , users need to click on the Imgae tab at the top. Then there are many options to resize images such as Small, Medium, .
Step 5:
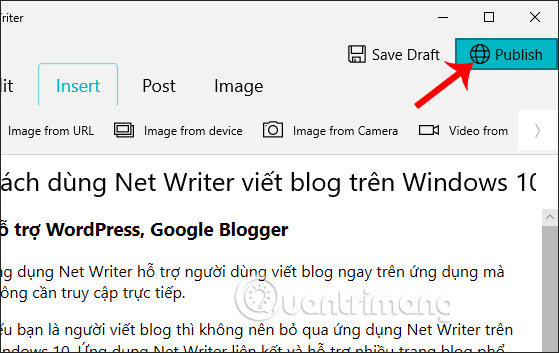
After composing the content press the Publish button to post the article.
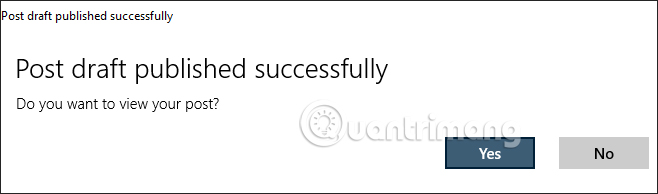
Pop-up display asks users if they want to see posts posted to the blog. If you want to see the post on the blog, click Yes.
Also the article is displayed on the Net Writer interface. Continue clicking New Post to write more content.

Step 6:
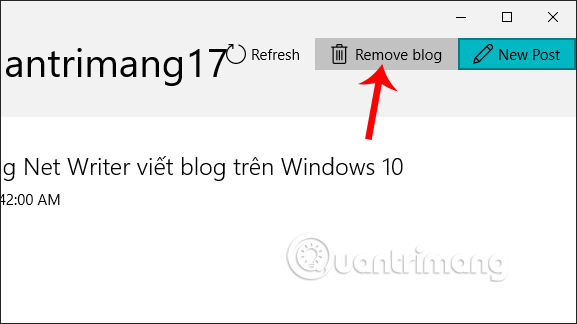
To exit the blog account that is currently logged in on the Net Writer application, click on Remove blog .
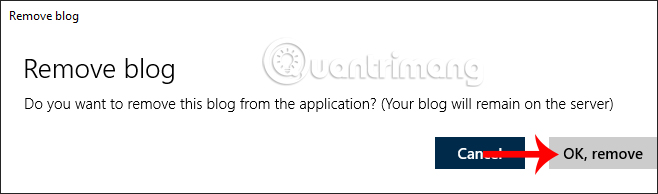
Click OK, remove to exit this blog. The account you login is still saved at the server system. Because you are using a free version, users can only use one blog.
Net Writer brings a simple and fast blogging application. However, with the free version the manufacturer limits many features. Users can upgrade to the Pro version to use some additional features such as logging in to multiple blog accounts, saving to drafts, syncing via OneDrive.
I wish you all success!
Was this article helpful?
Your feedback helps us improve.
Related Articles
 Write Blog with Microsoft Word 20132 minutes read
 10 tips when using LibreOffice Writer8 minutes read
 How to Start a Blog12 minutes read
 How to use Net Writer to write blogs on Windows 10 - WordPress and Google Blogger support4 minutes read
 How to Choose Your Blog Name11 minutes read
 How to set up LibreOffice Writer to run like Microsoft Word5 minutes read
Reader Comments 0
Sign in with email or Google to join the discussion.