Instructions for creating websites with Dreamweaver CC part 1
This 8-part tutorial series is designed to help you build a website in Dreamweaver CC 2015, including guiding the process of defining web pages, building structures in HTML, adding text and images, style pages with CSS..
Dreamweaver is a great program to build and design websites in an intuitive way. But you may feel frustrated when you first open Dreamweaver. This program has so many features that you don't know what they are used for?
This 8-part tutorial series is designed to help you build a simple but elegant website in Dreamweaver CC 2015, including a guide to the site definition process (Site Definition is a page or set. pages on the World Wide Web, containing specific information provided by a person or an entity and retrieving URLs), building HTML structures (Hypertext Markup Language), adding text and images, creating styles for CSS pages (Cascading Style Sheets).

Note : You do not need to have any previous experience with Dreamweaver. However, general knowledge about Hypertext Markup Language (HTML) and Cascading Style Sheets (CSS), will help many topics in this series. HTML and CSS are open web standards and there are many resources available to learn about them.
What you will build
Let's get started by downloading the sample files and watching the project completed.
1. Download the sample files here.
2. These files are compressed as a single ZIP file. Extract files to a convenient location, such as the desktop.
On Mac OS X, click the downloaded ZIP file in Finder to automatically extract the files.
On Windows, right-click the downloaded ZIP file and select Extract All from the context menu. Browse to the desired location to save the file, and then click Extract.
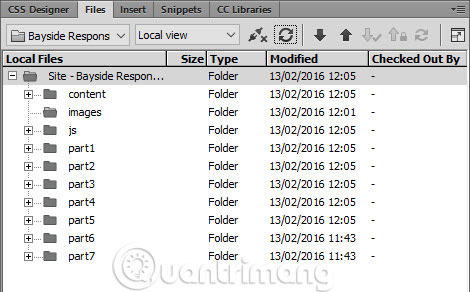
3. Inside the extracted files is a folder named bayside, containing 9 subdirectories.
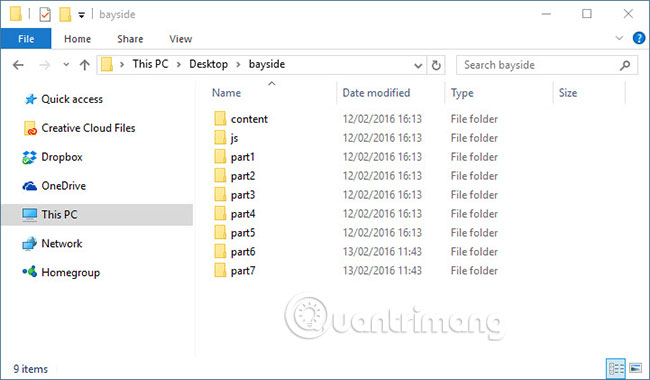
The Content folder contains text content for web pages and js directory containing JavaScript files, which will be used to control navigation menu on small screen resolution. Other directories contain the complete version of the project (each folder contains the final results of each section in this series). You can use them to check your code.
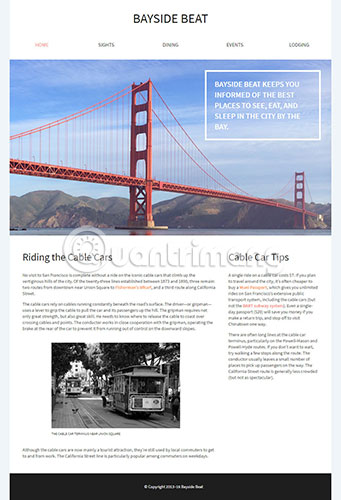
4. Open the part7 folder and drag the index.html into the browser to view. The completed project homepage looks like this:
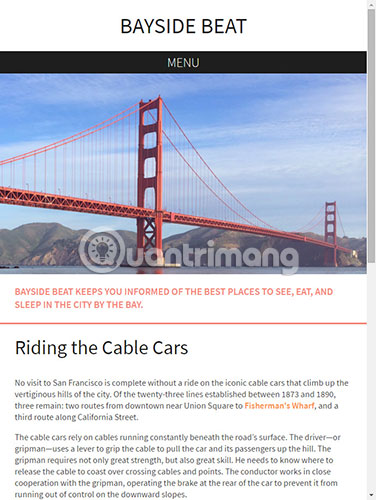
5. Change the browser size by dragging one of the sides to the inside. When the view is smaller than 700px, the layout will change from two columns to one column. The navigation bar is replaced with MENU on a black background. The white text in the box on the image of the Golden Gate Bridge, has turned dark pink and is currently placed below the image, as follows:
6. Click MENU. The navigation menu will slide down smoothly on a semi-transparent black background.
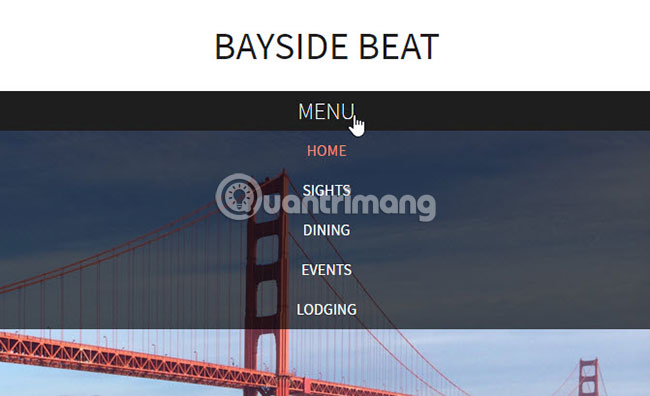
7. Click MENU again. The navigation menu slides up and loses sight.
8. Open the navigation menu again and click SIGHTS to see the second page.
That's what you'll build with Dreamweaver CC 2015 throughout this series. In this process, you will learn how to do the following:
- Identify a website in Dreamweaver.
- Build the structure of a website with HTML5 elements.
- Use the DOM panel to search for elements already on the page and add new elements.
- Add text and images to the page.
- Download and re-sample images from Creative Cloud Library.
- Create styles for Dreamweaver's CSS Designer
- Create a second website in the same way.
- Control different layouts with the Visual Media Queries bar.
- Download completed pages to an online web server.
At the same time, you will also know the most important parts of the Dreamweaver user interface.
This is an in-depth tutorial, so you should spend a lot of time poring over. Each part is divided into small sections to explain what to do and why. Relax after each section to make sure you have enough time to understand and remember the various techniques introduced in it.
Note : This tutorial series was written for Dreamweaver CC 2015.2 and uses many features that are not available in older versions of the program. Although older versions of Dreamweaver also have the ability to build a similar website, you should use Dreamweaver CC 2015.2 for this tutorial. If you have not registered Creative Cloud, you can use the free trial version.
Set up workspace for Dreamweaver
Before starting work, switch to Design workspace . This will give you access to all the main control panels needed for this tutorial. On Windows, the fastest way to do this is to use the Workspace Switcher at the top right of the screen.
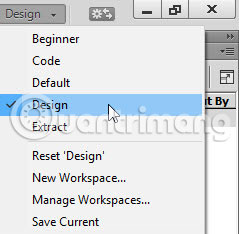
On Mac OS X, by default, Workspace Switcher is in the same location, but if you have turned off Application Frame , it will be on the left. If you have turned off Application Bar , Workspace Switcher will be hidden. Another way to select a workspace is to go to Window> Workspace Layout> Design .
Set up a website in Dreamweaver
A common mistake for beginners is to start working immediately on websites in Dreamweaver without defining the website. This results in links to images and stylesheets that point to a location on the local computer. Everything works well until you upload the website to the remote server. Then you discover all of his links are broken and need to be repaired. Avoid this unfortunate mistake by always defining the site. This is a quick and easy task.
In Dreamweaver, a website organizes all the documents on the local computer that are linked to the website and allows you to monitor, maintain links, manage files, and transfer web site files to the server. web. A typical Dreamweaver website has at least two parts:
- Local Folder : This is the working directory, usually a folder on the hard drive. Dreamweaver calls this folder the original site.
- Remote Folder : This is where you store files on the computer running the web server. Web servers are usually (but not always) computers that make your site publicly available on the web.
Tip : If you plan to work on some websites, you should create a folder on your local hard drive to store them. On Mac OS X, the Home folder includes a folder called Sites. On Windows, set the directory named Sites to the highest level of drive C. Although screenshots for this series are made on Windows, the approach is identical to Mac OS X (in addition to the shortcuts and some buttons will be covered later).
Define the Local Site Folder for the Bayside Beat website
All you need to get started is to name the site and tell Dreamweaver where you want to store the files on the local computer. You do not need to specify Remote Folder until you are ready to upload your website to an online web server on the Internet.
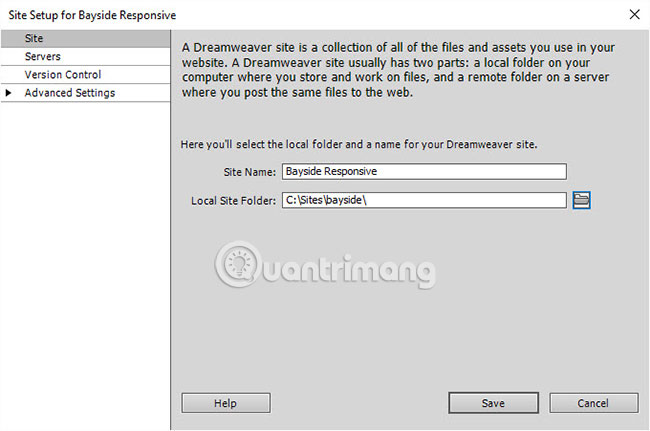
1. Open Dreamweaver and select Site> New Site . The Site Setup dialog box will appear.
2. In the Site Name field , enter Bayside Responsive as the name of the website. The name is used internally by Dreamweaver to identify websites. This name may or may not have a space.
3. Click the folder icon next to the Local Site Folder field to browse and select the Bayside folder from the sample files you downloaded earlier. The Site Setup dialog box now looks like the image below, although the file path for Local Site Folder will depend on where you copied the bayside folder on your hard drive.
4. Expand Advanced Settings in the left column of the Site Setup dialog box and select Local Info .
5. Click the folder icon to the right of the Default Images field to open the Choose Image Folder dialog box .
6. Click New Folder (in Windows, New Folder is at the top of the dialog box; on the Mac, it is at the bottom). Name the new folder image, select and press Select Folder (Windows) or Choose (Mac). The Site Setup dialog box will look like this:

7. Leave all other options at the default values. There is no need to insert values for Web URLs because we are using Document- related links .
8. Click Save.
Dashboard Files in Dreamweaver now show the new local root directory for the current page. The list of files in the control panel Files serves as a file manager, allowing you to copy, delete, move and open files just like on a desktop.
Now you have defined the Local Site Folder for the Bayside Beat website. This is the place to keep copies for web pages on the local computer. You have also specified the default folder to store images. This tells Dreamweaver to automatically copy the image to that folder when you import images from outside the site's root directory.
Name files and folders in a web page
A typical website contains a large number of files and directories. For ease of maintenance, it is important to organize them appropriately. Create separate, properly named folders for images, videos, stylesheets, and external JavaScript files. Remember the following points:
- File and folder names in web pages will never contain spaces or any of the following characters: /?% *: | '<> .
- Although other special characters are allowed, but generally, it is advisable to limit the use of Roman numerals, dashes and underscores.
- Most file and directory names end as part of the website URL, so keep them short but meaningful. Long URLs are difficult for users to remember and enter into browsers on mobile devices.
- The majority of websites are hosted on Linux servers, case sensitive. Use all lowercase letters for file names and folders to avoid problems finding files.
Save the asset to the Creative Cloud Library
Images and palettes for this project are stored online in the shared Creative Library Library. Creative Cloud Library makes images available everywhere and is especially useful when collaborating with others. For example, a person may be responsible for creating visual assets, while you are responsible for building the actual website. Check out the online documentation to learn more about Dreamweaver's Creative Cloud Library.
You need to save the assets in the shared library to your own library.
1. Use assets in Bayside Beat Libary.
2. Click Save to Creative Cloud at the top right of the browser screen and save the shared asset to the Bayside library, if you haven't done so already.
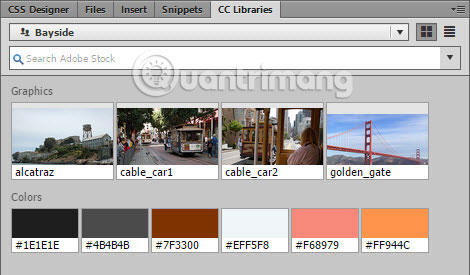
3. Select the Bayside library in the Dreamweaver CC Libraries panel. You will see 4 images and 6 colors as follows:
Create working websites
You will create the Bayside Beat website from scratch. The sample files you downloaded contain text content in Microsoft Word and rich text format, a JavaScript file and project copy at each stage for you to compare with your own working files.
Let's start by creating two HTML pages for the website.
1. If Dreamweaver welcome screen is displayed, click HTML in the Create New section, or choose File> New from the main menu. The New Document dialog box will open.
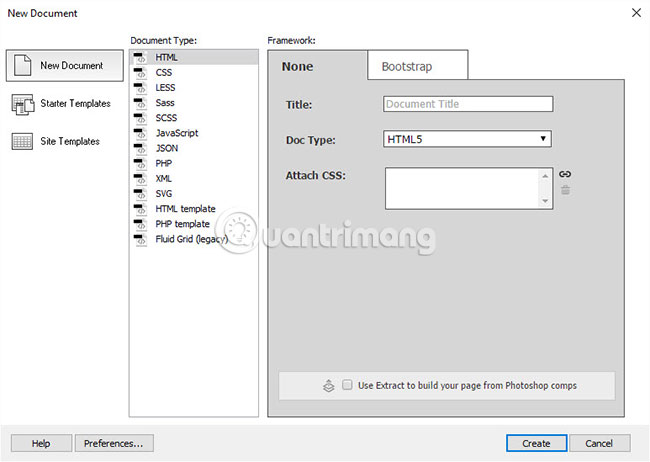
2. Make sure New Document is selected in the left column, Document Type is set to HTML and the Framework is set to None.
3. Enter Bayside Beat: Cable Cars in the Title field .
4. Make sure Doc Type is the default HTML5 and nothing is listed in the Attach CSS field. If anything is listed in Attach CSS , select it and click the trash icon on the right of the field.
5. Click Create. Dreamweaver creates a blank HTML page in the Document window .
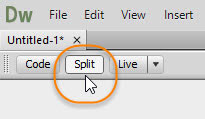
6. If necessary, select the Split button at the top left of the Document window to display the HTML markup below.
7. The Document (or Live View ) window is completely blank, but the basic HTML structure is revealed in Code View.
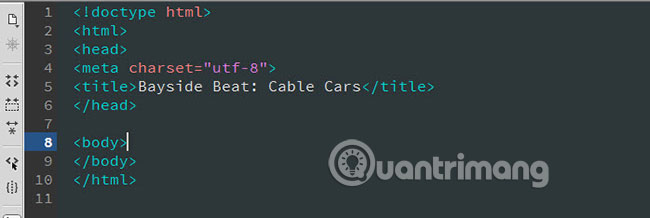
Line 1 declares the document type (doctype), letting the browser know this is an HTML file.
HTML is a tag-based language (tag). The tags are surrounded by curly braces. Most tags come in pairs, closed cards are indicated by a forward slash, after the opening bracket.
The entire page is nested within a pair of tags (on lines 2 and 10). The section on line 2 - 6 contains information for the browser. All content of the page is between open and closed tags.
In most cases, Dreamweaver creates all the necessary code for you when you work with an intuitive interface and dialog box. But you need to be careful if you copy and paste the code from elsewhere. An HTML page has only one head and a body. If the content is not displayed in Live View or the browser, the most likely reason is that you pasted it outside the body section.
8. Save the file by selecting File> Save or using the keyboard shortcut Ctrl + S (Windows) or Cmd + S (Mac).
9. In the Save As dialog box, make sure you are in Bayside's Local Site Folder, name the index.html file and click Save.
The file is listed in the Files panel and the tab at the top left of the Document window displays the file name.
Tip : You can always access the Local Site Folder of the current site by clicking the Site Root button at the bottom of the Save As dialog box .
10. Create a new HTML file. The welcome screen is no longer displayed, so you need to use the File> New menu option to open the New Document dialog or press Ctrl + N (Windows) or Cmd + N (Mac).
11. Select the same options as in step 2 earlier, but this time leave the Title field blank , and then click Create.
12. Save the file in the web root directory as sights.html.
13. In Split View, the value between the tags on line 5 is "Untitled Document".
This is what will be displayed in the browser tab or title bar and also selected by the search engines. Leaving this value unchanged is a common mistake for beginners.
There are two ways to change this value:
Go into the code and change it manually, making sure you keep the HTML tags open and closed.
Use Dreamweaver's Property Inspector tool.
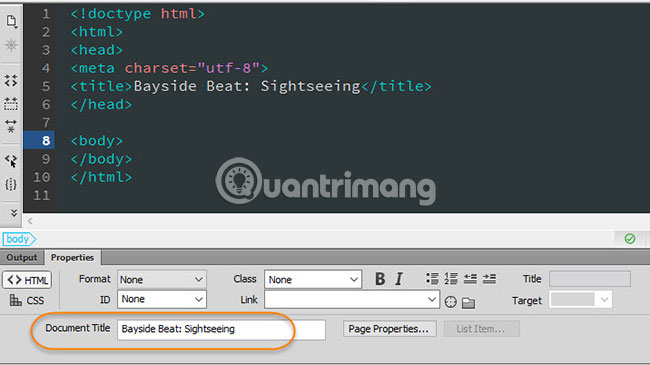
14. The Property Inspector is a large horizontal panel at the bottom of the Document window in the Design workspace. If necessary, click the Properties tab to make the Property Inspector appear (initially, it is hidden behind the Output panel).
15. Replace Untitled Document in the Document Title field with Bayside Beat: Sightseeing. Note that nothing has changed in basic HTML when you type. To confirm changes, press Tab or Enter / Return . The value in the Document Title field replaces Untitled Document in HTML code on line 5.
16. Save the sights.html.
Although Dreamweaver creates HTML markup for you, it is best to keep Split View open when working with websites. Split View allows you to verify that the changes you have made are correct. That doesn't mean Dreamweaver is not reliable. Except in unusual circumstances, Dreamweaver will do exactly what you require. But it is important to know where you are in the document. If the insertion point is in the wrong position, the new code will be added there. If you are not careful, you may encounter a mess that is difficult to find the cause. The DOM dashboard, which will be used in the next part of this tutorial series, also plays a very important role in tracking page structure.
Tip : If you want to see the code below with a visual representation of the page, select View> Split Vertically . To revert to dividing the Document window horizontally, select the same option again. The View menu also allows you to choose Live View on which side. Drag Code and Live View separation bars to adjust their relative size. Dreamweaver remember the settings automatically.
Now, you have finished defining your site and creating two blank websites. You can start adding content to them by following section 2: Adding and formatting text content.
Hope you are succesful.