Add free Windows Live Apps to your blog
In the following article, TipsMake.com will introduce to you how to add a combination of Windows Live Apps applications for free
TipsMake.com - Want to integrate Hotmail, Office Web Apps, Messenger . on your personal website or blog? In the following article, TipsMake.com will introduce to you how to add a combination of Windows Live Apps applications for free .
To register Windows Live to the user's domain, you need to add the necessary information to the WordPress.com blog or change the corresponding properties of the domain.
Begin
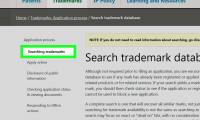
Access the Windows Live Custom Domains link to get started. Windows Live accounts support you up to 500 child accounts, so it is suitable for teams and teams working in a large organization.
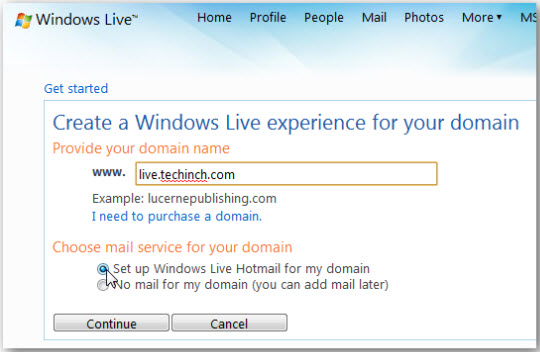
Next, enter the domain name or subdomain to add Windows Live to. In this article, we will proceed to add the email address to the domain, so select Set up Windows Live Hotmail for my domain > Continue :
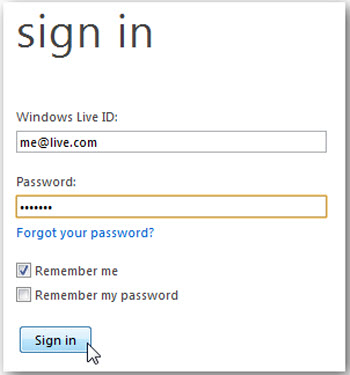
Next, you need to log in with your Windows Live ID account, or if you don't have one, create a new one:

The login account can be Hotmail, Live Messenger, XBOX Live, Zune ID, or Microsoft.com:
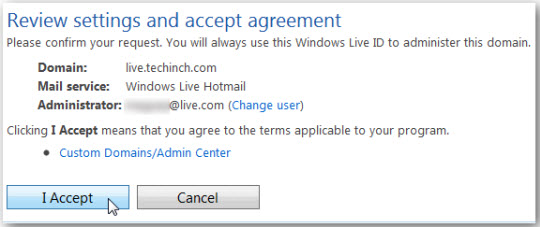
Review the full parameter you entered correctly or not, and press the I Accept button to set up the account:
The next thing to do is to add or adjust DNS information on your site. This may vary depending on whether you use the WordPress.com blog service, private server or other hosting service. Next, we will show you how to handle this step by step.
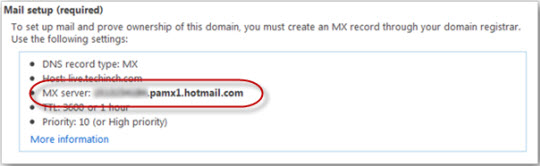
First, note the information of the system shown below. At the same time, you will see Mail settings:
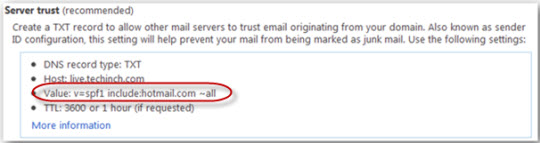
Security settings:
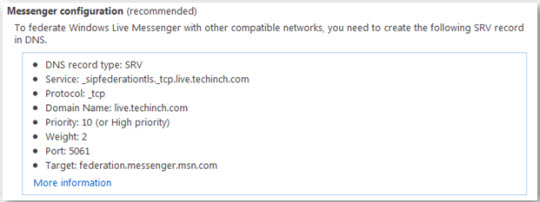
And integration with Messenger. Please note these settings, because if you make a mistake, we will not be able to continue in the following steps:
Integrate Windows Live into WordPress blog
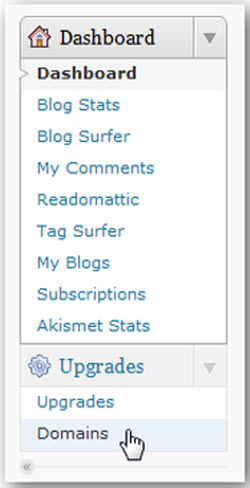
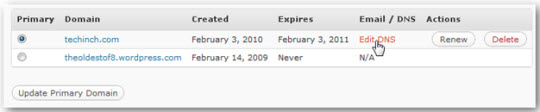
If you have integrated Windows Live into WordPress, log in to the main WordPress control panel with a new tab, select the button with the arrow next to Upgrades > Domains from the menu:
Click the Edit DNS link next to the domain that needs Windows Live integration:
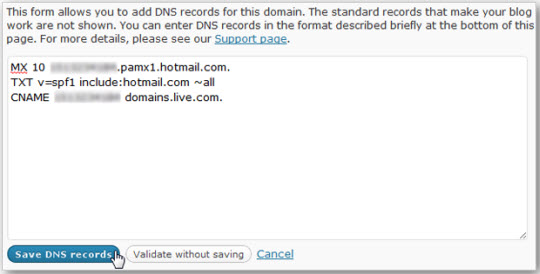
In the text box of this page, fill in the following values, remember to replace Your_info with the display code of the Mail Setup process on the Windows Live control page. In this example, the blurred screenshot above, this parameter will look like this: 1234567890.pamx1.hotmail.com :
MX 10 Your_info.pamx1.hotmail.com.
TXT v = spf1 include: hotmail.com ~ all
CNAME Your_info domains.live.com.
After changing, click Save DNS records . Note that this process only integrates email with your WordPress account, you cannot integrate Messenger with the domain system located at WordPress.com:
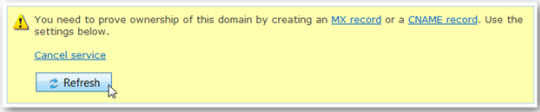
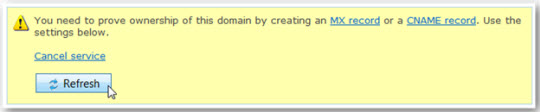
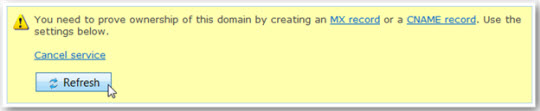
Finally, go back to the Windows Live Settings page and press the Refresh button. If all settings are correct, you can now use Windows Live on the WordPress.com domain immediately:
Integrate Windows Live with a separate server
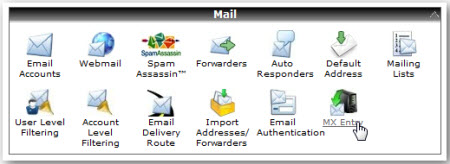
Basically, these steps are equivalent to integrating Windows Live with WordPress.com, but depending on the server or host we use, there will be appropriate changes. For some host systems, you may have to ask support staff to conduct additional MX records. In this article, the website uses cPanel control mechanism, and we will proceed to add MX Entries via cPanel.
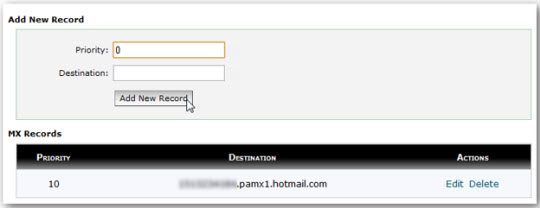
Log in to cPanel window, select Mail > MX Entry :
Next, do the same as above:
MX 10 Your_info.pamx1.hotmail.com.
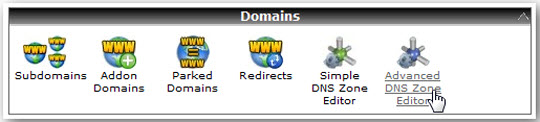
Then, go back to the cPanel control page and select Domains > Advanced DNS Zone Editor :
Add 1 txt record with the following content:
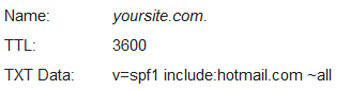
Select Add Record after filling in the above parameters:

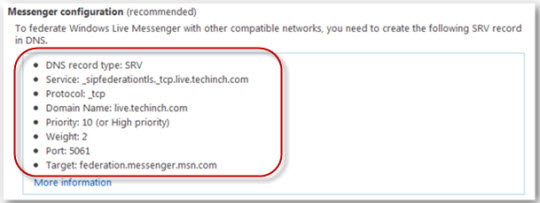
To complete the process of integrating Messenger into the domain, you need to add the SRV value into the DNS adjustment section. But cPanel does not have this option, so we need support from the host service provider:
After completing this step, go back to the Windows Live Settings page and press the Refresh button. Now you can use Windows Live right on the WordPress.com domain:
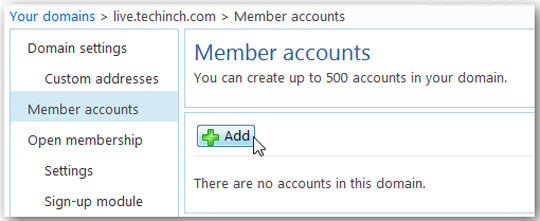
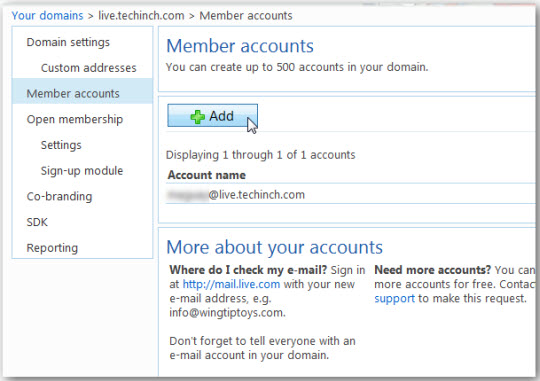
Create an email account on your domain
When we have completed all of the above steps, we have reached about half of the way. Now you can create additional email accounts to access Hotmail and Windows Live applications from your domain. Click Add to start:
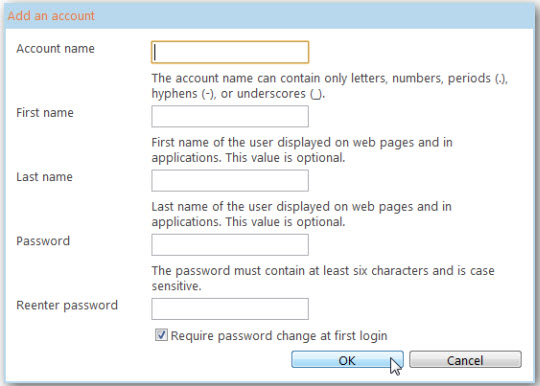
Enter the account name (will be in the form of accountname@yourdomain.com ), enter the password (this is a temporary password and you will have to change it after the first time you login):
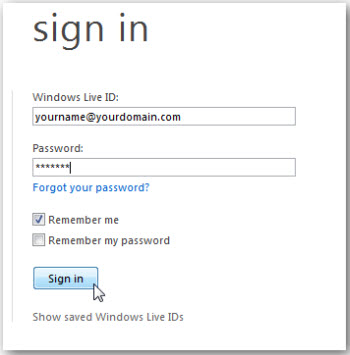
Next, go to http://www.mail.live.com/ and log in with the newly created email address and password. Remember the login email address will look like yourname@yourdomain.com :
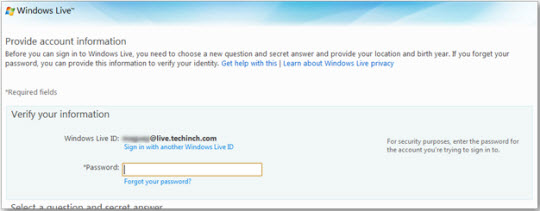
To complete this process, enter a password, a secret question and answer, backup email address and geographical location. Choose I accept :
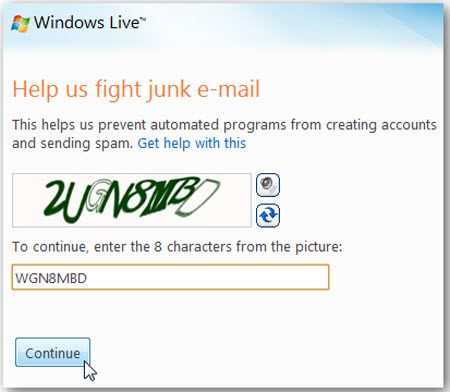
Enter the verification code via the Captcha mechanism to check, click Continue to continue:
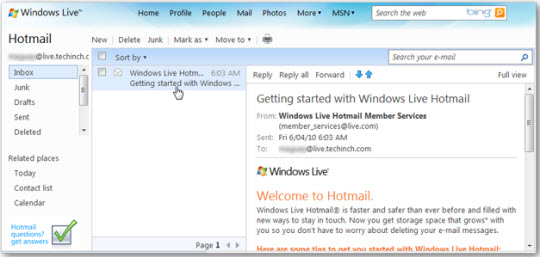
Your new Hotmail mailbox will be downloaded:
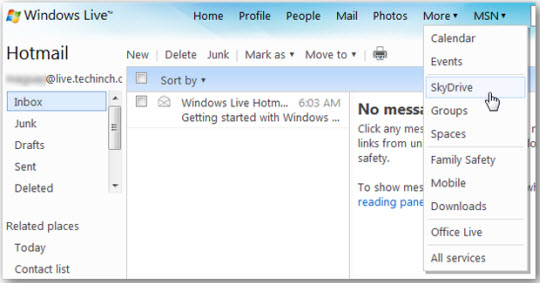
You can now access any Windows Live service from the menu above:
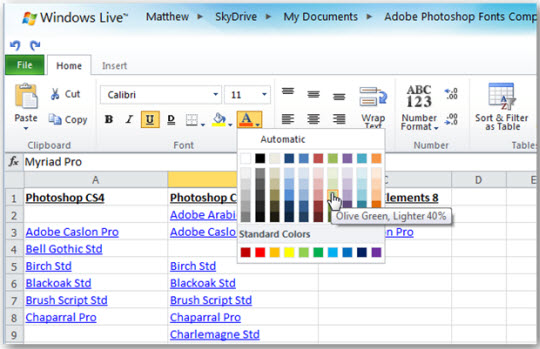
This is an example of Excel Spreadsheet documents opened with Office Web Apps via SkyDrive on a Windows Live account:
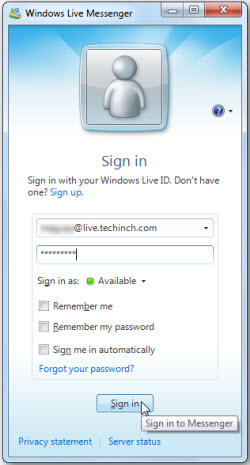
Log in to your account yourname@yourdomain.com with Windows Live Messenger:
Important paths
Now accessing your Windows Live account is extremely simple and easy. Just log in to the Windows Live member pages like http://www.hotmail.com/, http://www.skydrive.com/… and use your Windows Live ID account from your domain. To manage Windows Live for domains, visit https://domains.live.com/ and log in with the Windows Live ID used to create an account:
Good luck!
Was this article helpful?
Your feedback helps us improve.


Reader Comments 0
Sign in with email or Google to join the discussion.