Instructions for creating websites with Dreamweaver CC part 5
Learn how to use CSS in Code View and CSS Designer to style the home page, set the spacing around components, and add automatically resized images on different devices.
Table of Contents
In the fifth part of this series, learn how to use CSS in Code View and CSS Designer to style the homepage, set the distance around components, and add automatically resized images on devices. different.
Note : Downloads include Creative Cloud Libraries and project files for this tutorial series. You can continue to build on your start file in part 1 or navigate to the relevant directory to use the start file for each section.
- Instructions for creating websites with Dreamweaver CC part 1
- Instructions for creating websites with Dreamweaver CC part 2
- Instructions for creating websites with Dreamweaver CC part 3
- Instructions for creating websites with Dreamweaver CC part 4
Welcome to Part 5 of this tutorial series on how to create a simple and responsive website in Dreamweaver CC 2015. In the previous section, you started creating the homepage of the Bayside Beat website, first of all work in Code View, then use CSS Designer. The advantage of using CSS Designer is that you can see the results immediately in Live View. In this section, the design begins to take shape by adjusting the space around the elements and adding images to automatically resize, depending on the screen resolution.
Control horizontal and vertical space with padding and margin
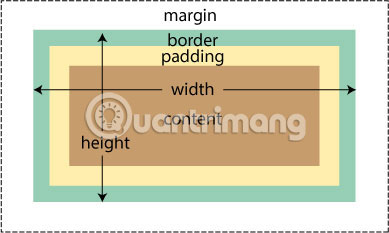
CSS has two horizontal and vertical spatial control properties around an element: Padding and margin. Both of these attributes add space around an element, but there are important differences between them. The margin must not include the overall width or height of an element, regardless of whether you use the default model box or override it with padding and margin created in part 4.
The following table summarizes how padding and margin affect different features.
The Padding Margin element of the element's background that extends into the padding Background of the parent element displays through Border Padding inside the Margin going outside Collapsing (margin properties overlap values together) Never collapse The Adjacent vertical margins will collapseBoth padding and margin increase the space around an element, but the margin works in a different way.
The figure below shows the two elements stacked. The first one has a lower margin of 20px, and the second one has an upper margin of 30px.
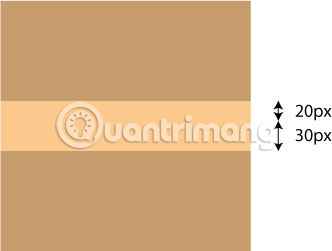
You immediately assume that the vertical distance between the two elements is the sum of both margins (in other words 50px in this example). But not so. The adjacent vertical margins will merge (collapse). Therefore, the vertical distance between the elements is the larger margin ( 30px in this example).

Padding, on the other hand, never collapses. If you replace the lower and upper margins in this example with the same number of padding (the first element has a padding of 20px and the second element has a padding of 30px ), the content of both elements will be 50px apart. .
In the rules you created in part 4, both the body and the wrapper
All have a top margin of 0. So why is there a space at the top of the page? That's because browsers apply default margins to some elements, including headings.
Margin on the default of heading
combined with the margin on the wrapper 's 0
push the wrapper off the top. Because the parent element's background is always displayed over a margin, you will see a light blue background in the body. On the other hand, padding is never collapsed. In addition, the background part of the element extends into padding.
Delete the distance at the top of the page and style the heading
To solve the gap problem at the top of the page, you need to replace the upper margin of the main heading with the number of equivalent padding. At the same time, you must also style for other headings.
1. Select the main heading
in Live View and make sure that the responsive.css are selected in the Sources of CSS Designer. The next selector will go after #wrapper, so make sure it is selected in selectors. Then click the plus button to create a new selector.
2. Since the heading is selected, Dreamweaver suggests #wrapper header h1 as the selector. This is a very specific selector, looking for elements
nested within elements
in turn placed inside an element with the wrapper ID . To make the selector less specific, press the arrow key once to change the proposal to header h1 . But this is still too specific, so press the up arrow again to change it to h1. The target will now target the elements
anywhere on the page. To apply the same rules to elements
,
Click on the right of h1 in the editable field and enter a comma followed by h2. The selector will look like this:
h1, h2
Press the up arrow key to make the selector work less specifically when Dreamweaver first suggests a name for the selector. If necessary, double-click the selector to open the edit field and simply enter the group selector manually.
3. Click the icon
 at the top of Properties and set the following text properties for the new selector:
color: #1E1E1E (nhấp vào mẫu màu xám đậm trong bảng điều khiển CC Libraries để sao chép giá trị thập lục phân vào clipboard) font-style: normal font-weight: 400
The headings are now darker gray than the main text and they are no longer highlighted.
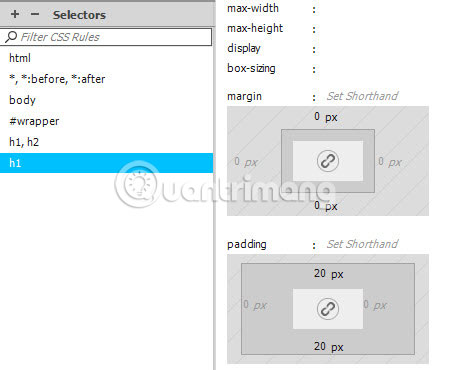
4. With the main heading and the selector h1, h2 still selected, click the plus button in the selectors and press the up arrow twice to create the selector for h1. Click on the icon to switch to the layout section and set the following properties:
lmargin-top: 0px margin-bottom: 0px padding-top: 20px padding-bottom: 20px
This preserves the space along the heading, but the background part comes from the wrapper
not the body. Unexpected light blue strips will disappear.
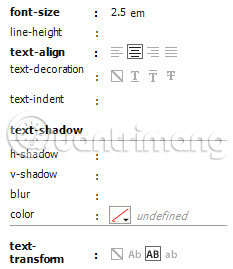
5. In the text, set the following attributes and values:
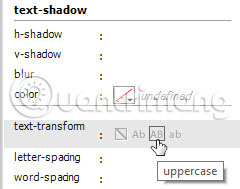
font-size: 2.5em text-align: center text-transform: uppercase
Text-align and text-transform attributes are set by symbols. Hover your mouse over them if you're not sure what they mean.
The main heading is now larger, centered and written in all capital letters.
6. Select one of the heading
and create the h2 selector by pressing the up arrow twice to make the selected selector less specific. Set the following attributes and values:
margin-top: 0.5em font-size: 2.25em
Use me as a measure of changing the size of the text and the top margin in proportion to the text in the main body of the page.
Add space horizontally inside the wrapper
The text inside the wrapper
located right next to the edges. One way to add space on both sides is to add some horizontal padding. However, that will prevent the image of the Golden Gate Bridge from filling the entire width of the hero
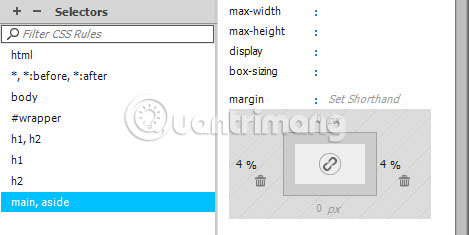
when inserting it later. Instead, create a group selector for main, aside with the following attributes and values:
margin-left: 4% margin-right: 4%
After you make the changes, don't forget to save everything with File> Save All Related Files .
Insert images from CC Library with captions
Make pages 'shine' with some images. In this section, you will download an image from CC Library and insert it into index.html with the caption, using the element
At the same time, you will select the image format and resize it.
1. Open Split View so you can see what happens in the HTML below. If necessary, click Source Code in the Related Files toolbar. Then, in Live View, select the second paragraph after the "Riding the Cable Cars" heading, starting with the words "The cable cars rely ." .
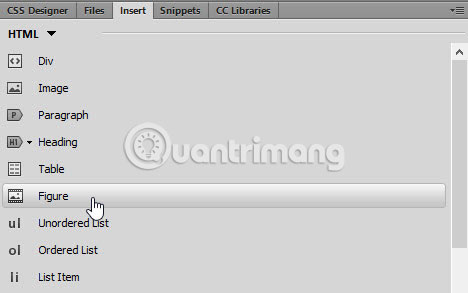
2. Open the Insert control panel and click Figure in the HTML section.
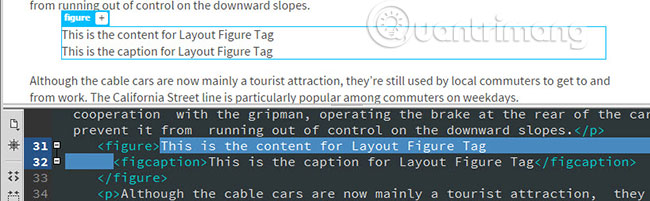
3. Select After from Position Assist Dialog to insert the element
after the selected paragraph. New element has nested inside. Both contain placeholder text.
4. With element
Still selected, right-click on the image labeled cable_car1 in the CC Libraries panel. Select Unlinked Insert from the context menu. Position Assist Dialog will ask where you want to insert the image. Click Nest to nest it inside the element
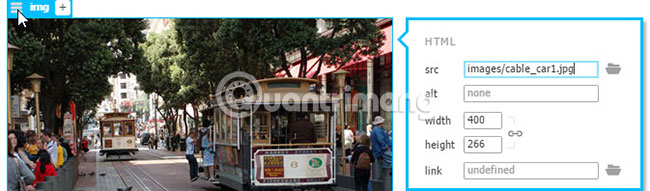
5. A dialog box asks you to specify the location of the file in the web page, image format and size. The src field automatically proposes to save the image in the image folder because you set it as the default image folder in Part 1 of this tutorial series. It is based on the proposed name of the image in CC Library. Both options are fine, but saving images in PNG format will make the file size larger. Open the drop-down menu to the right of the dialog box and select JPEG.
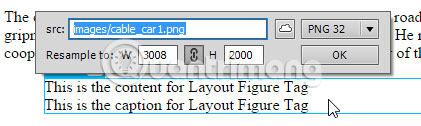
This changes the file name extension in the src field to .jpg.
6. With a width of over 3000px, the image size is too large. Change the value in the W field to 400. By default, the link icon between the fields W (width) and H (height) is selected, so the value in the H field will automatically change to 266 .
Make sure the values in the dialog box match the image below, and then click OK.

7. Images are inserted inside the element
and Dreamweaver automatically puts width and height in the HTML below. You want this to be a responsive layout, so these values need to be removed.
With the image still selected, click the hamburger icon on Element Display to display the Quick Property Inspector , delete the values in the fields width and height, and close the Quick Property Inspector .
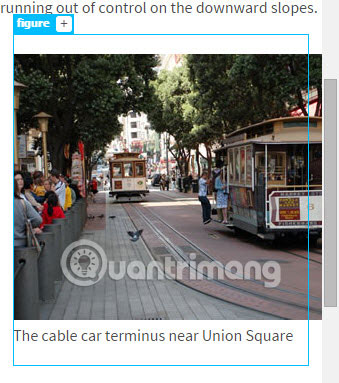
8. Double-click the placeholder text for the element
To enter Edit mode , select it and click Delete to leave only images and comments in the placeholder.
Dreamweaver can also delete alt = "" from the card

9. Double-click the placeholder text for the legend and replace it with the car terminus cable near Union Square .
10. Save index.html.
The context menu in the CC Libraries panel has the Linked and Unlinked options for Insert and Download. Unlinked simply creates a local version of the image in the website. If you select one of the Linked options , the local version will automatically be updated whenever the image is modified in the library in Creative Cloud.
Drag and drop images from CC Library
Other images in index.html need to be nested inside
with ID hero . In this section, you will learn how to insert it into the page by dragging and dropping directly from the CC Libraries panel. This technique can be difficult to master the first time, so read through the following guidelines for an overview of how to do it before trying it.
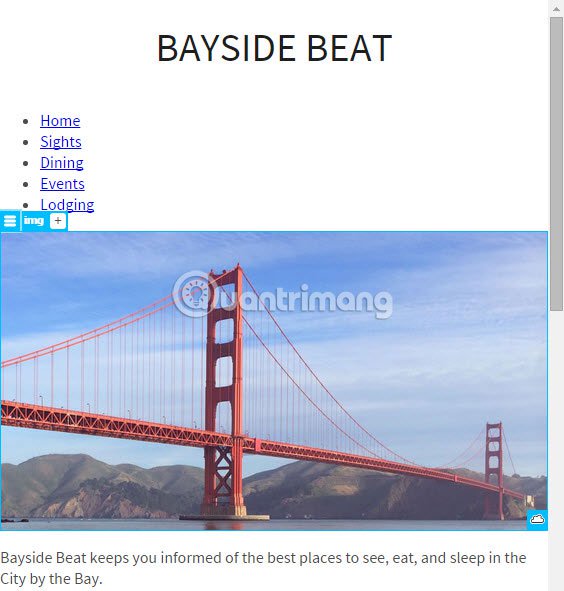
1. Close Split View by clicking on the Live button at the top left of the Document window and making sure you can see the start "Bayside Beat keeps ." right after the bulleted list.
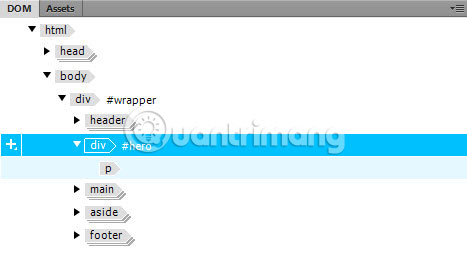
2. In the DOM panel, collapse most of the nested elements, but make sure that the #hero div element is expanded, as shown in the image below. This makes it easier to locate images more accurately.
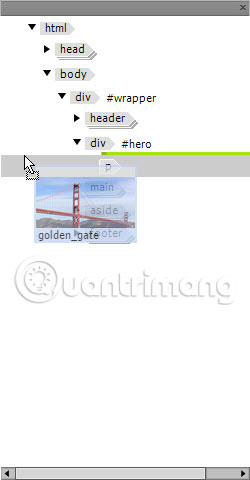
3. In the CC Libraries panel, select the image with golden_gate label and start dragging it to Live View. When moving on the page, you will see a horizontal green bar indicating where the image is inserted.
Stop dragging when the blue bar is between the list of bullets and paragraphs, but do not release the mouse button. After a few seconds, you will see an icon Small at the bottom right of the mouse pointer.

4. Do not release the mouse. Move the mouse pointer over the icon to display the floating version of the DOM panel. Continue dragging across the floating panel until the blue line is between the #heroelement div and the following p . When it is in place, release the mouse.
5. A dialog box appears asking you to specify the location and how to store images in the local website.
Change the image format to JPEG, set the width and height to 1000 and 547 respectively. Then click OK.
6. The image of the Golden Gate Bridge must be inserted between the bulleted list and the paragraph. Don't worry if it's in the wrong position. You can fix that very quickly.
With the image still selected, click the hamburger icon to display the Quick Property Inspector .
7. Enter The Golden Gate Bridge in the alt field , while deleting the values in the width and height fields. This image is not yet annotated, so the alt attribute is required for non-intuitive browsers. The image will automatically resize depending on the screen resolution, so no size is needed.
8. In the DOM control panel, check that the img element is between the div # hero and p , as well as indented at the same level with p .

9. If the image is in the wrong position, drag it into the DOM panel until there is a horizontal blue bar between the following #hero and p div . Then release the mouse.
10. Save index.html.
Live View drag and drop as well as DOM control panel are effective ways to rearrange assets and HTML elements in a web page. So practice this technique until you are comfortable with it.
If you don't like using the mouse, you can insert the image of the Golden Gate Bridge in the same way as in the previous section. First, just select the hero
, then use Unlinked Insert from the context menu. When prompted by Position Assist Dialog , select Nest.
Make the image responsive
Images of Golden Gate Bridge 1000px wide and other images in a 400px wide web page. Although you have removed width and height attributes from HTML, browsers will display images at their natural size unless you use a bit of 'magic' CSS to make them responsive to Screen space is available.
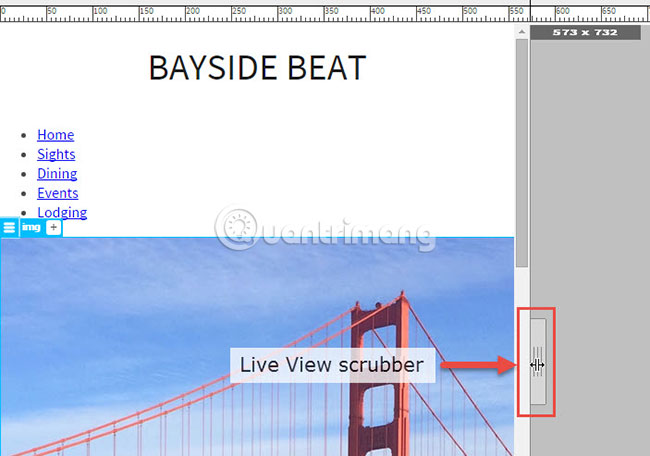
1. Reduce the width of Live View by dragging the Live View filter to the left. When the Live View is less than 1000px wide, a horizontal scroll bar appears and the right side of the Golden Gate Bridge is obscured.
2. With the Golden Gate Bridge image selected in Live View, create a new selector in CSS Designer. Press the arrow once to change the proposed selector to #hero img and press Enter / Return to confirm the change.
This creates a 'descendant' selector, consisting of two or more selectors separated by a space, targeting the image inside an element with the hero ID .
3. Set the following properties and values (in the Layout section):
max-width: 100% display: block
Set the maximum width attribute to 100% to ensure that the image is never wider than its parent, in this case the hero
.
4. Drag Live View in both directions. Image of Golden Gate Bridge automatically resizes to fill available horizontal space.
5. Select the cable car image in Live View and press the arrow up once. This will move the selection to the HTML hierarchy to select the element
dad.
6. Create a selector for the image and set the following properties:
width: 400px max-width: 92% display: block margin-left: auto margin-right: auto padding-top: 20px padding-bottom: 20px
7. If necessary, change the Live View size to less than 400px. Visual guide for the element
indicates that the maximum width attribute of 92% is overwriting the width and the element is centered horizontally, but the image spills out to the right.
8. To style the nested image in elements
You need to create another selector of figure img . Then set the maximum width attribute to 100%.
This prevents images from spilling out of its parent container. When Live View is wider than 435px, the image is displayed at a natural size of 400px and centered horizontally.
9. While you are still working with the element
create a selector for figcaption, then set the following attributes and values:
display: block margin-top: 0.5em font-size: 0.75em text-transform: uppercase
Use CSS filters to style images
Most modern browsers currently support CSS filters, although they are still only tested. Create some simple styles to convert the image to grayscale and then reveal the color version when you hover over it.
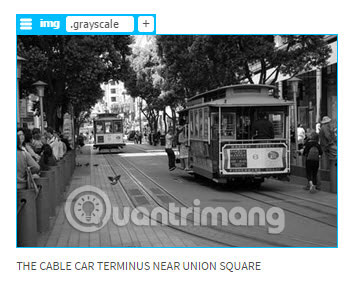
1. Select the cable image in Live View and click the plus button in img Element Display . Enter .grayscale (starting with a period) in editable fields and press Tab or Enter / Return to assign a layer to the image.
Make sure that the responsive.css selected in the pop-up window appear and click repeatedly to remove it.
2. Select the .grayscale selector Dreamweaver created in CSS Designer's Selectors and select the Show Set checkbox at the Properties pane .
3. Use the add attribute and add the value fields to set the following attributes and values:
-webkit-filter: grayscale(100%) filter: grayscale(100%)
Now the image looks like a black and white photo.
4. In the Selectors pane , right-click the .grayscale selector and select Duplicate from the context menu. Dreamweaver creates a copy of the style rule, but leaves the name of the new selector open, ready for editing. Connect with pseudo-class : hover at the end like this:
.grayscale:hover
5. You will learn more about the pseudo-class in Part 6 of this tutorial series.
6. In the Properties pane , double-click the value of each attribute and change it to grayscale (0%).
7. Hover over the image in Live View. The image will now be colored.
8. Save changes File> Save All Related Files .
For compatibility with multiple browsers, you need to use both -webkit-filter and filter . Older browsers that cannot understand this attribute will ignore that styling rule and display colored images.
Create paragraphs with a unique style
In the previous section, you styled the cable car image by assigning it a layer. However, it is not always necessary to use a class to style different elements. The middle part of the picture of Golden Gate Bridge and heading
The first is inside the hero
so it can be styled differently from all other sections by creating a selector for #hero p .
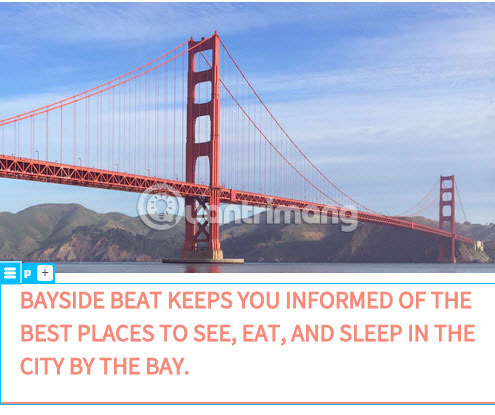
1. In Live View, select the segment right below the Golden Gate Bridge image.
2. Keeping the related stylesheet rules is important, so highlight the #hero img in the Selectors pane of CSS Designer and click the plus button. Dreamweaver suggests #wrapper #hero p as a selector. Press the arrow up once to change it to #hero p .
3. Uncheck the Show Set checkbox in the upper right of the Properties pane and click the icon
 to switch to the text.
4. Click on the pink pattern in the CC Libraries panel to copy the hexadecimal value # F68979 to the clipboard and paste it as the value for the color attribute. Only paragraph in hero
New to pink. All other passages are still dark gray.
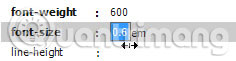
5. Set the font-weight to 600.
6. Click once on the right of the font size and select you as the measurement unit. As you discovered in Part 4, Dreamweaver always sets the value to 0 , so the text will disappear.
Value needs to be set to 1.5em. There are two ways to do this:
- Just enter 1.5 directly into the editable field and press
Enter/Returnto confirm the value. - Position the cursor right below the value until the pointer turns into a double-headed arrow. Then hold down
Ctrl(Windows) orCmd(Mac) key at the same time as the mouse button and drag the mouse to the right. When you do so, the value will increase by 0.1 units each time and you can see the effect immediately in Live View. If you adjust too slightly, drag back to the left. Click continuously on the value to confirm the edit. This technique is especially useful if you want to evaluate the results visually in Live View while dragging instead of setting a specific value.
Holding Shift while dragging will change the value of 10 units each time. Pulling without pressing the modifier key will change the value of 1 unit each time.
7. Convert text to uppercase by clicking the uppercase symbol for the text-transform attribute .
8. Click the icon
 on the Properties pane to switch to the border. The border attributes are grouped as tabbed dashboards. Setting the values in the first tab applies the same border to each side of the element. Other tabs place individual borders at the top, right, bottom and left.
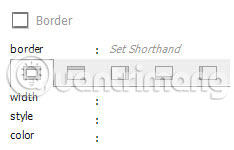
9. Select the tab for the bottom border and set the width to 3px and type to solid. There, there is no need to specify color because of the default color for the border, since it is inherited from the text of the current element.
10. To complete the styles for this paragraph, click the icon
 at the Properties pane to ignore the layout properties. Locate the padding visual tool, then set the left and right values to 4% and 20px below.
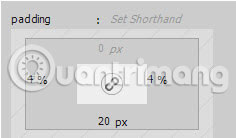
11. The distance between the upper part of the text and the image of the Golden Gate Bridge is too large. Use the marginvisual tool to reset the top margin to 10px.
The text now has a unique style.
Style the footer
Now, you have enough experience in creating selectors and styling rules to style the footer. Try adding a style definition directly in Code View at the end of the style sheet. The code looks like this:
footer { padding-top: 20px; padding-bottom: 20px; background-color: #1E1E1E; color: white; font-size: 0.8em; text-align: center; }
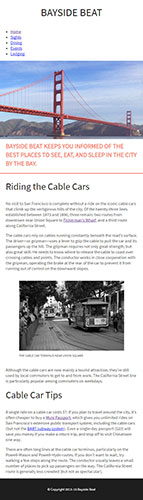
Don't forget to save any changes when you're done. If you view the page in the browser, it will now look like the image below. The design of the website is progressing great.
You have now completed half of the styling for the Bayside Beat website. Next is Part 6: Create link styles and navigation menus.
Was this article helpful?
Your feedback helps us improve.
Related Articles
 Instructions for creating websites with Dreamweaver CC part 119 minutes read
 Instructions for creating websites with Dreamweaver CC part 317 minutes read
 Instructions for creating websites with Dreamweaver CC part 735 minutes read
 Instructions for creating websites with Dreamweaver CC - Part 6: Create links and navigation menus26 minutes read
 Instructions for creating a website using Dreamweaver CC - Part 4: Changing fonts and creating basic styles21 minutes read
 Instructions for creating a website with Dreamweaver CC - Part 2: Adding and formatting text21 minutes read
Reader Comments 0
Sign in with email or Google to join the discussion.