How to Use Google Spreadsheets
On June 6, 2006, Google released a spreadsheets product as a 'limited test' to a small number of users. That limited test stuck around, and Google Sheets is now widely used as a sub-feature of Google Docs. The product resembles a simple...
Table of Contents
Part 1 of 3:
Opening a Spreadsheet
-
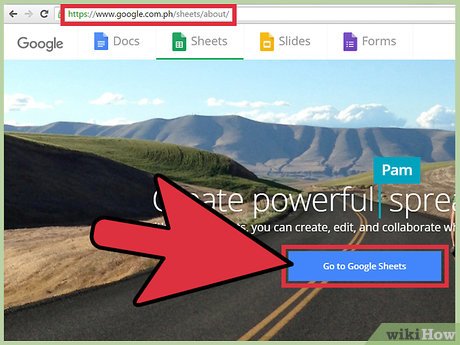 Access Google Sheets. Find the application by navigating to Google Sheets. Alternatively, you may click the grid menu in the upper, righthand corner of your screen while on Google's homepage, your Gmail account or any page with Google search results. Select Docs from the menu, and then click the menu with three horizontal lines on the upper, left-hand corner of the Docs page. Sheets should appear as your second option from the top, and you can click that. Finally, you may access Sheets through Google Drive by clicking the My Drive dropdown menu. Sheets will appear as one of the options.[1]
 -
 Open a new spreadsheet. Google will display a variety of templates under the "Start a new spreadsheet" text. The most basic option is the "Blank" sheet, but you can also open templates designed for budgets, calendars and a number of other uses. Click on More to see several additional templates.[2]
 -
 Rename your spreadsheet. New spreadsheets begin with italicized text reading "Untitled spreadsheet" in the upper, left-hand corner of the screen. Simply click on that text, replace with the title by which you want the document saved and then click ⏎ Return.
 -
 Open an existing spreadsheet from your computer. You may see a list Microsoft Excel and Google Sheets documents already located below the available templates. These are documents that have already been stored in the "My Drive" section of Google Docs. If you wish to open a spreadsheet that's not in My Drive, click on the folder icon at the upper, righthand corner of your screen (which will say "Open file picker" when the cursor hovers over it). You'll find the Upload option all the way to the right, and this will let you either drag and drop files from your computer or select a file from folder lists.
Part 2 of 3:
Using Google Sheets
-
 Enter data in rows and/or columns. Note that you can label the first cell of rows and columns, bolding the text of initial cells to set them apart from the numeric data that follows. You'll find columns going all the way to the letter Z and as many as 1000 rows initially.[3]
- You can also add more rows by scrolling to the bottom and clicking the Add button. It's followed by a text box (and text saying "more rows at bottom") that allows you to specify how many rows you wish to add.
-
 Adjust rows and columns. To manipulate entire rows (delete, hide, copy and paste, etc.), right-click the number of the row and select your preferred function from the menu that appears. To perform similar functions to entire columns, click on the dropdown arrow that appears when your cursor hovers over that column's letter.
- You may also move or delete a row or column by selecting its number or letter (respectively) and selecting the Edit tab from the toolbar.
- You may add a new row or column to a specific location by selecting any cell contained therein and clicking the Insert tab from the toolbar. You'll see options to insert rows or columns above or below and to the right or left of the selected cell.
-
 Format cells, rows or columns. To format an entire row or column, select its corresponding number or letter. To format a single cell, select that cell. Once your desired dataset has been selected, you may either click the Format tab or select from several formatting options (Font, Font Size, Bold, Italics, etc.) along the toolbar.
- The Format tab and toolbar will also allow you to determine the alignment and text wrapping for text or data within a cell, row or column.
- By selecting multiple cells (horizontally or vertically), you will also discover the option to Merge Cells on both the Format tab and toolbar.
- To adjust the way numbers are represented within a cell, row or column, note that there's a Number subsection under the Format tab. This allows you to show numbers in a variety of ways (currency, percentages, etc.). You'll also notice several commonly used number formatting options along the toolbar, as well as a small dropdown menu for additional number formats.
-
 Organize data. After selecting your desired dataset from specified cells, rows or columns, you may then sort or filter that data by clicking on the Data tab. You can even name ranges of data for easier reference.
 -
 Insert graphics. Various visual representations can be useful when attempting to help others better understand your data. You can find the option to place charts, images, links, forms and drawings near the bottom of the dropdown menu that appears after selecting the Insert tab.
 -
 Perform functions. Google Sheets' ability to perform calculations is one of its more useful capabilities. You'll find Functions under the Insert tab and at the far, righthand side of your toolbar. Clicking the toolbar button will reveal several commonly used functions (SUM, AVERAGE, etc.) along with an option for More Functions at the bottom of the dropdown menu.
- Google Sheets offers most of the same functions users find in Microsoft Excel, so those already experienced with the software should find Sheets to be pretty familiar.
- More advanced users can also create their own functions using Google Apps Script. You can find a more complete tutorial on doing so here: https://developers.google.com/apps-script/guides/sheets/functions#getting_started.
Part 3 of 3:
Saving and Sharing Spreadsheets
-
 Finalize your spreadsheet. While Google Sheets automatically saves your drafts, you may wish to again rename your spreadsheet or make a copy of it before sharing with others. You can find these options under the File tab.
 -
 Share your spreadsheet. You can find the Share function under the File tab and as a blue button in the upper, righthand corner of your screen. Select the Share option and enter email addresses of those whom you wish to access the spreadsheet. You'll note that you can determine whether others can edit, comment or simply view the document. You'll also see an option to create a shareable link that you can distribute separately.
 -
 Download your spreadsheet. If you wish to have a copy of your spreadsheet locally on your computer, select the "Download as" option under the File tab. You'll have several options including the ability to download the document as a Microsoft Excel (.xls) file or as a PDF.
 -
 Email your spreadsheet. You'll find this option under the File tab. You may either email collaborators (those with whom you've already chosen to share the spreadsheet) or email the spreadsheet to others as an attachment.
4 ★ | 2 Vote
- 5 Google Sheets features you should know
- How to set edit permissions for spreadsheets in Google Sheets
- Familiarize yourself with spreadsheets, rows, columns, and cells.
- How to quickly insert a Google Sheets spreadsheet into Google Docs
- How to set up the right to edit spreadsheets on Google Sheets
- How to protect spreadsheets in Excel
- How to insert Google Sheets spreadsheets into Google Docs
- Google Docs & Spreadsheets: games or tools
- Working with Sheets
- How to open multiple spreadsheets side by side in Excel 2013
MORE LIKE THIS
- How many tabs does it take to slow down your browser?
- Alt + Tab delay and 5+ quick and easy ways to fix it
- Alt Tab does not switch windows, the fix is not difficult
- Add Tab to Windows Explorer as a browser
- 47 common keyboard shortcuts for all web browsers
- How to Add a Pinterest Tab to Your Facebook Fan Page
- How to Close Tabs
- How to Reopen a Tab
- How to Update Sound Drivers
- Review Samsung Galaxy Tab S6: Do you want to buy an Android tablet?
-
 How to quickly insert a Google Sheets spreadsheet into Google Docs
-
5 tips to turn messy Excel data into beautiful results in just minutes
-
Excel 2016 - Lesson 3: How to create new and open existing spreadsheets
-
Please experience 'ChatGPT's grandfather' on Excel
-
How to Compare Data in Excel
-
How to insert a table into an email in Gmail
 How to quickly insert a Google Sheets spreadsheet into Google Docs
 5 tips to turn messy Excel data into beautiful results in just minutes
 Excel 2016 - Lesson 3: How to create new and open existing spreadsheets
 Please experience 'ChatGPT's grandfather' on Excel
 How to Compare Data in Excel
 How to insert a table into an email in Gmail
-
 Free Tools
-
Application
-
Web Email
-
Website - Blog
-
Web browser
-
Support Download - Upload
-
Software conversion
-
Social Network
-
Simulator software
-
Online payment
-
Office information
-
Music Software
-
Map and Positioning
-
Installation - Uninstall
-
Graphic design
-
Free - Discount
-
Email reader
-
Edit video
-
Edit photo
-
Compress and Decompress
-
Chat, Text, Call
-
Archive - Share
-
-
System
-
Mac OS X
-
Hardware
-
Game
-
Tech info
-
Technology
-
Science
-
Life
-
Electric
-
Program
-
Mobile