How to use Calendo to create an appointment on Windows 10
Calendo application will help you to make appointments and manage daily scheduled tasks.
Table of Contents
The calendar application helps users a lot in their daily work, helping you to schedule tasks as well as managing them more quickly and conveniently, compared to writing paper in a traditional way. Calendo is an application to schedule tasks to be performed on a daily basis, with an intuitive interface and very easy to use. Users only need to enter the task to be done on a specific day and review it whenever they need on Windows 10 devices through account synchronization. The following article will show you how to use Calendo to create and manage tasks and appointments on Windows 10.
- 5 tools to help manage and schedule
- How to schedule and event with Calbot Windows 10
- Instructions for using Calendar with Google Calendar in Windows 10
- Guide to managing jobs with Google Calendar in Gmail
Instructions for scheduling on Windows 10 with Calendo
Step 1:
Users click on the link below to install the Calendo application for the computer.
- Download the Calendo Windows 10 app
Step 2:
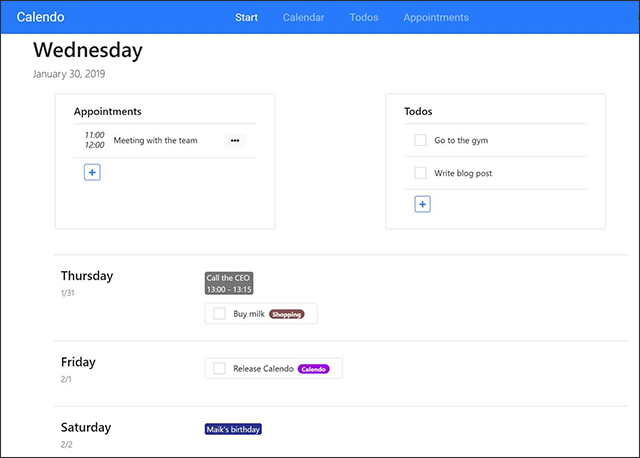
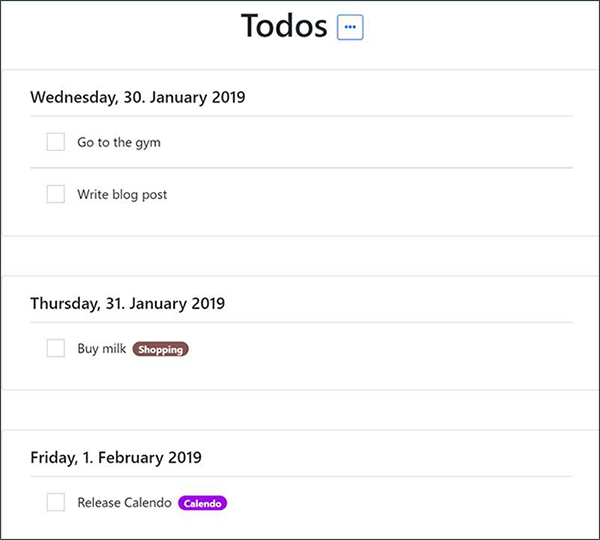
After installation is complete, we open the application and display the main interface with the items with different functions. The Start item displays all scheduled appointments, Calendar displays the calendar with added dates, Todos with tasks created and Appointments to manage created appointments.

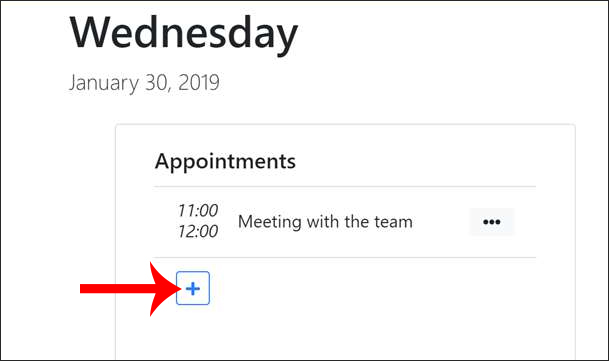
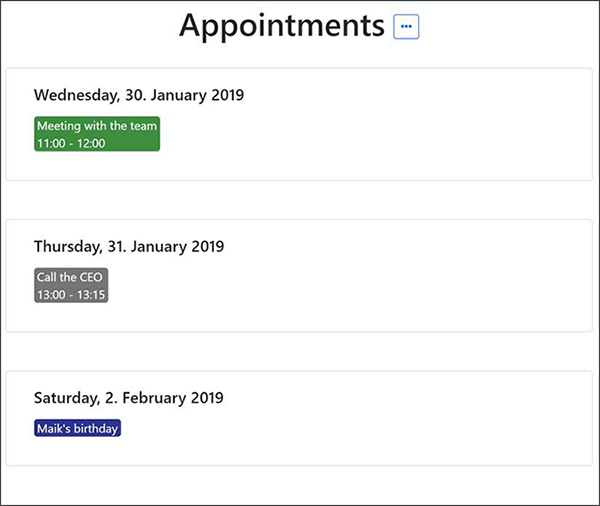
To create an appointment schedule, click the plus icon at the Appointments group . Displays the time for us to choose the date that took place. Select the start and end time, select the color for the appointment content and name and then click Save to save.
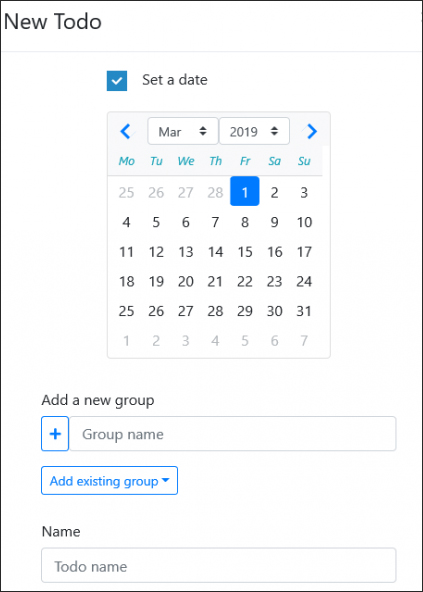
To create a task for the day, click the plus button at Todos and then select the date, name the task management group in Add a new group, enter the name of the job content in Todo name and then click Save to save.
So you've finished saving appointments and jobs for a specific day on the Calendo interface.
Step 3:
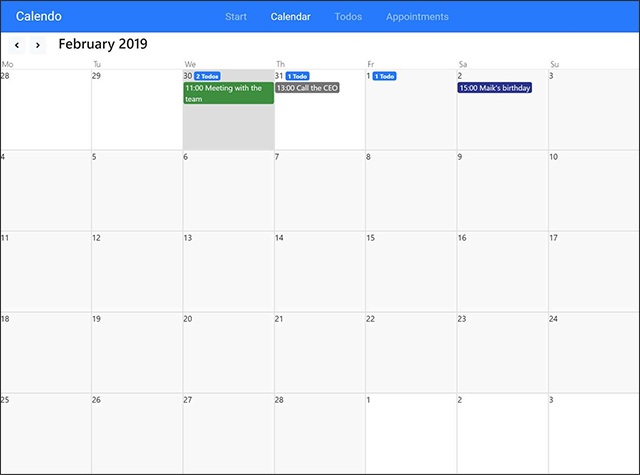
Click on the Calender tab above to display all scheduled jobs on the Calendo application.
Step 4:
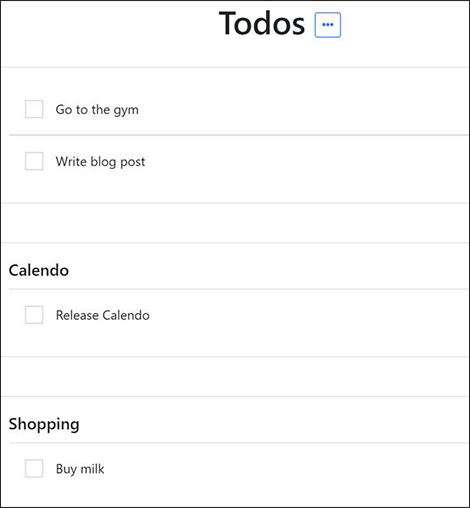
If you want to edit or manage the created tasks , users can immediately access Todos items . With the completed work, click on the square. To make it more compact for the to-do list, click the x at each content to delete. 3 dots icon used to categorize tasks or create new calendars.
Jobs are categorized according to the work group you created yourself.
Step 5:
Appointments will display all the tasks that the user scheduled. Click the 3 dots icon to add a new appointment you want to create.
Calendo has separate management items for appointments and work content that you have scheduled to be more manageable, in addition to reviewing the application's main interface. If you log in to your account in Calendo, we can also synchronize work content on other Windows 10 devices.
I wish you all success!
Was this article helpful?
Your feedback helps us improve.
Related Articles
 How to create an appointment on the Zalo PC chat group4 minutes read
 How to use eDoctor online chat with doctor at home2 minutes read
 'Secret' helps you conquer her in the first date6 minutes read
 How to schedule a call on Skype3 minutes read
 How to create SSH key on Windows9 minutes read
 Microsoft adds new series of AMD Ryzen CPUs to Windows 11 supported list3 minutes read
Reader Comments 0
Sign in with email or Google to join the discussion.