How to Uninstall Directx
DirectX is one of the core technologies behind running games and video programs on Windows. That means if it breaks, you're probably going to run into some errors. You can try rolling back your system to before your last update, or you can....
Method 1 of 2:
Performing a System Restore
-
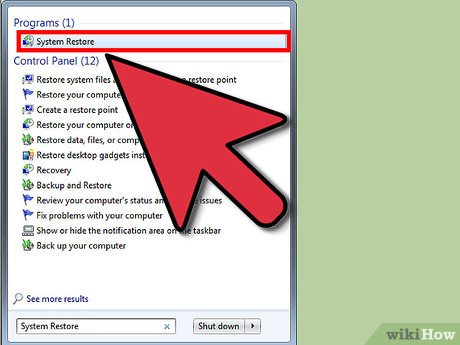 Open the System Restore tool. Performing a System Restore is the easiest way to uninstall a DirectX update, since there is no official way to uninstall DirectX. You will need to have a restore point from before DirectX is installed, which is typically created during the installation process. Using System Restore will uninstall and revert ANY changes that were made since the restore point was created, so it should be used very soon after installing the DirectX update.
- Windows 8 – Open the Start screen and type 'recovery'. Select 'Recovery' from the list of search results. This will open the Recovery window. From there, click the 'Open System Restore' link.
- Windows 7 and Vista – Click Start and type 'restore' into the Search box. Select 'System Restore' from the top of the search results list.
- Windows XP – Click Start and then select All Programs → Accessories → System Tools. Click on System Restore.
-
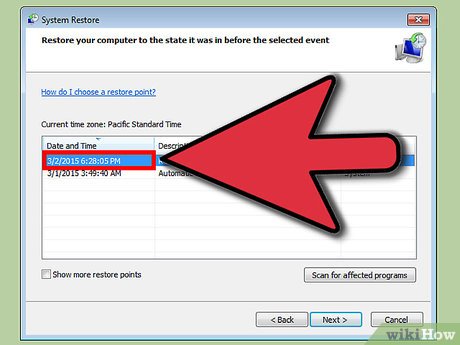 Select your restore point. You will be presented with a list of available restore points. Compare dates to find one that was created before DirectX was updated. Click the 'Scan for affected programs' to ensure that DirectX will be rolled back.
- Remember, anything that was installed or updated between the point and now will be removed. Any programs that were installed then but are gone now will be reinstalled.
-
 Perform the restore. Once you've chosen your restore point, wait for the restore to be completed. The restore process can take a significant amount of time. The computer will restart during the restore process, and then Windows will load with a message confirming that the restore was successful.
 -
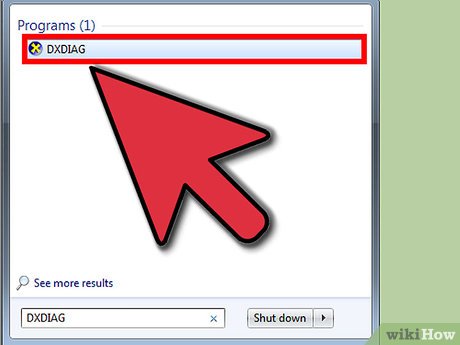
 Check that DirectX was rolled back. Once Windows starts again, open the Run window by pressing Windows key + R, type in 'dxdiag', and press Enter. This will open the DXDiag tool, which will check your system and report the version of DirectX that is installed.
- The DirectX version will be listed at the bottom of the System Information section on the first tab.
- You must have some version of DirectX installed with Windows. Windows 7 and later cannot have anything less than DirectX 11 installed.[1]
Method 2 of 2:
Repairing Your Current DirectX Files
-
 Run the DirectX Diagnostic Tool. Open the Run dialog by pressing Windows key + R and enter 'dxdiag'. This will open the DirectX Diagnostic Tool. It will display an overview of your system. You can click each tab to see information on your display, sound, and inputs. A text box at the bottom of each tab will tell you if there are issues detected with that particular system.
 -
 Download the DirectX installer from Microsoft (but not the file shown in the video above, that is a powerpoint presentation). If you're having difficulties running programs and are receiving DirectX errors, you may have corrupt or missing DirectX files. The best way to try to fix this is by reinstalling the latest version of DirectX. The installer is available for free from Microsoft.
- If you are having issues, upgrading to the latest version may help much more than uninstalling.
-
 Run the installer. The installer will scan your system and then install the necessary files to update your copy of DirectX to the latest version. Restart your computer after it's finished and check to see if you receive the same errors.
 -
 Update your video card's driver. Many times, updating your video card drivers will help fix DirectX errors for games and other video-centric programs. To update your driver, you'll need to determine which video card you have, and then download the appropriate file from the manufacturer.
- To find your video card information, open the Run dialog (Windows key + R) and enter 'dxdiag'. Click the Display tab, and note the Chip Type and Manufacturer from the Device section.
- Visit that manufacturer's website. This will typically be NVidia or AMD. Search for your Chip Type on the website and download the latest driver files.
- Run the driver installer. Your old video card files will be overwritten with the latest version. You may notice your screen flickering during the installation process.
-
 Reinstall Windows. If nothing you do seems to be fixing your problem, it may be time to reinstall Windows. This will replace all of your DirectX files with the built-in files with your Windows installation. Reinstalling Windows will take an hour or so, not counting the time it takes to backup and restore your files and reinstall your programs. Follow one of the following guides for your version of Windows:
- Install Windows 7.
- Install Windows 8.
- Install Windows XP.
- Install Windows Vista.