How to take better Live Photos on iPhone
Live Photo on iPhone records a few seconds of motion before and after the shot - creating a small clip that adds life to the photo. However, these photos do not always meet expectations.
Table of Contents
1. Use a tripod

Stable shots are crucial for high-quality Live Photos. Even the slightest shake or movement can blur the image. To prevent this, use a tripod to hold your phone steady or place it on a stable surface. When light is low, the shutter needs to stay open longer to capture enough light; any movement during this time can distort the appearance.
In situations like concerts or crowded places where using a tripod may not be practical, hold the phone with both hands and keep your elbows against your body to ensure stability.
2. Adjust focus and exposure
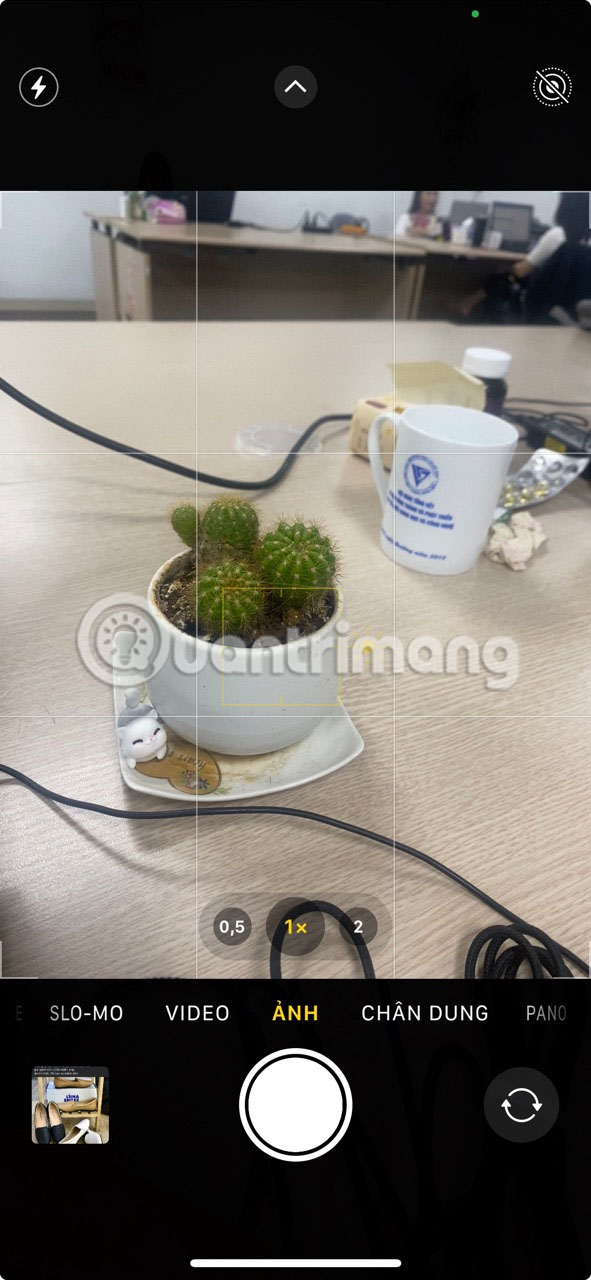
Like regular photos, you can adjust the focus and exposure of a Live Photo. This feature is useful in varied lighting conditions or when highlighting a specific subject.
To adjust focus, tap the screen and a yellow box will appear around the area. You can drag this square to change the focus point. In addition to the yellow box, you'll see a sun icon with a small slider to adjust exposure; Slide up to increase exposure or slide down to decrease exposure.
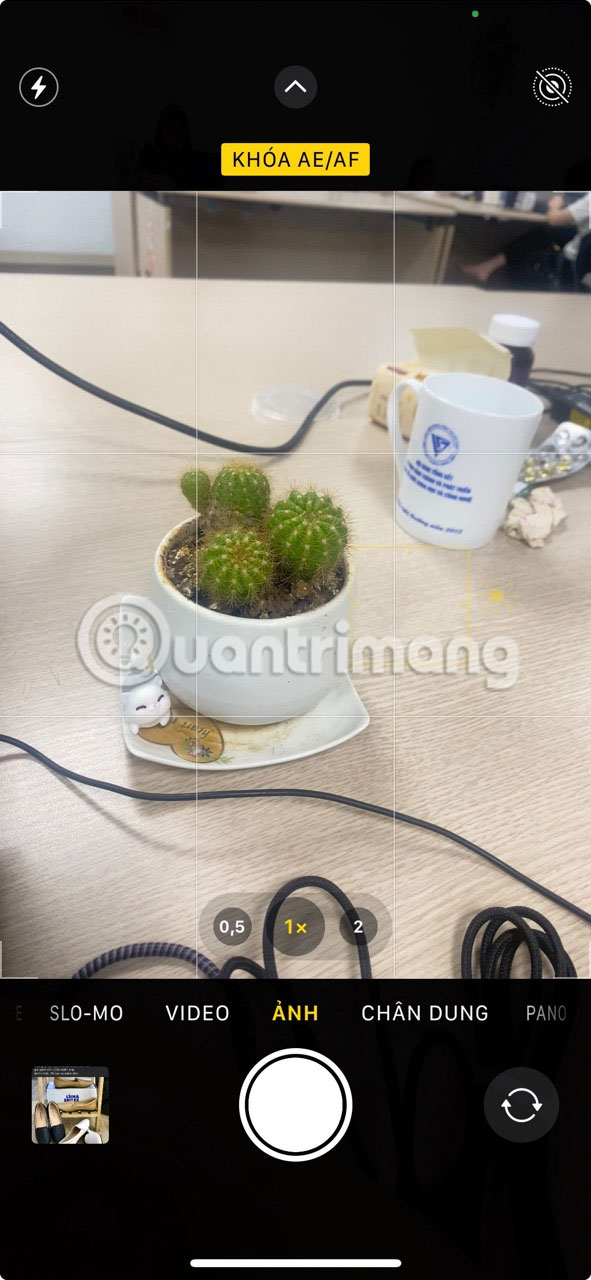
If you touch and hold on the screen, you'll see a yellow AE/AF LOCK banner at the top. This will lock focus and exposure to reposition the camera without losing settings. Then, scroll your finger up or down to adjust the exposure.
3. Add effects to Live Photo
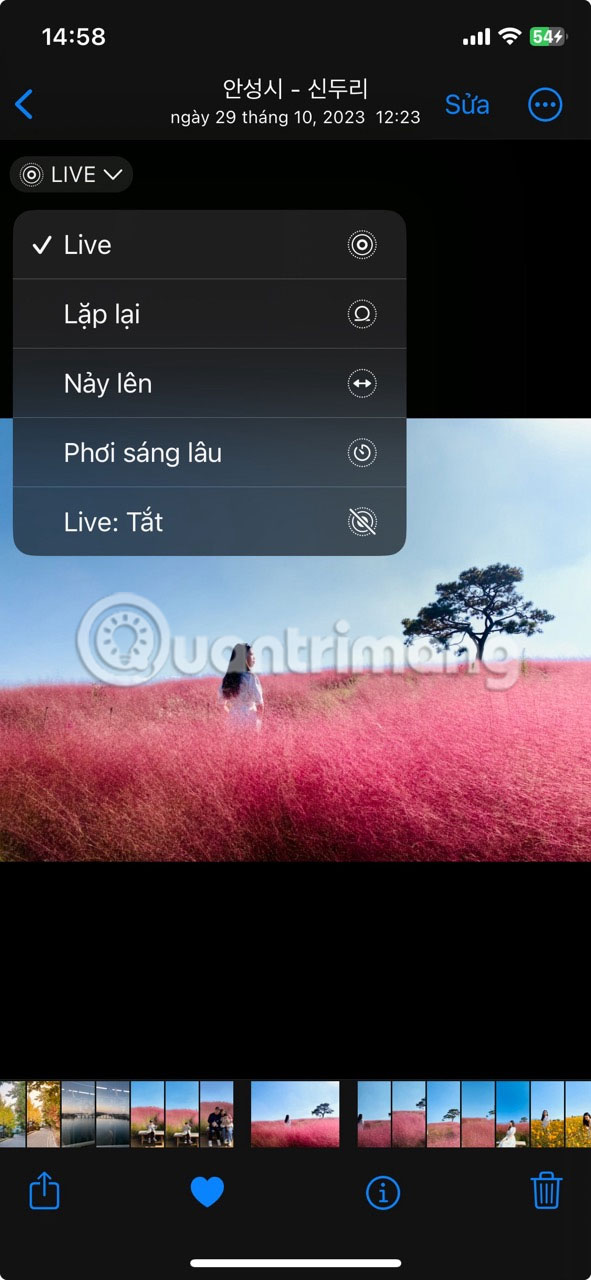
You can add effects to your Live Photo. There are 4 options available: Loop, Up, Long Exposure and Live: Off. Here's what each option will do.
- Loop : Turn your Live Photo into a loop that continuously plays over and over again. It creates GIF-like animations or highlights from a live photo.
- Bounce : Similar to the Repeat effect but over and over again. It basically adds fun animations like boomerangs.
- Long exposure : This is an artistic effect that captures motion blur in still images. It looks great on rivers and streams, car lights at night and waterfalls.
- Live: Off : If you want to completely disable the Live Photo effect, select this option. It turns your live photo into a regular still photo.
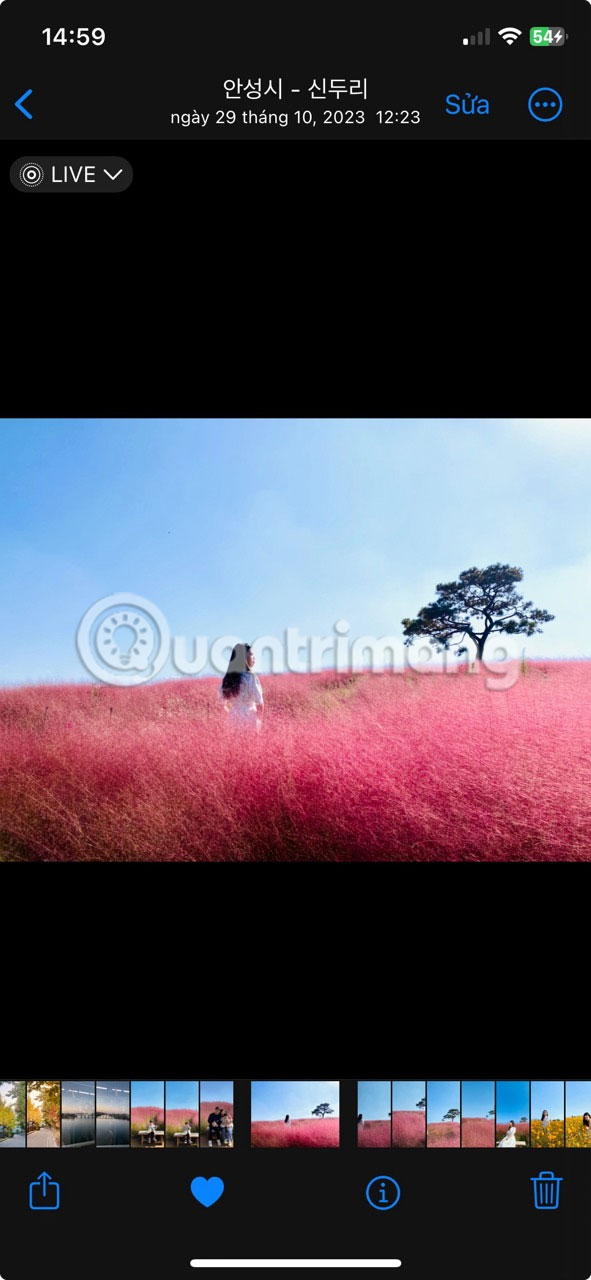
To use these effects, open a Live Photo in the Photos app. At the top left, you'll see Live (two overlapping circles); Tap on it to open the effects menu. Then, choose the effect you like and it will be applied to your photo.
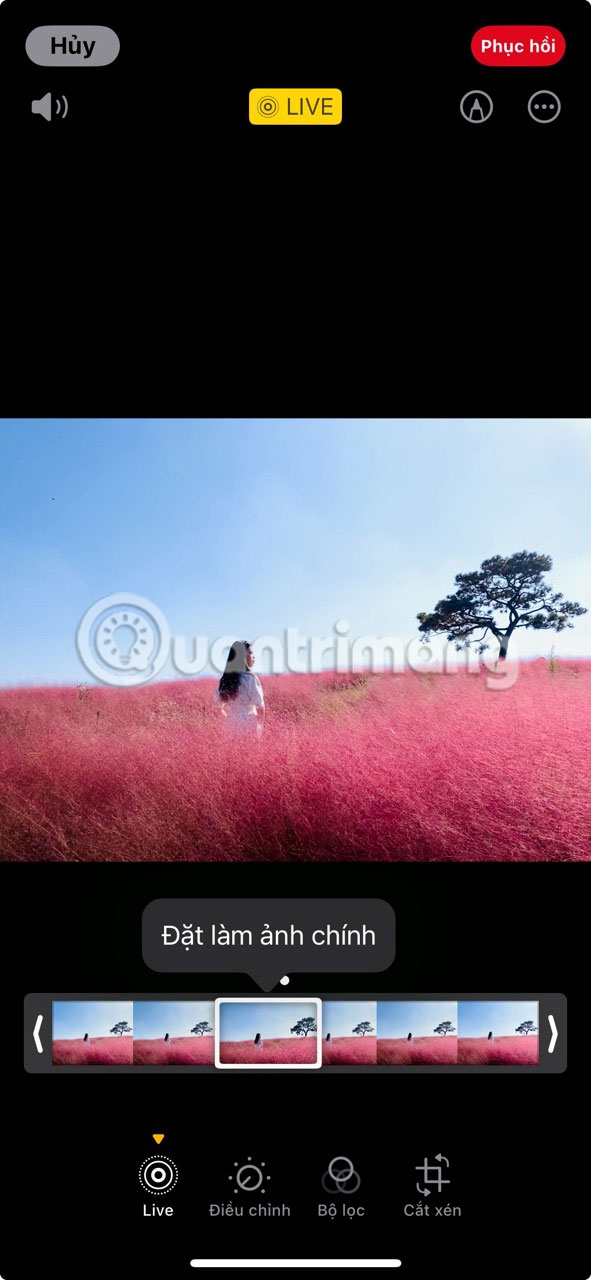
4. Set a unique main photo
The main photo is the still photo that appears in your camera roll before tapping Live Photo. This is also what you'll see if you've synced your Live Photos with other devices.
Sometimes the automatically generated important photos aren't the best. For example, you blink or have an awkward expression when taking a Live Photo. Or, you might have taken a group photo and the main photo shows someone not looking at the camera. In such cases, you can select and set a different primary photo.
To choose a different main photo, open the photo in Photos and tap Edit in the upper right. Next, tap Live at the bottom (the one with three nested rings). You will now see a timeline of all the frames in your Live Photo.
Scroll through to find the frame you want as your main photo. The white dot above it shows the current main photo. Then, tap Set as key photo just above the keyframe. When you're done, tap Done in the right corner. Live Photo thumbnails now show the new main photo.


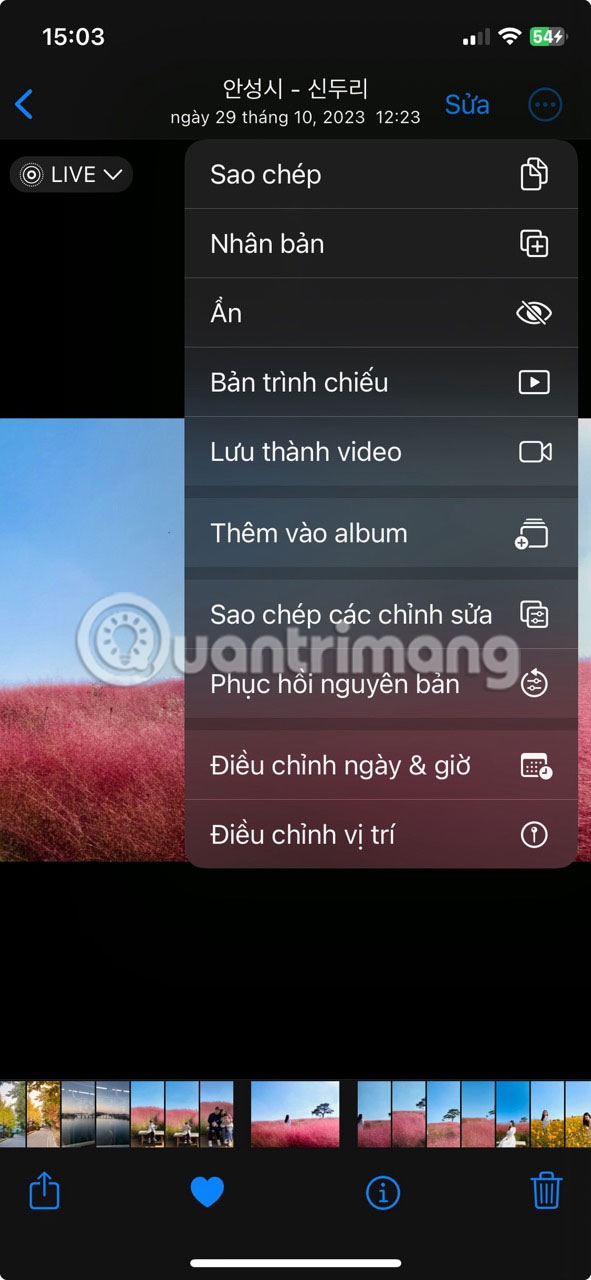
If you want, you can also restore to the original main photo. To do this, open Live Photo and tap the three dots in the upper right corner. From the menu, select Original Recovery . This action will delete all edits and restore the Live Photo to its original state.
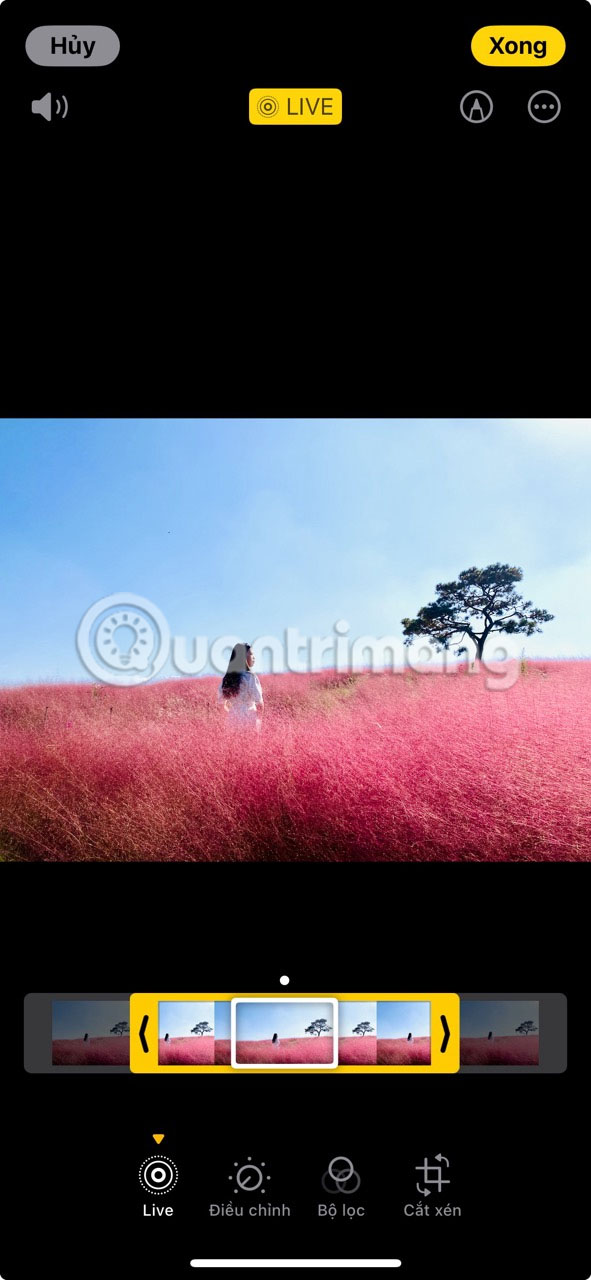
5. Crop Live Photo
Sometimes Live Photo captures moments that you don't want to include. For example, you took a photo of a beautiful landscape with birds flying across the frame but someone walked in and ruined the photo. In such cases, you can crop your Live Photo to remove unwanted frames. However, this cropping is only possible at the beginning and end of the Live Photo; frames in between cannot be removed.
To crop a Live Photo, open it in Photos and tap Edit. Next, press Live at the bottom to access the timeline. At the bottom of the timeline, you'll see vertical bars with white arrows; These points indicate the start and end points of the Live Photo.
Drag these bars to the frames you want to keep. Anything outside these bars will be cut off. Next, tap Done in the upper right corner to save the changes. The Live Photo will now be cropped and the thumbnail will reflect these changes

To restore the original photo with all frames intact, open the photo in Photos, tap the three dots, and select Restore Original .
6. Turn Live Photo into video
Did you know you can convert Live Photos into videos? This feature is ideal for sharing Live Photos on social media platforms that do not support its format.
To turn a Live Photo into a video, open it in Photos and tap the three dots. From the menu, select Save as video . This action will save the Live Photo as a video on your camera roll.


7. Find the right time
Even with these tips, you can still end up with dull or uninteresting photos. Because Live Photo captures movement, timing is important - you have to choose the moments that really matter. For example, when taking a photo of someone jumping, tap the shutter button just before they jump so the Live Photo captures their preparation and actual jump.
Here are some tips and tricks for taking and editing Live Photos on iPhone. Remember that Live Photos not only capture the moment, but also the emotions and actions surrounding it. So, try these scenarios and see how your Live Photo comes to life.
Was this article helpful?
Your feedback helps us improve.
Related Articles
 Instructions for taking live and animated photos on iPhone5 minutes read
 Instructions for editing Live Photos on iOS 103 minutes read
 How to send Live Photos images as animated GIF images in iOS 114 minutes read
 How to bring iPhone's Live Photos feature to any Android device4 minutes read
 Instructions for using GIF Toaster to create GIF images from Live Photo on iPhone2 minutes read
 Instructions on how to convert Live Photos to still images on iPhone2 minutes read
Reader Comments 0
Sign in with email or Google to join the discussion.