How to edit Live Photos on iOS 11
There are many top quality editing tools to beautify Live Photo photos, making sure your photos will be more vivid than ever.
Live Photo editing ways on iOS 11
- 1. How to set up Key Photo for Live Photos images in iOS 11
- 2. Edit Live Photos photos using the Markup tool in iOS 11
- 3. Mute in Live Photos on iOS 11
- 4. Add effects to Photo Live Photo in iOS 11
- 5. Cut Photo Live Photo in iOS 11
- 6. Transfer the Live Photo image back to the original image in iOS 11
1. How to set up Key Photo for Live Photos images in iOS 11
Step 1. Run the Photos app and then select photos in Live Photos that you want to edit.
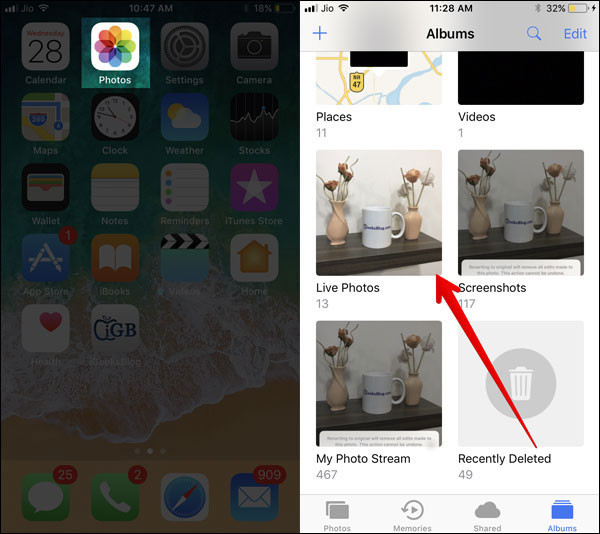
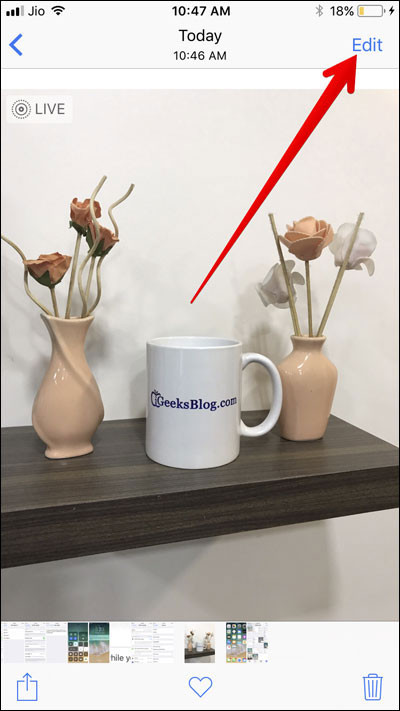
Step 2. Next, you must press the Edit button.
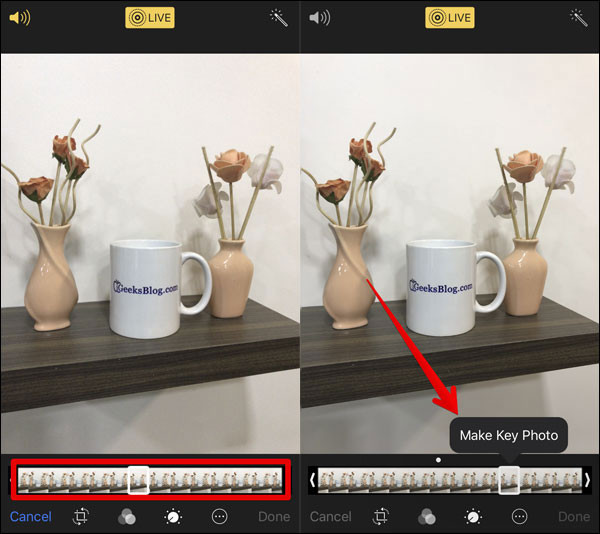
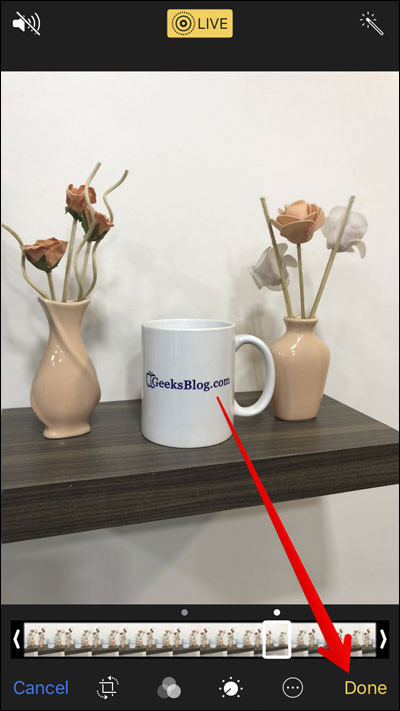
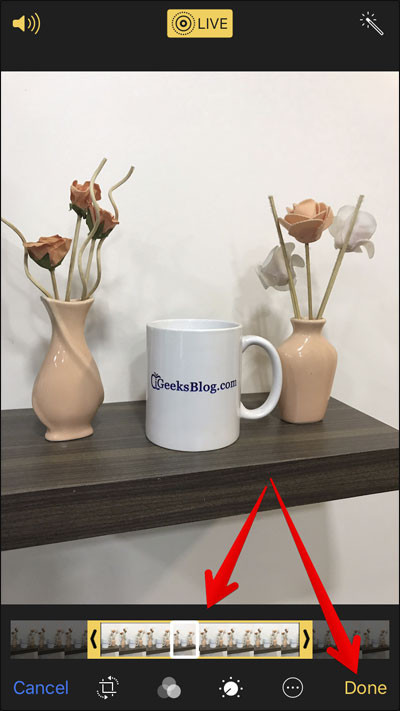
Step 3. Now, in the bottom bar, select the frame you want to set as a new Key Photo.
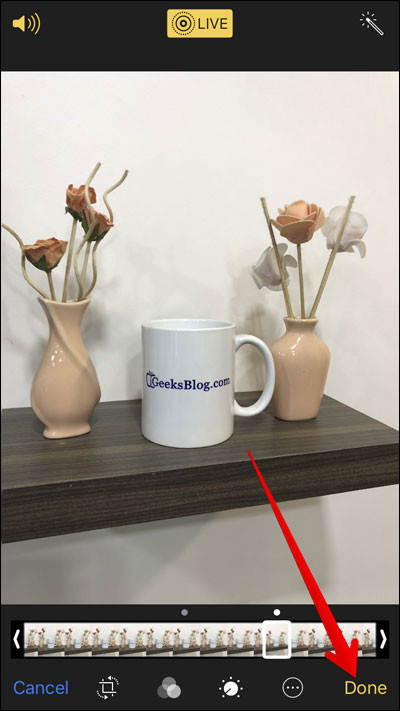
Step 4. Finally, make sure to click Done to confirm the changes.
Note: Continue and make the most of the editing tools available to 'decorate' your Live Photo photos. For example, you can use some filters, resize, rotate images and more.
2. Edit Live Photos photos using the Markup tool in iOS 11
Note: Live Photos' Markup allows you to edit its static version.
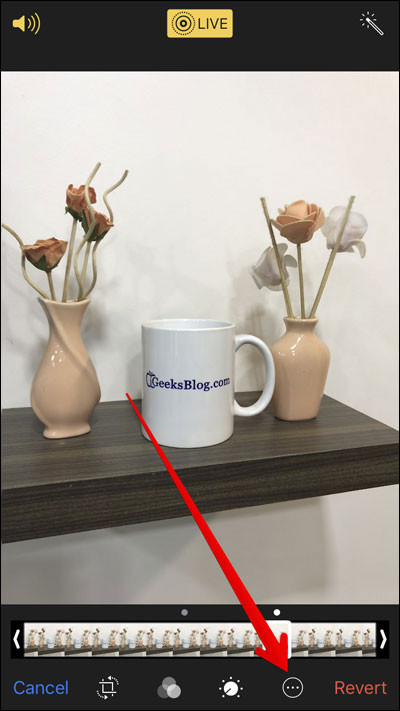
Step 1. Open the Live Photo image you want to edit, click Edit . In the Edit section touch the inner ring with three dots inside.
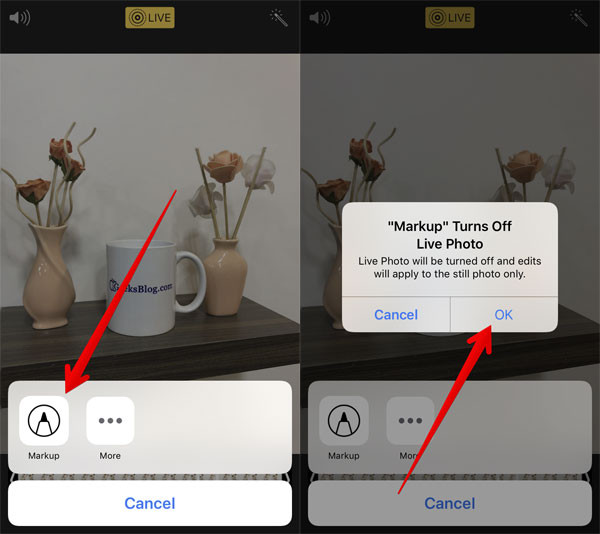
Step 2. Touch Markup . A pop-up window displays the message 'Markup' Turns off Live Photo and edits are applied to still photo only ' . Click OK .
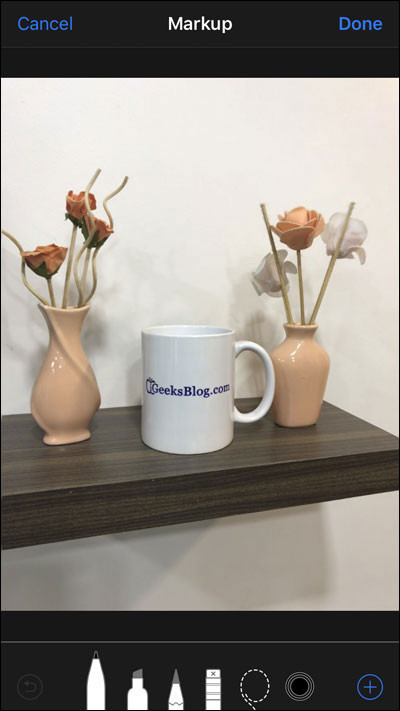
Step 3. Now, make the most of all image annotation tools.
3. Mute in Live Photos on iOS 11
Step 1. In the Edit Photo Live Photo section, click the sound button in the top left corner to mute or turn on the sound.
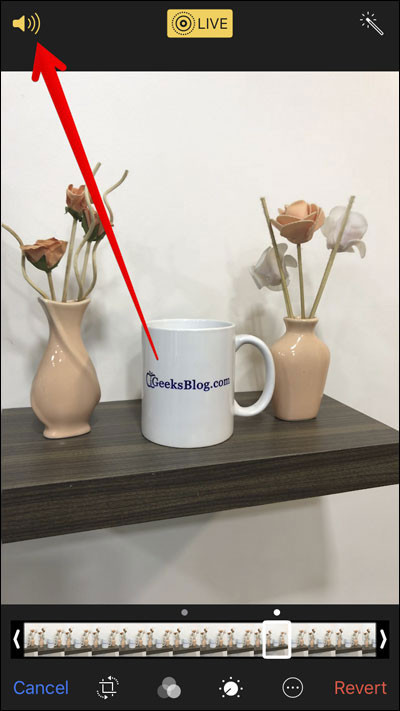
Step 2. Click Done in the bottom right corner to confirm the change.
4. Add effects to Photo Live Photo in iOS 11
- How to send Live Photos images as animated GIF images in iOS 11
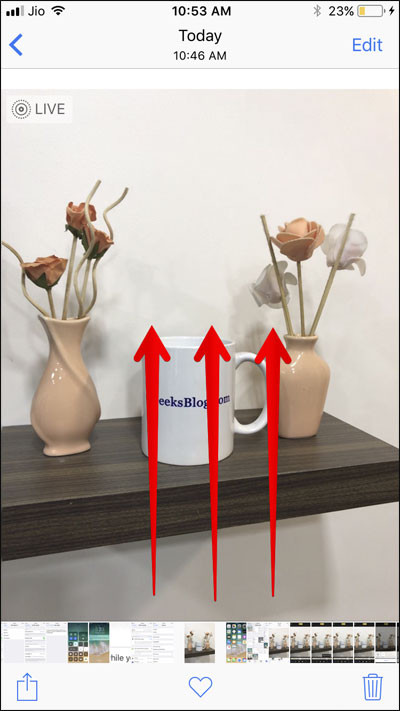
Step 1. Select the photo Live Photo you want to edit, then swipe up.
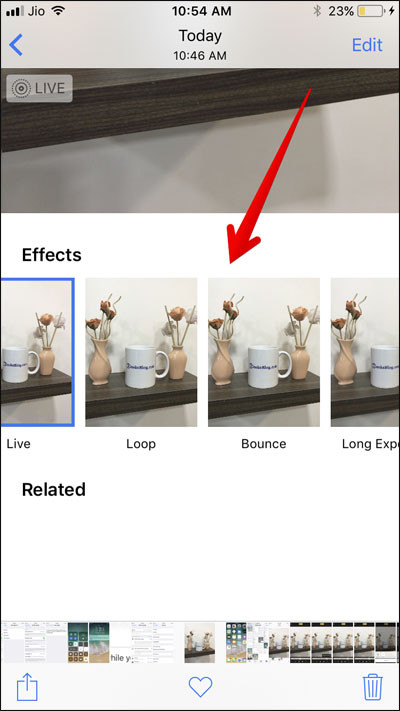
Step 2. Now, you have four options: Live, Loop, Bounce and Long Exposure, just click on the effect you want to use.
5. Cut Photo Live Photo in iOS 11
Step 1. Open the image and click Edit . On the bottom pane of the screen, you can drag the bar left or right to edit the start and end points.
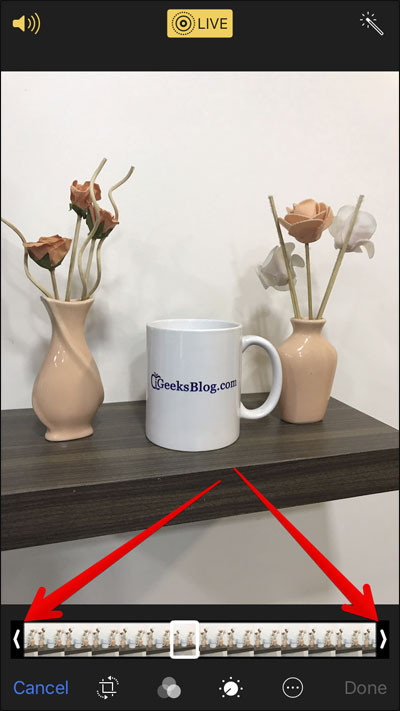
Step 2. Click Done to confirm the change.
6. Transfer the Live Photo image back to the original image in iOS 11
Step 1. In the Live Photo editing section, click on the Revert option at the bottom right of the screen and the message appears, select Revert to Original to confirm.
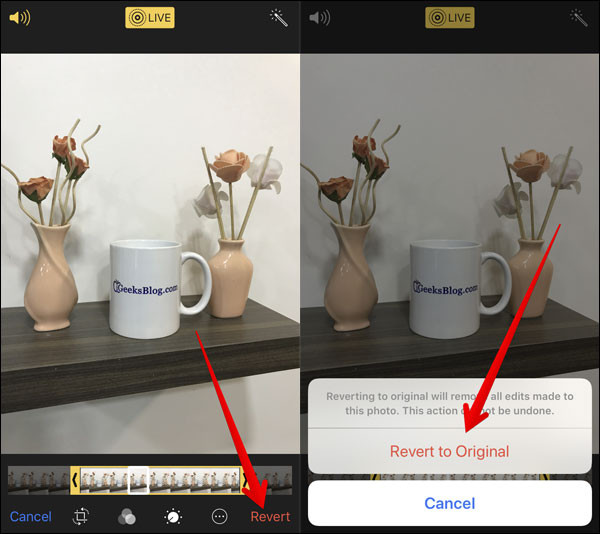
Live Photo photos will be instantly transferred to the original.
You should read it
- ★ Instructions on how to convert Live Photos to still images on iPhone
- ★ Instructions for taking live and animated photos on iPhone
- ★ 'Divine' photo editing applications, anyone who loves 'virtual life' should update immediately
- ★ How to install animated wallpapers on iPhone
- ★ Download Photo! Editor 1.1: Multifunctional photo editor