How to share a Mac screen with Messages
Apple makes it easy to share your screen with other Mac users. You might expect this screen-sharing feature to appear in FaceTime, the video calling app on Mac, but instead you'll actually find it in the Messages app.
Here's everything you need to know about using Messages to share Mac screens.
The biggest advantage of using Messages to share a Mac screen is that it comes pre-installed on your computer and uses an Apple ID account. That means you don't need to download anything or create any new accounts, simply open Messages and log in.
The only requirement is that the person you share the screen with needs to use Messages on a Mac. If that is not possible (because the other person does not use a Mac for example), see the article: How to share files between Mac and Windows 10.
How to share a Mac screen with Messages
Step 1: Log in to Messages
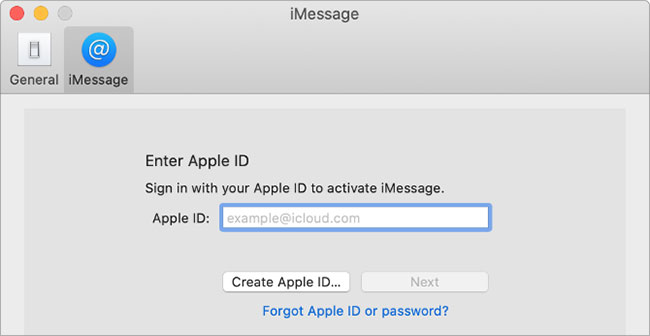
First you need to make sure Messages is set up to use Apple ID. You almost certainly did this when you created an account on your Mac, but to double check, open Messages and go to Messages> Preferences> iMessage from the menu bar.
If you are not logged in, Messages will ask for your Apple ID and password. If you're logged in, make sure Messages displays the correct account at the top of the window.

Anyone you want to share a screen to need to do this on their Mac. If you can't share screens, ask them to check this setting to make sure they're logged in.
Once both parties have logged into your Apple ID account, you're ready to continue.
Step 2: Invite people to share the screen with
Let's say you want to share your screen with others. Open Messages and select another person from the contacts sidebar to open the conversation. If there is no existing conversation, click on the pencil icon to start a new conversation.
Then go to Buddies> Invite to Share My Screen from the menu bar.
The other person will see your screen sharing invitation appear on their Mac. When clicking Accept , a new window appears showing the Mac screen exactly like what you see. Messages also start a voice call so you can talk about what you are doing without having to type the message.

Step 3: Invite the person you contact to control your Mac
From here, you can show the person you contact anything you like on your Mac and they will see it, just like you see. You can also allow them to control their Mac by clicking the Screen Sharing icon in the menu bar (which looks like two overlapping squares).
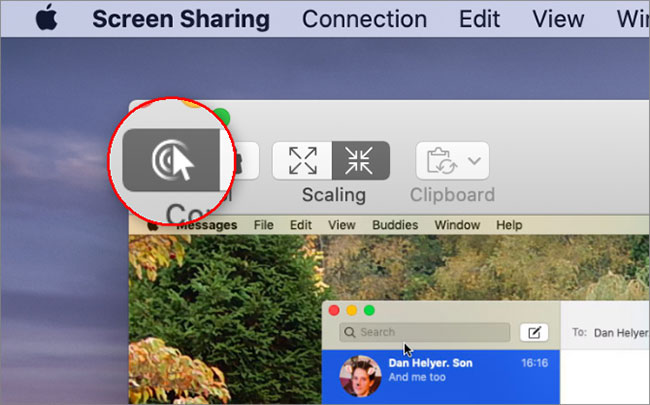
If someone is sharing a screen with you, you can request control by clicking the mouse icon in the top left corner of the Screen Sharing window. The person will receive a notice letting them accept or deny your control request.

All operations are completed! Now you can share everything on your Mac screen with anyone else. And you don't need to install any third-party application to do that.