How to set up Wyliodrin on Raspberry Pi
Wyliodrin is a tool that allows you to use the Raspberry Pi as an IoT device without too much expertise. However, before you start using it, you will need to set up this tool on your Raspberry Pi.
Table of Contents
The Raspberry Pi can be a great platform for Internet of Things projects. It is cheap and has many form factors. The only problem is to add software to make the Pi do what you want.
Wyliodrin is a tool that allows you to use the Raspberry Pi as an IoT device without too much expertise. However, before you start using it, you will need to set up this tool on your Raspberry Pi.
Brief introduction about Wyliodrin
Part of what makes Wyliodrin great for IoT enthusiasts, as well as large corporations, is the focus on visual programming. This allows you to control your devices without having to know programming languages like C. Of course, advanced users may choose to write code manually, but not necessarily.

Wyliodrin also allows you to develop Raspberry Pi remotely. This means that after the initial installation is over, you don't need to write code to an SD card or use a cable to connect to your Pi.
Before start
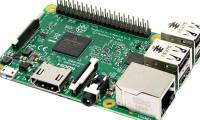
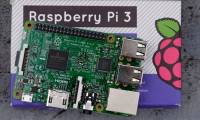
Before you get started, of course, you'll need a Raspberry Pi, as well as a power source. You will also need an empty SD card with a minimum of 4GB (or 8GB would be more suitable).
You will also need a computer to run the Wyliodrin IDE, WyliodrinSTUDIO. Fortunately, this IDE runs on Windows, macOS and Linux. There is even a Chrome extension, which allows you to run IDE on Chromebooks. One thing to note is that you'll need to write disk images to SD cards, which is not an easy task on Chromebooks.

To get started, visit the Wyliodrin website and download the IDE for the operating system. Once you've downloaded and installed the IDE, run it to get started.
Set up Raspberry Pi
When WyliodrinSTUDIO launches, you will see a pop-up window that provides several options. Select 'Connect Board', then on the next screen, select the Raspberry icon . On the following screen, click the SD Card image link below the second step to download the image.
After the image has been downloaded, you need to write it to the SD card (can't simply copy and paste). On Windows, you will need to use a utility like RUFUS. On macOS and Linux, you can use the following command:
dd bs=4M if=wyliodrin.img of=/dev/sdX
Here, you will replace 'wyliodrin.img' with the actual file name and '/ dev / sdX' with the SD card drive identifier. You can do this by plugging in the card and running dmesg, then searching for related messages. You can also use the blkid tool .
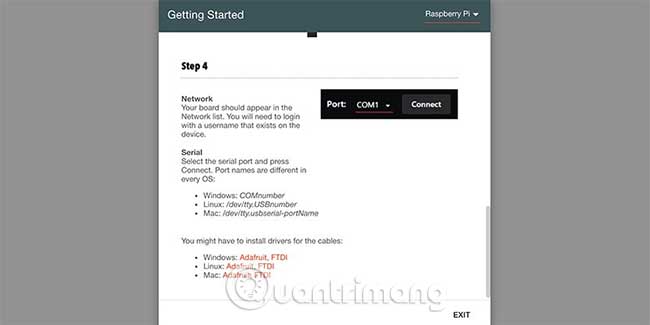
Once the SD card has finished recording, you can safely eject it, then plug into the SD card slot on the Raspberry Pi, insert the Ethernet cable, and power on. When the Raspberry Pi has finished booting, it will show up in the network list of WyliodrinSTUDIO.
You can now use the tutorial projects integrated in the IDE to familiarize yourself with the software.
One of the benefits of Wyliodrin is that it works on many different platforms. This article focuses on getting Wyliodrin to run on Raspberry Pi, but it also works on other motherboards. That is very convenient because you can use the skills you learn through using the application to develop projects with other hardware.
One of the platforms that Wyliodrin supports is Arduino. If you're not sure which one to use, check out TipsMake.com's Raspberry Pi and Arduino comparison for more details.
Hope you are succesful.
Was this article helpful?
Your feedback helps us improve.
Related Articles
 How to add an ADC to Raspberry Pi: What you need to know9 minutes read
 Raspberry Pi Zero vs Model A and B, how are they different?10 minutes read
 How to boot Raspberry Pi 4 from USB or over the network8 minutes read
 What is the Raspberry Pi and how is the Raspberry Pi used?6 minutes read
 How to start Raspberry Pi 3 from USB8 minutes read
 Why should people try Raspberry Pi 4?8 minutes read
Reader Comments 0
Sign in with email or Google to join the discussion.