Create your own wireless printer with Raspberry Pi
Wireless technology is probably the best improvement for printing for years. Fewer, more flexible cables about where you can put your printer, it's great (unless you have an old printer).
Table of Contents
Wireless technology is probably the best improvement for printing for years. Fewer, more flexible cables about where you can put your printer, it's great (unless you have an old printer).
- 8 best versatile printers 2017
Although it's easy to buy a new printer for less than $ 50, the old printer may still work well and you don't want to replace it. In addition, your old printer may have a special function or a way to manage two-sided printing that makes you happy, so you can't replace it.
The solution to this problem is to turn it into wireless. There are already several solutions, but the most popular option is to use your Raspberry Pi as a wireless print server.
Benefits of wireless printing
If you haven't enjoyed the benefits of wireless printing yet, this project is definitely a great starting point for you. Currently, you probably own a bulky printer, take up a lot of space in the office, and you don't use it too often; Or it has a bunch of messy cables.

With wireless printers, you can completely transfer your print jobs to a separate room (even in your warehouse), and simply get the results when the printing is complete. In this way, the space previously used to keep your printer on the table can be used for other purposes. Using wireless technology, printing can take place through any device you have, whether it's a laptop, smartphone or tablet.
Wireless printing really makes printing more flexible. And Raspberry Pi can help with this.
Prepare for wireless printing with Raspberry Pi
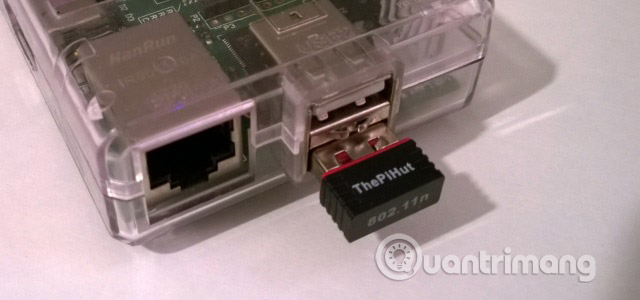
To print wirelessly with the Raspberry Pi, you'll need to make sure you've connected and set up a wireless USB dongle for your Raspberry Pi. You should also use a USB printer. This can be done with a printer, combined with an adapter (adapter) parallel to the USB, but you will need to find a solution elsewhere, if you encounter any problems with that. .
You will also need a USB cable to connect from your printer to the Raspberry Pi.
Finally, set up your Raspberry Pi with your favorite operating system and make sure it's up to date (if you haven't already done so).
To update the Raspberry Pi, enter:
sudo apt-get update
then order:
sudo apt-get upgrade
This tutorial is written based on the wireless print server running on Raspbian.
Configure your Pi Raspberry as a print server with CUPS
With the device connected and set up, the first thing to do is make sure your printer can be recognized.
Open a command line (directly on your Raspberry Pi or via SSH) and enter:
lsusb
The list of USB devices will appear. Check and identify your printer.
Then you will need to install Samba, the open source file sharing software. This can be done by entering the command:
sudo apt-get install samba
Follow any instructions shown.
Next, it's time to install CUPS (Common Unix Printing System - General Unix Printing System)
Note : You must install Samba first.
sudo apt-get install cups
CUPS provides drivers for your printer. Many manufacturers already provide drivers for Linux, but in case the driver you need is not available, use CUPS.
You are now ready to add the default user to the printer admin group.
sudo usermod –a –Gpadmin pi
Add your printer
Next, you'll need to set up your printer with Raspberry Pi. Boot into the GUI with startx, start your browser and enter 127.0.0.1:631 and switch to the Administration tab .
Select Add new printer , enter your Raspbian authentication information when requested, and then select your printer from the displayed list. Switch to the next screen, select the correct device from the list. In the following screen, confirm the details and assign the name, then select Share This Printer and click Continue.
Depending on your device manufacturer, the next page may take some time to load. This is because the entire name of the device drivers is being loaded, so if you connect to an HP printer, you may have to wait a long time. Once the list has finished loading, select the correct printer driver (selected by default) and continue. Also, click Select Another Make / Manufacturer and select Raw. You can let Windows handle the driver itself!
Click Add Printer, then select Set Default Options . A moment later, the printer will be ready to start accepting tasks. To make sure it works, click Maintenance and select Print Test Page .
Connect to your Pi Raspberry from Windows
By doing all the steps above, you need to make sure that the access from Windows to your Raspberry Pi is enabled, so you can start printing.
This is done by editing the samba configuration file in /etc/samba/smb.conf. You can do this in the GUI because you're still in it, although it's quite simple to boot it in bash, with a text editor.
Add the following code:
  # CUPS printing.  See also the cupsaddsmb (8) manpage in the
  # cupsys-client package.
  printing = cups
  printcap name = cups
  [printers]
  comment = All Printers
  browseable = no
  path = / var / spool / samba
  printable = yes
  guest ok = yes
  read only = yes
  create mask = 0700

  # Windows clients look cho share này tên là một nguồn downloadable
  # printer drivers
  [print $]
  comment = Printer Drivers
  path = / usr / share / cups / drivers
  browseable = yes
  read only = yes
  guest ok = no
Next, press CTRL + W to search for 'workgroup' and set it as follows (replace your_workgroup_name if needed, but usually keep it as Workgroup):
  workgroup = your_workgroup_name
  wins support = yes
After saving, exit the GUI and restart samba:
sudo /etc/init.d/samba restart
Start printing from Windows & Mac OS X
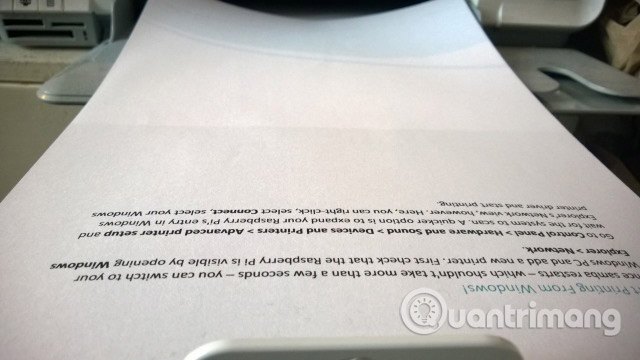
When samba restarts (this process will only take a few seconds), you can switch to a Windows computer and add a new printer. First check if Raspberry Pi is displayed by opening Windows Explorer> Network .
Go to Control Panel> Hardware and Sound> Devices and Printers> Advanced printer setup and wait for the scan system. Another faster way is to expand your Raspberry Pi entry in the Network view of Windows Explorer, from which you can right-click on the printer, select Connect, select your Windows printer driver and get started. print.
Meanwhile, Mac users can add a new printer in the usual way.
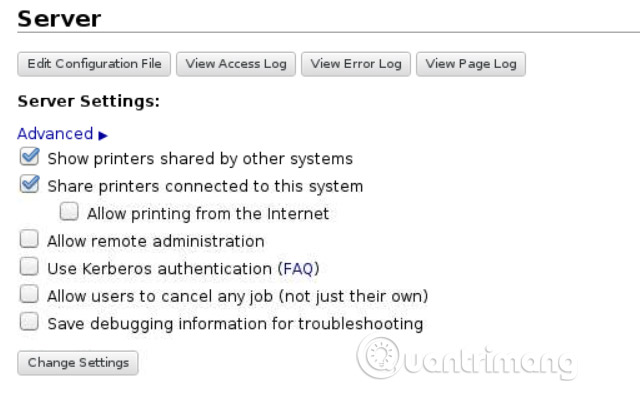
Any necessary administrative actions of the print server can be done by opening http:/// [RPI.IP.ADDRESS.HERE]: 631, to display the CUPS printer administration web interface, above. any networked computer.

Have you tried turning your old printer into a wireless printer with Raspberry Pi? If you have any questions, please leave a comment in the comment section below!
Good luck!
See more:
- How to share a printer via LAN
- How to fix Windows errors not connected to the printer
- Instructions for renaming the printer on Windows 10
Was this article helpful?
Your feedback helps us improve.
Related Articles
 26 amazing applications of the Raspberry Pi mini-computer.22 minutes read
 How to turn a Raspberry Pi into a wireless access point8 minutes read
 How to create a wireless Android Auto dongle for your car using Raspberry Pi5 minutes read
 How to Make a Regular Printer Wireless with a Wi Fi Router8 minutes read
 How to connect directly to a Raspberry Pi without Internet8 minutes read
 How to Add an HP Printer to a Wi Fi Network5 minutes read
Reader Comments 0
Sign in with email or Google to join the discussion.