4 ways to set up Raspberry Pi as a media server
One of the most popular uses of cheap Raspberry Pi computers is to become a media center. Indeed, whether you are using the Model A, Raspberry Pi Zero or Raspberry Pi 3 (the latter models will naturally bring high performance), the fact that all devices can give you the solution Compact media center, affordable and low energy consumption.
But which media center application should you install on the SD card of the Raspberry Pi? The article will provide some options and guide you to install them now. Consider the features, advantages and disadvantages of each option.
4 ways to set up Raspberry Pi as a media server
- ReadyMedia (MiniDLNA)
- Kodi / OpenElec
- OpenMediaVault
- Plex Media Server
ReadyMedia (MiniDLNA)

Formerly known as MiniDLNA, ReadyMedia requires installation on standard Raspberry Pi operating systems, such as Raspbian Jessie. Start by attaching the drive (s) to media data on, and then use the standard installation command:
sudo apt-get install minidlna
Unlike other examples here, some manual configurations are needed.
After installation, this simple tool is compatible with DLNA / UPnP-AV, which means that any DLNA compatible device on the same network will be able to detect your Pi and play media from it.
Fast, lightweight, and easy to configure, ReadyMedia is a great consideration, if you only want to stream your media content and don't care about indexing it.
Kodi / OpenElec

Perhaps the most recognizable name on this list, Kodi - formerly XBMC - is available for Raspberry Pi. Various options are also available for Raspberry Pi setup as a media server. They are writing a full distribution based on Kodi for SD card and manual installation using:
sudo apt-get install kodi
Such distributions include OpenElec, OSMC and XBian. You probably already know that OpenElec is available on NOOBs, making installation easy.
But wait a minute. Are Kodi-based media servers really not media centers? They are actually both, so they are on this list. While you can use these distributions (or manually install Kodi) as a media center / HTPC solution on Raspberry Pi, providing DLNA / UPnP means Kodi can be used as a media server. .
If you already use OpenElec, OSMX, XBian, etc., you don't need a media server because you already have one. Just open Settings> Services> UPnP and enable Share video and music libraries through UPnP . Then you will be able to stream content from your Kodi-based system. It's simple, but ask you to set up your media center software and mount different hard drives that store your media.
OpenMediaVault

Admittedly, OpenMediaVault is closer to NAS than a media server. OpenMediaVault is the current smart choice for Pi owners who want to create media files (or other documents and data) from any device on the same network.
The installation is very simple, but you may encounter initial problems when attaching any hard drive that you have connected to your Pi. However, this will be quickly fixed, allowing you to configure the system correctly. Among the features with OMV, it features support for a UPS (uninterruptible power supplies) and statistical pages to support system monitoring. There is also support for EXT3 / EXT4 / XFS / JFS and RAID file systems, which can be set to reflect HDD. SSH, FTP, TFTP, SMB and RSync are all supported to connect directly to your OMV device, although you will usually access it via your web browser, by opening the IP address.
Various plugins are also available for OMV, such as Bittorrent client. You can try the demo version of the control panel on OMV website.
Summary: This is a great option for a NAS that focuses on communication, but the setup time may be a bit long. If you are looking for a quick option, this may not be the best option for you.
Plex Media Server

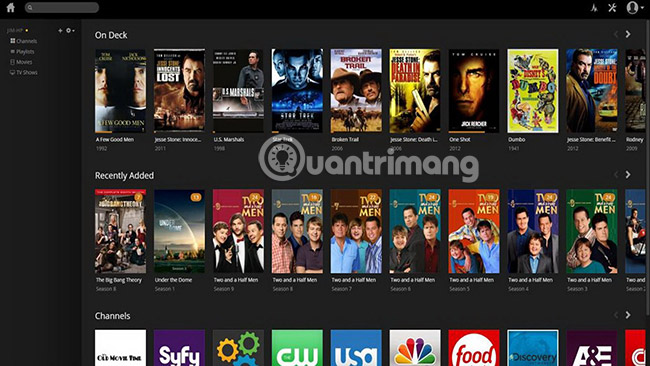
If you like being able to stream simple streams from a desktop or a dedicated media server to your Raspberry Pi, choose Plex. A popular name in the field of home media streaming, Plex can be used to stream content to any device, even Google Chromecast.
Use Plex Media Server with your Raspberry Pi, first ask you to download the RasPlex client application installer to your Windows, Mac or Linux computer and write the software to your compatible SD card with Pi.
In addition to Raspberry Pi, you will be able to enjoy media transmitted via Plex on many devices, because Plex is probably the most widely used application in all media server applications. Mobile apps are available for Android, iOS and Windows 10 Mobile, while multimedia players like Apple TV, Amazon Fire TV and many smart TVs also have Plex client applications. There are even applications for Xbox One and PlayStation 4, as well as Windows, Mac OS X, and various third-party builds available for Linux.
Note : Plex requires your files to be named in a specific format, if it is used to get the appropriate metadata from the web. The site supports https://support.plex.tv/articles/200220687-naming-series-season-based-tv-shows/ from the Plex website explaining how to organize and name files.
As mentioned above, Plex should be your first choice when it comes to media server and RasPlex client application is a good mainstream application. However, for the best results, make sure you are using Raspberry Pi 2 or Raspberry Pi 3.
The article introduced you to four options for setting up your Raspberry Pi as a media server, capable of delivering movies, photos and music to devices around your home, with just one touch. Is there any tool you like and think everyone else should use? Let us know what you think in the comment section below!
See more:
- How to install Windows 10 IoT Core on Raspberry Pi 3
- 7 great ideas using Raspberry Pi as a server
- 10 great projects combining Raspberry Pi and Windows 10 IoT Core